|
|
Post by quarry on Mar 20, 2008 17:04:13 GMT -5
I've read threads here about the Norman Nut File. And more posts about people who have made their own from feeler gauges cut with a dremel tool... I'd like to have a go at making my own (and a set for a friend). My question is, exactly what dremel tool (bit) does one use to cut the gauges with??? Pictures would be helpful! Thanks!!! - The Rock Digger  |
|
|
|
Post by cynical1 on Mar 24, 2008 18:44:48 GMT -5
quarry -
I'd be curious too. Most feeler gauges I've run across are much akin to spring steel...which is not famous for it's machining properties.
It would also seem tricky making the equivalent of a "ground" edge needed for your serrations to stay sharp with a Dremel tool, as the only bits small enough to make these cuts are engraving bits designed to cut wood.
Then you've got the issue of rounding the feeler gauges to give you a radius for the nut slot.
I saw the Norman Nut Files on eBay. They look slick enough, but for the money I can buy a lot of torch tip cleaning sets...
Just my two cents...but I'd still be curious to see how they do it with feeler gauges...
Happy Trails
Cynical1
|
|
|
|
Post by cynical1 on Mar 25, 2008 21:19:21 GMT -5
|
|
|
|
Post by quarry on Mar 26, 2008 10:34:46 GMT -5
Cyn... That's actually the board I read that got me wanting to do this in the first place!!! They never mention exactly what kind of Dremel bit they used to cut the feelers with... That's where I'm stuck. Guess I'll get out the Dremel and start experimenting...  |
|
|
|
Post by sumgai on Mar 26, 2008 14:01:03 GMT -5
|
|
|
|
Post by quarry on Mar 26, 2008 16:54:19 GMT -5
Wow, Sumgai. Just in time! I'm on my way out to Home Depot. Hmmm... Carborundum... I should have known... |
|
|
|
Post by ccso8462 on Mar 26, 2008 16:58:37 GMT -5
A diamond cut-off wheel will do the trick, if you can find one.  I got one from a jewelers supply and it was incredible. The carborundum is the next best bet. HTH Carl |
|
|
|
Post by cynical1 on Mar 26, 2008 17:24:31 GMT -5
quarry -
After seeing the pictures of the home-made fret files you might be able to get away with the Dremel cut-off wheels that come in the plastic sleeve. Go slow as at high speed they cut pretty fast.
Happy Trails
Cynical1
|
|
|
|
Post by quarry on Mar 26, 2008 19:37:18 GMT -5
OK, I just got back from Home Depot with both a metal cutting wheel (I think its carborundum), and a pack of 20 cut-off wheels...
Now, how many feelers do you think I should cut at one time?
I'd sure like to cut several at once...
I'll be doing this tomorrow (Thursday), so I'll let you know how it goes... Oh, and then I have two nuts to file....
|
|
|
|
Post by cynical1 on Mar 26, 2008 21:10:14 GMT -5
quarry -
If it were me I'd try somewhere between 1/16" (.0625) and maybe 3/32" (.09375) to start. If it breezes through that play it by ear.
If you have a vice I'd lock them in with only the depth you want to cut rising above the jaws. That should keep yours cuts at an even depth. A light touch should make a clean cut without too many burrs. Basically, let the tool to the work.
I would strongly suggest safety glasses and a long sleeve shirt. Remember, it's all fun and games until someone loses an eye...and picking pieces of cutoff wheels out of your arms takes a lot of the romance out of it, too...
Happy Trails
Cynical1
|
|
|
|
Post by quarry on Mar 27, 2008 19:46:59 GMT -5
OK, I've managed to cut up my feeler gauges into nut files! I used the "Heavy Duty Cut-off" wheel. The first try, I cut about 3/8" worth of gauges... Then I got impatient, and just cut the whole lot at one time. Worked! I found the easiest way for me was to strap the dremel down (onto my vice, with a bungee cord), and hold the gauges. They got quite warm after a few cuts, so I'd stop, go do some other chores, then come back and make some more cuts... anyway, it worked. I then tested it on a "Tusq" nut that needed cutting. I already had the cuts started with an exacto knife saw blade, so I just had to "size" them with the feeler "files"... it worked! With my set, the largest feeler was 0.025 inch. I used several of them to make cuts for the larger strings... It did work, but I'd prefer to have larger feelers... In the end, I know some day I'll break down and buy some real nut files, but in the meantime, these work just fine for my purposes! 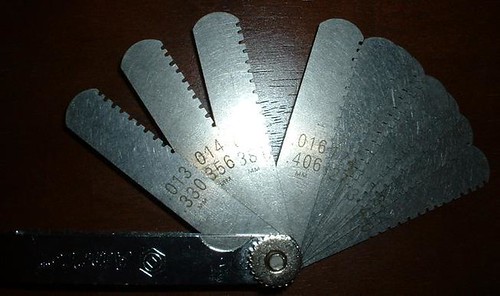 |
|
|
|
Post by cynical1 on Mar 27, 2008 20:37:21 GMT -5
quarry -
Very impressive. I had my doubts, but as Ambrose Bierce once said, "Doubt is the father of invention." (...that, and a lack of $90.00...)
Now you have me digging though the tool box looking for old feeler gauges...
Happy Trails
Cynical1
|
|
|
|
Post by cynical1 on Jun 13, 2011 22:20:40 GMT -5
OK, the jury is back for me on this idea. I dug around and found an old set of long feeler gauges in the tool box and decided to try this.
I taped them off into 4 bundles of about 1/8" thick. I marked up lines 1/8" apart and locked a bundle into the vice. I free handed the grooves and was surprised at how fast a Dremel tool with a 1/16" cut-off wheel burned through them. They ain't machine shop grade, but the cuts are about 1/32" to 1/16" into the gauges.
So, tonight I figured I have a shot at cutting the nut on Project #1. I generally add a few thousandths to the string gauge for my nut slots, and this is very easy to accomplish with these feeler gauges.
They don't cut as fast as a nut file, but all in all I'd say they cut well and cleanly. Not the same as a file, but I didn't leave a hundred large on the table, either.
If you already know how to cut a nut then you can use these with not problems. And working with 3" of serrations makes it easier to cut the horn flare relief on the peg side of the nut. You're not as prone to overshoot the nut and hit the headstock.
I'm sold. Thanks Quarry, wherever you are, for the idea.
Happy Trails
Cynical One
|
|
|
|
Post by Yew on Jun 14, 2011 8:55:22 GMT -5
I guess if you are trying to clean up to get a neater cut from these, running a wound string (maybe a little larger diameter) to go from a square cut, to a more rounded shape?
|
|
|
|
Post by cynical1 on Jun 14, 2011 11:25:30 GMT -5
Yew -
You allude to a can of worms I have tried to avoid, much like discussions on religion...nut slot shape. Even most builders and professionals will have firmly held beliefs that can make for a very contentious debate...
DISCLAIMER: This is a very simplistic and general overview on cutting slots in a guitar or bass nut. You can find confirmation, as well as contradiction, for everything mentioned here from different builders, techs and people who read a lot about this sort of thing. This is how I was taught, and this is how I do it. You may have a different approach that works, and that's cool by me. I am not here to proselytize. Do not quit your day job and run off to become a nut cutter based solely on the content of this post.
Most nuts are cut with a radius to closely match the string gauge at the bottom of the slot. This is one of those "accepted practices" that works for a fixed bridge guitar or bass. But what about the other potential shapes?
Let's visit what's important on a nut slot. The depth and the clearance on the side of the strings and the angle and flare of the cut.
Depending on your touch or style, the depth of the nut slot may vary. More aggressive players will require a higher clearance off the first fret while those with a lighter touch can get away with less. For a quick reference on clearance, fret the first fret of a non-buzzing string. Now, take a feeler gauge and check the clearance over the second fret. It will generally run between .010 and .020. I tend to cut mine high for myself, but that's a preference because I know I don't have a light touch on the bass...and assume I won't on the guitar. I can always cut it deeper later if I choose to but I can't add more if I cut it too deep. (Well, there is the trick of taking bone nut shavings and mixing it with Crazy Glue to fill the slot and re-cutting it, but I never tried it and can't comment on its effectiveness)
The amount of string above the nut has an accepted practice of wound strings being 1/2 the diameter of the string with the unwound strings being 100% in the slot. Again, based on your playing style you may need to have the thicker strings deeper in the slot to avoid them coming out during a Pete Townsendesque mad strumming affair...
The clearance on the sides of the slot are generally two to three thousandths wider then the string. For example, a .036 string would take around a .039 slot. Most file sets require you "cheat" buy moving the file in the slot to achieve this. You can shank the slot real quick by moving too fast or getting off center.
Finally, the angle. Look at the side profile of a Gibson style nut. Notice that it's flat facing the fingerboard and has a radius towards the headstock. This is the flare you're trying to emulate. When you've going for the correct depth you're working at a shallow angle back towards the headstock, basically falling away from the fingerboard. Once you've got your depth, then you're going to work in that radius flare towards the headstock giving the string a smoother breakover out of the nut leading towards the tuners. You'll want to leave a small angled shelf at the leading edge of the nut rather then a knife edge to keep the string from sawing through too easily.
Now for the contentious part...the shape at the bottom of the slot. As previously stated, the accepted practice is a radius slot at the bottom of the nut. A "V" shaped cut is generally felt to be too sloppy, and can mute the string or allow it to move or pop out. But a square bottom to the slot...hmmmm...
Let me share the Cliff Notes on something I was taught years ago on setting up a Strat with a Trem-Leo. Before locking nuts and roller nuts or oil impregnated graphite nuts, you had bone and moving strings. How to reduce the coefficient of friction was a matter of slot configuration. Think about it for a minute. A radius bottom to the slot will always contact the entire bottom of the string producing the highest surface area for the string to contact the nut while being whammied. Now, if you square the bottom of the slot you have only a tangential relationship to the sides and bottom of the string. Less contact with the nut means less friction and better tuning stability.
The most frequent response to this is "But it'll wear faster". FYI, a Trem-Leo on a standard nut will always wear the nut faster then a fixed bridge. To paraphrase the immortal ChrisK, Physics is.
Well, that's it for me on this one. Feel free to search the Interwebs and read some books on the subject. Most disagree and contradict each other, but cut a few dozen nuts and you'll find a method that works for you.
Happy Trails
Cynical One
|
|


 I got one from a jewelers supply and it was incredible. The carborundum is the next best bet.


