yug
Apprentice Shielder
 alleged "chainsaw luthier"
Posts: 36
Likes: 0
|
Post by yug on Aug 19, 2011 20:52:33 GMT -5
So, just a word to the unwise or any one else that views this post. Strip the finish first, then remove the binding. The binding is attached to the wood via the finish. I didn't know that but now I do. Stripping the guitar to begin instanter. then finish the rest of the binding. Yes, I know.
Dumba**.
yug...
|
|
|
|
Post by cynical1 on Aug 19, 2011 21:41:08 GMT -5
I wouldn't beat yourself up on this one. Binding is always applied prior to the final finish. There are several types of adhesive used, but no binding is going to stay put by just the finish.
What happened is that the glue completely separated from the wood, so the only thing keeping the binding in place was what was left of the finish.
When you stripped the finish the binding just did what gravity alone could not...it fell off...
At this point I would prepare for the worst in that your bracing inside of the guitar is likely to have suffered a similar fate. But, since you're pulling the top completely off the repair of the bracing should be pretty easy and straight forward.
Thanks for keeping us updated on this...I was gonna bump this one soon of you didn't drop back.
Other then the easy removal of the binding, how's the project going?
Happy Trails
Cynical One
|
|
popsaka
Meter Reader 1st Class
 I'm tired a'playin' so low...
Posts: 87
Likes: 0
|
Post by popsaka on Aug 20, 2011 5:54:37 GMT -5
...thank for a marvelous thread you guys -great reading. Yug, I do wish you would post more pix, plus a full pan back of the axes before you started would have been dynamic...
|
|
|
|
Post by cynical1 on Aug 21, 2011 17:23:15 GMT -5
I give yug a lot of credit for tackling this project. I would have painted it blue and hung it on the wall as a conversation piece.
By the time he's done with this he'll know ore about acoustic guitars then he probably ever wanted to.
And I'm about the last one to chastise anyone for not taking pictures as the project progresses...but one at the end would be cool.
HTC1
|
|
yug
Apprentice Shielder
alleged "chainsaw luthier"
Posts: 36
Likes: 0
|
Post by yug on Oct 30, 2011 11:59:42 GMT -5
The Sivertone is now NAKED!!!
I've put this off for a bit to get up my nerve. This project has been a little daunting but I got off my lazy butt this last week and stripped the finish and the rest of the binding. Today I will begin taking the fingerboard off the neck and the top off the body. Hopefully, in one piece.
The neck appears to be a different wood from the body. Ash, possibly? It is possible that the neck, sides, and back are all the same wood. Could be mahogany, maybe rosewood. I think I'll take the guitar over to the Woodcraft store and see if one of their helpful staff can identify.
So, Cynical 1, what's next?
Thanks,
yug...
|
|
|
|
Post by cynical1 on Oct 30, 2011 15:39:52 GMT -5
Good to see you back. And good to see you're still working on the Platinumtone...because with the effort and treasure you're into it's worth more then silver...
Well, as far as wood goes, my first guess would be a laminate for the top and sides. Back in the 60's mahogany was pretty cheap, so it may be solid mahogany on the sides. Once the top is off we'll know for sure.
What to may want to do is make a simple MDF carrier for the body while you remove and plan how to work out the details on the top. All this involves is getting some 3/4" or 1" MDF sheet, trace the body profile then cut out a guitar shaped hole out of two pieces. Then just screw a few 1" x 1" or other available scrap between the two pieces. This keeps things aligned and stable while it sits unsupported, and gives you a good support for any\all bracing rework you'll have to do. Nothing sucks more then when the bottom walks, you redo the bracing and then the top won't fit anymore because the guitar has walked or twisted on you. You can also put some small feet on the bottom of the carrier to make sure the two piece support about an inch or so from the top and bottom. This whole thing shouldn't run more then $10.00 for wood, hardware and gas. And it'll save you from having to extract a hand tool from the drywall later...
Again, based on the availability and affordability of mahogany back in the 60's I'd bet the neck is mahogany. The fretboard is probably rosewood. These are common and traditionally held choices because they were cheap for years. These were built to sell, so cost, availability of material, stability and workability was always a strong consideration. Marketing=Mojo.
So, what's next you ask. Sounds like you've already got things mapped out. I'd tackle the neck or body and finish it completely before I jumped into the other. You want the carpentry completed, then a finish applied before you leave it. It's pretty dry where you are, but unfinished wood does what unfinished wood likes to do... Plus, if you lacquer things you've got 30 days to kill before you can buff it out. This gives you a month to do the other task while the first one cures.
If it were me, I'd get the neck out of the way first. The carrier, with a little weigh on a piece of plywood keeps the body from moving on you. The neck can do bad things left unfinished for a period of time. Probably not as bad for you, as your wood is about as stable as it's gonna get.
The neck will be the most critical part of the process, so you're gonna want to get that good before you spend any time tweaking the body. The body will probably just require some additional and\or repairs on the bracing and dropping the top on. The binding can take some time, but it's relatively straight forward on an acoustic as there are no odd shaped horns or contours to screw with.
I'd take a look at what LMII has for tops and fretboards. They can cut all your fret lines and drop the radius on there for you. You'll have to do your fret dots\markers, but that's the easy part.
I'd look at the granadillo fingerboards. You can get a 1st grade board for $31.30 cut, radiused and slotted. I've used this stuff before and it'll mirror up with some 0000 steel wool. The grain is tighter then rosewood and IMHO I think is got better graining and color compared to traditional rosewood.
The top is your call and is really only limited by the coin you want to drop on it. If you've never done one of these before I'd steer clear of the exotics. If you shank it you're SOL.
Since winter is coming you've got some time to bang away on this guitar...and if it goes terribly awry this is firewood season... Any pictures you want to put up would be appreciated. So much of the text in these posts could be made comprehensible with a few good pictures.
Have you thought about what you're going to do around the sound hole on the new top?
Happy Trails
Cynical One
EDIT: I forgot to mention this earlier, but LMII has a regular section for clearance, one offs and stranded items. Many times they cut a top and the customer changes his mind, or someone read the work order wrong. You can score some really good deals by keeping an eye on the at section. Do a search from their main page and you'll find it.
|
|
yug
Apprentice Shielder
alleged "chainsaw luthier"
Posts: 36
Likes: 0
|
Post by yug on Oct 30, 2011 18:40:31 GMT -5
As far as I can tell the top is NOT a laminate. I believe this was a "high end" guitar in it's day. I've put a caliper on the top and it measures out just under 3/32". It appears to be 2 pieces of book matched spruce. I will put the body in traction for the time being while working on the neck. The biggest difficulty will be finding wood for the top. The lower bout measures 22" across. Most of the wood I've seen from LMI or Stew-Mac is just 11". No room for mistakes.
I've thought a lot about the sound-hole. I've seen interesting rosettes done on a scroll-saw. The original is 2 pieces of binding, one black one white glued into the sound-hole. I've even thought about copying my brother's Alvarez "Blue's man" and cutting F-holes for it. That's a ways away, though.
For now, I'm attacking the neck with all I've got.
Thanks,
yug...
|
|
|
|
Post by cynical1 on Oct 30, 2011 20:16:33 GMT -5
The biggest difficulty will be finding wood for the top. The lower bout measures 22" across. Most of the wood I've seen from LMI or Stew-Mac is just 11". No room for mistakes. I don't know if you saw this, but LMII has some misc. sides under PSIDES at the bottom of the One of a Kind page. The description is as follows: "Misc sides for practice bending, .090” thick. Price is for two pieces. Pieces are not necessarily bookmatched, or even the same species. All Sales on this Item are Final. We are unable to select specific species."My point is that .090 is a hair under 3/32", so depending on what the species is, or are in a mismatched pair, you can use that as a filler between the two 11" sides to give you more fudge to cover the entire top. And two pieces for $12.00 is a bargain if it solves the problem. Granted, this is more common on the back, but any port in a storm...something like this: 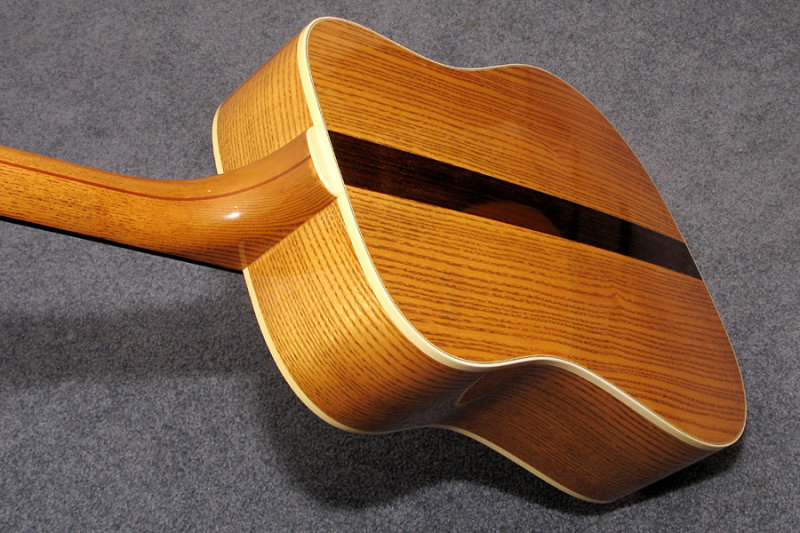 And there is actually quite a bit of physics involved in the shape, location and size of the sound hole. And if you're really ambitious the detail work around the sound hole can get very intricate. But, as you say, that's a ways off. Good luck on the neck. Just go slow and steady and you're home free. Happy Trails Cynical One |
|


