peterrabbit
Meter Reader 1st Class
 My mileage DOES vary
Posts: 67
Likes: 0
|
Post by peterrabbit on Oct 24, 2012 12:29:13 GMT -5
Howdy all:
After burning out YET ANOTHER volume pot by soldering too many ground wires to it, I decided to try something different. I now take all my grounds and solder them together, along with a short piece of thin wire, and shrink- or tape-wrap them so that just the short wire is exposed. This is what I then solder to the pot - one small join. It does make it a little harder to desolder, but it's cheaper than buying new pots all the time!
Good luck on all future builds!
Peter
-------------------
She kept the ring, but gave me the finger.
|
|
|
|
Post by 4real on Oct 24, 2012 16:42:21 GMT -5
Well, it's a thought, but there are other ways to do it. Often people don't realize the oxidization on pots, the coating and the oil used to make and store them. To do a good join, you need a really clean surface and one that has some 'grip' as well. I therefore 'file' an area, often on the edge or corner and solder immediately while still bright and clean in this area as the first thing. Often a similar thing to jack sockets and switches where the 'chrome' plating can be similarly resistant. Strip wires back a little and 'tin' these too and then it is easy to simply melt the two together. Other alternatives which are good is to solder to a washer that attaches to the shaft of the pot when screwed in to the ground. Similat to what you are suggesting, I'll often use a 'star' ground from a brass washer or some solid copper wire in a loop to fit a small screw. Anything ground connect to this and when installing, screw this through the sheilding. With things like sheilded wires (say from pups) I do similarly to what you have suggested, certainly on the braid which is a solder 'soak'. Cut the coating back to allow adequate room for the individual wires to reach their connection ponts...cut he shield back and attach a smaller wire (normally green or grey in my guitars, for ground)...soldering brad to other things usually ends up messy and takes heat and a lot of solder, this avoids that. Keep that sheilding 'braid' though, this is an idea solder 'wick', heat this over a blob of wire and you will find it soaks up everything, take away before cooled and joined again. Best 'tip' I think is to take the little extra time to do all the soldering outside of control cavities and such, on a cardboard template. Keeps everything clear (you can write on the cardboard to be sure you get things the right way and which pot is what) and the guitar protected...and usually you can test the wiring that it works before installing. You might need to extend some wires, but they can always be shortened before installation if necessary. Here's two examples of mine... 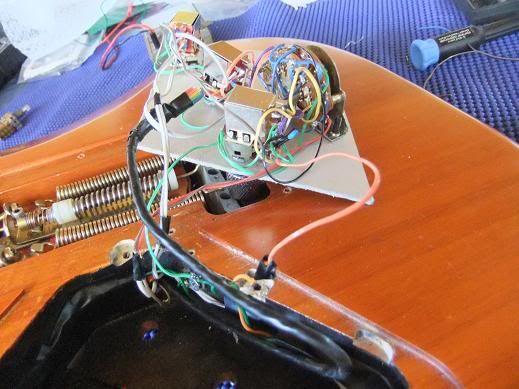 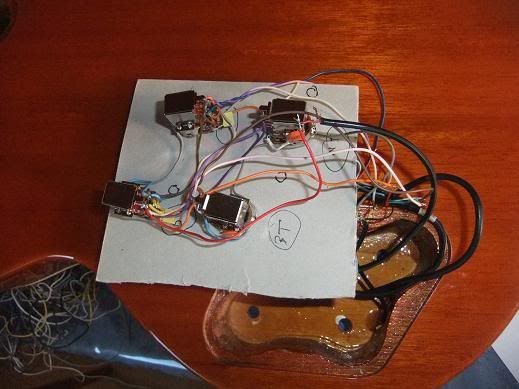 The results are clean and work, guitars are kept safe from solder burns and you can get to it from any angle. I can't locate teh pot filing thing, but I do this first and often on the sides, especially wher ethere are push-pull pots as these contain a plastic switch and thin metal that can easilly be damaged. |
|