edvard
Meter Reader 1st Class

Posts: 51 
Likes: 0
|
Post by edvard on Jun 29, 2014 15:19:57 GMT -5
OK folks, here's the story:
I bought a Warmoth neck back a um, few years ago (when they didn't offer nuts installed), because I had hopes to build a clone of my favorite guitar, the Ovation Breadwinnner. It's been more years than I want to mention, but marriage and children tend to overshadow concerns like building your dream guitar when the Rock Star dream has been discarded for happier circumstances. I never got rid of the neck, or the first "real" guitar I ever owned (an '82 Fender Bullet S-3), and I've noodled around with building stompboxes, playing and recording guitar on the computer, and now that the kid is off at camp, I have an opportunity to finish what I started.
My obstacles are:
1- Lack of money for some essentials may drag this project out longer than it needs. At least I have the neck!
2- To my chagrin, I eventually discovered the original Breadwinner is a 24.75" scale, and my neck is a 25.5". I actually prefer this because of my larger fingers, but now I'm going to need to tweak the body style a bit to accommodate scale length, neck pocket, and bridge position without sacrificing too much in the way of playability and faithfulness to the original. I am using a CAD program to facilitate this, so it'll be easier than hand-drawing, and maybe some others here may be able to help.
My goals are this:
1- I'm still dead-set on a Breadwinner clone, as I already have my Bullet, and now a Strat (a Squier I picked up as pieces in a box for $3.99), I never liked any of Gibson's body shapes ('cept maybe the Corvus), and I long ago lost fascination with pointy guitars. The BW is still my favorite guitar shape.
2- See #1 above; money is short, so compromises must be made. That's okay because I'm not going to be playing out anytime soon, nor will I be showing it off to my friends. Though I plan on doing as good a job as I can, this is strictly personal.
3- Regarding #2, I'm actually fascinated with the idea of how cheaply I can make this thing. Can I use plywood? Pine? Can I wind my own pickups? Yes, some things will cost money because some things are just plain necessary. I don't have a press brake to attempt forming a bridge from sheet metal, and a bone nut doesn't mean I can just recycle a bit from last night's pot roast (or can I?...)
Questions:
1- Non-standard woods for the body. I know many guitar manufacturers over the years have used woods that would make most self-respecting luthiers cringe and shudder. I am well aware that plywood, MDF, and pine are not "tone woods", but hey, it's for personal use, I prefer to play high-energy rock and metal (tone? you mean when I go SKREE SKREE WONK CHUGGA CHUGGA? Oh yeah...), and like I said I'm only out to impress myself. Besides, if I screw it up, I can trash it guilt-free and start fresh. THAT SAID, a "dead" guitar would be no use to me either. What's a good compromise here?
2- Pickups. I don't have any extras, and I've been interested in winding my own non-standard pickups involving 3-pole pieces lately. How difficult is custom pickup winding?
3- I have c-clamps, bar clamps, table saw, chop saw, dremel, and router table. Anything else absolutely necessary?
4- Once I have a solid plan to go ahead with, I plan on releasing the CAD plans under a Creative Commons license if there's enough interest. Any takers?
Thanks much folks, back to the drawing board...
|
|
|
|
Post by newey on Jun 29, 2014 16:10:21 GMT -5
edv- Telecasters were made of pine at some point, and it has its devotees. There are any number of plywood guitars out there. Over at the TDPRI site(which is a a tele-centric community), there's guys building Teles out of OSB. Their sound samples sound pretty good, so who are we to judge. OSB is probably more glue than it is wood! SO, yes. As for winding pickups, I've never done this but there are a number of tutorials out there on the web. You can build a pickup winder to run off of a variable-speed drill. From what I've read, the learning curve in this involves learning to work with the very fine wire used, which is fragile. As for added tools, to do a body you will need a band saw, scroll saw or some such. And you need a real, honest to god router to do a neck pocket properly; a Dremel with the router attachment probably isn't going to cut it, pun intended. Of course, you'll only be using these things once, so rental or borrowing them makes sense. You may also want to consider that you can probably get a custom body made for $400 or so. How much is your time and trouble worth? Not trying to discourage you, just saying.  . As for the scale length, I haven't looked at a breadwinner recently to know whether you'd have the room to move the bridge back 3/4" or not. If not, then you're right, you'd need to "scale up" the body style a bit. You wouldn't need much added, it's only a 3/4" difference. And if that neck has been sitting around a while, make sure to check it before you launch into this project, since you're effectively building around the neck here. If it has developed a twist, you may be looking for a new neck anyway (and could then get a 24.75" for true authenticity.). To do this as cheaply as possible, consider sourcing such things as the bridge, knobs, neck plate and other hardware from a decent quality donor guitar. Find something cheap with a warped neck or damaged body, it doesn't matter, you're just using it as a parts mule. Also consider buying a body blank, it will come as the right size overall, and won't cost much more than the lumber itself would cost you. And potentially you could get a single piece and avoid the need to dowel-and-glue multiple pieces. |
|
edvard
Meter Reader 1st Class
Posts: 51
Likes: 0
|
Post by edvard on Jun 29, 2014 23:24:33 GMT -5
Thanks for the advice . My comments... Body: I want to keep it as 'wood' as possible, so MDF, ODF and the like are out. Just personal taste. And I hate dust. For plywood, I may be able to scrounge some pieces free. Local construction sites, Craigslist 'Free' ads, Freecycle groups, etc. I'd need it about 15" by 22" at least, which isn't much so I can probably afford that. Hardwoods and body blanks are a bit out of my comfort range price-wise, though if I had my 'druthers, I'd go with a "hippie sandwich" of 1/2" maple or some other hard white wood on top and bottom of 1" of mahogany or similar. I like the look of the dark stripe running around the body. If I go with plywood, I'll do it in paint. Pickups: After posting, I looked up pickup winding videos. Seems the gamut runs from paying for a winder with all the bells and whistles or going at it with nothing but a blank to wind the wire on, some way of spinning it, some method for keeping track of the spins or a multi-meter. Oh wait, wire would be nice too  . All in all, spinning one's own pickups looks like a whole 'nother project to indulge in. Maybe I'll just keep my eyes peeled on ebay for some inexpensive pickups (I'm not very picky). Tools: Forgot to mention I DO have a band saw, one of those thin-blade models, not a full-size one. That still OK? I had no intentions of using my Dremel as a router; I have a proper table router. Maybe a bit on the budget side, but it does well. Scale: While working with the CAD files I worked up, it appears this is more than just moving the bridge back 3/4". To explain, what I've found is that 25.5" scale bolt-on necks pretty much dominate the market. Maybe because 24.75" scale guitars have traditionally been set necks done most famously by Gibson, so there's no standard (that I can find) for Gibson-scale bolt-on necks concerning neck pocket, etc. I've seen dozens of build reports of "Partscasters", exactly zero on "Parts Pauls". Warmoth sells conversion necks that are sized so a 24.75" neck can be fit on a 25.5" scale body, but it still has the body space constraints of their 25.5" necks. They do sell what they call a "7/8 size" neck that must be matched with their 7/8 body, but there are no mounting details on their website. I prefer the longer scale anyway, so it's not a big deal, but no matter what, it'll need a pocket 3" long and 2-3/16" max heel width, even for flat-butt Tele necks, and 7-1/8" from bridge to neck butt. That's a fair bit of real estate to try and squeeze into the Breadwinner shape, but I think it can be done. I check the neck every year or so, and I keep it in the box it came in, stored flat. No twists yet. Hardware: Good idea cannibalizing a 'throwaway' guitar for the parts. That's still spending money, but I think I can keep that to a minimum if I shop right... |
|
|
|
Post by newey on Jun 30, 2014 4:49:09 GMT -5
OK, so you're set for tools. If you are going the plywood route, however, you'll need some good woodworker's clamps.
|
|
|
|
Post by haydukej on Jun 30, 2014 9:42:38 GMT -5
If you get tired of hunting/waiting for a deal on Ebay for your pickups, I might suggest checking out the pickups at Guitar Fetish. While I have not purchased or directly heard any of these myself, it seems to be a general consensus that most models are a pretty good bang for the buck. I believe Newey actually has used some of their pickups in his creations and has been pleased with them. |
|
edvard
Meter Reader 1st Class
Posts: 51
Likes: 0
|
Post by edvard on Jul 1, 2014 0:39:45 GMT -5
Yep, I got a full set of C-clamps and bar clamps in various sizes, and I remember high school wood shop enough I know how to use 'em Even if I didn't, I've got a stack of bricks in my shed. Ya think ~150 pounds of patio pavers will do the trick?  Mmmm... GFS. I quit going to their site, because I had a very bad habit of digging through the clearance section when I couldn't even afford those (which was fairly frequent) and got tired of getting drool on the keyboard  Thanks for the tip though, it's been a while, maybe I'll do a bit of window shopping while payday is still close... Hey, looky there... a 24.75" bolt-on neck for less than 40 bucks... *twitch* |
|
edvard
Meter Reader 1st Class
Posts: 51
Likes: 0
|
Post by edvard on Jul 6, 2014 17:16:18 GMT -5
Okay, two more questions...
1- If I decide I want to spend a few bucks and go for the "Hippie sandwich" look, I'll need a darker color for the middle, and I think it's bad voodoo to cut out three pieces so I can stain the edge of the middle piece before gluing. I'd rather glue, then cut, so the middle would have to be dark all the way through naturally. Usually dark wood means walnut, mahogany, purpleheart or some other exotic stuff, but I'm trying to keep costs down.
Here's the plan, top to bottom:
1/2" Poplar, Maple or other pale hardwood (easily obtainable from the lumber store)
3/4" - 1" *dark wood*
1/2" Poplar, Maple, etc.
Anybody know of an easily-obtainable dark colored softwood or hardwood? "Easily obtainable" meaning I can get it at my local lumber store.
I don't get out to look at different woods as much as I'd like to, and the internet has a veritable rainbow of information (meaning confusing, vague, or even contradictory), so I'm calling on actual experience.
2- I plan to release the CAD plans for this beast under a CC license, but I wonder if even the similarity to an actual production guitar would open me up to any lawsuits? Eastwood is making Breadwinners currently, under license from Fender, who acquired Ovation's assets a while ago. I mean, it'll be tweaked for scale and some of my own preferences, and I'm sure that even the original trace is not 100% accurate, but that won't stop an unscrupulous individual from trying to profit from it. I am not a lawyer, and I don't know any, do any of you have law experience and can roll an eyeball over what I have now?
|
|
|
|
Post by newey on Jul 6, 2014 17:51:09 GMT -5
Yes, you do.  Although not exactly my area of practice. But I wouldn't worry about the body shape. Headstock style, yes- Fender has successfully sued Strat cloners over the headstock shape, claiming that it was a trademark of theirs. But when they tried to trademark their body shapes a few years ago, and then sued someone for cloning Strat bodies, they got shot down in court. I'm sure the Breadwinner would be the same story. guitarnuts2.proboards.com/thread/4722/fender-spanked-trademark-court |
|
edvard
Meter Reader 1st Class
Posts: 51
Likes: 0
|
Post by edvard on Jul 7, 2014 21:50:06 GMT -5
Ah, OK. It's not like I'm planning on selling anything, either.
Almost got all the plans worked up to where they look decent. I may be releasing the file in a few days...
|
|
edvard
Meter Reader 1st Class
Posts: 51
Likes: 0
|
Post by edvard on Jul 25, 2014 2:36:45 GMT -5
Not yet. I did a few traces of some good pictures from the net, and it looks like my original drawing was a tad to way off in more than a few places. I wouldn't worry so much normally, but I get OCD sometimes... Sometimes. |
|
edvard
Meter Reader 1st Class
Posts: 51
Likes: 0
|
Post by edvard on May 2, 2016 0:45:41 GMT -5
OK, got some first steps... Template cut and smoothed, and the body wood trimmed and glued. Oh, the luthier's sins on this one, though: 1- Pine. Yep, salvaged 2x4s complete with nail holes, dents, and what-not. 2- I don't have a planer, so I did my best with the table saw and a long piece of sandpaper on a flat board. Next up, I gotta source a router bit with a top bearing for cutting out the actual board. My band saw is one of those table-top jobs that worked great for buzzing out the template, but gets a bit testy with 1-1/2" thick pine boards. I should probably also fill in and sand down some of the more notorious dents. I managed to miss the nail holes... Image tax:  |
|
edvard
Meter Reader 1st Class
Posts: 51
Likes: 0
|
Post by edvard on May 14, 2016 17:27:04 GMT -5
So I guess this is beyond the planning stage? Should I start a new thread? Nah! I'll just keep it going here... Body all cut out now:  A few router skips I have to fill in:  Nothing a little wood glue/sawdust paste won't fix, and I'll be painting, so I'm not TOO worried about these burn marks (I don't have a top-bearing router bit  ).  |
|
Deleted
Deleted Member
Posts: 0
Likes:
|
Post by Deleted on May 16, 2016 8:36:34 GMT -5
Seems like an adventure in the woods bro!
keep up the good work.
|
|
|
|
Post by cynical1 on May 17, 2016 17:04:42 GMT -5
Yeah, sandpaper and epoxy wood filler can be your best friends sometimes...
I would STRONGLY suggest you score a top bearing router bit BEFORE you try the neck pocket and pickup routings...after all, there's only so much epoxy wood filler can do...
Off to a good start. I'll be watching for more updates.
HTC1
|
|
Deleted
Deleted Member
Posts: 0
Likes:
|
Post by Deleted on May 17, 2016 23:08:50 GMT -5
The place where I live (ok the whole country) is stuffed with pine trees. I had once tried to make some dowels out of some random branches that feel off and failed. Very soft wood. Your species might differ.
|
|
edvard
Meter Reader 1st Class
Posts: 51
Likes: 0
|
Post by edvard on May 17, 2016 23:53:02 GMT -5
I would LOVE to have a decent top-bearing router bit, but it's just not in the budget at the moment, and I've read too many bad reviews of the cheap chinese ones that I can afford. Maybe I should re-think why I'm building then? Nah! The router bit I have is a 1/4" that's the same size as the shaft, and it appears to be doing OK for now, just give it a little wax on the edge I'm running against and we're good. I do appreciate the advice and will take extra care with the neck and pickup routes. After all, I am attempting to build an electric guitar, not a piano. Besides, I fully expect this to be an instrument that may go either way; my first build that I keep forever, or the burn-pile candidate I cut my teeth on. Either way, I'm having almost as much fun building it as I do playing. As far as the pine goes, I've read some good suggestions in a few threads at TDPRI and other places. It pretty much boils down to picking out the right species with dense grain and no knots, splits, or pitch sweat. I've read up on Janka hardness ratings of different species, and it looks like all the common Southern Yellow pines and even Douglas Fir are at least harder than Basswood, so I'm confident it'll hold up. *UPDATE* Well, in my initial zeal, I forgot the old maxim "Measure Twice, Cut Once" because I neglected to check the scale of the drawing I printed out before committing it to wood. I know better than to check the "Fit to Paper Size" box when printing something that needs to be accurate, but my wife doesn't. Bless her heart it wasn't her fault, I should have checked the drawing first, but this time I showed her how to print it at true 100% and I'm back on track. It's not a total loss though, I've learned a few things and can tackle a new build with a clearer outlook this time. Back to the woodpile! |
|
|
|
Post by cynical1 on May 18, 2016 12:14:41 GMT -5
I don't know what part of the world you're in, but top bearing router bits in 3/8" or 1/2" (with just these two sizes you can do everything on a guitar...hell, 3/8" will do everything, but it'll wear out faster...) run around $30.00 a piece. While this is significantly more than a standard bit, the expense is more than justified by the results you can obtain and the considerable amount of time you'll save...not to mention the reduction in "Oh s  t!" moments Another tool you should take a look at is a Forstner bit.  You'll use this to do most of the material removal in your routings. It can be used is a standard drill if cost prohibits a drill press. Once most of the material is removed you can then move in with your top bearing router bit and clean it up. Here's and example of what I'm talking about:  Using a Forstner bit like this will make your expensive top bearing router bits last quite a bit longer. A Forstner bit normally runs around $15.00-$20.00 and they last forever on pine... While it is true that you can do everything on a guitar with a good set of chisels, you're going to need 20 odd years of experience with said chisels to produce anything you'd want to play later. Plus, a good set of chisels will cost you a helluva lot more than two top bearing router bits... Since you have a "practice body" to play with you can prove the theory. Try making a clean neck pocket, control cavity and pickup routes with your standard bit. Then clean them up with a chisel...which you will need to do without the top bearing bit. For reference, back in the day it took me about 15-20 minutes to Forstner, setup and cut a neck pocket. And you're absolutely right, some pine species are harder than basswood, which seems to be the darling of the industry these days...that, and agathis...but don't get me started... One thing that always seems to get ignored in all of these discussions is that age of the wood. Evey wonder why a 50+ year old Les Paul sustains forever? For example, a 100 year old piece of pine will be harder to work that a 2 year old piece of oak. Pine can make a nice guitar. It will have a warmer sound, much like basswood and poplar, but it will make a very serviceable instrument. Again, the older the wood the harder it will be to work and the more resonance it will have. I've said it before, and look out, I'm going to say it again...
[gospel]To buy the minimum of tools and tooling necessary to build your first guitar you will spend considerably more than you would if you'd have just bought the guitar outright.
[/gospel]That's not to say you'll need to outfit a professional shop, but there is a bare minimum of tools and tooling you should expect to have if you expect to be happy with the result. As always, if you're in a part of the world where these things are more expensive that the US, arrangements can always be made one of us here to ship them to you. I did this for the late 4Real a couple times, as Australia was the wrong place to find small parts cheap. Either way, enjoy the project for what it is. A learning experience. After the first couple of guitars you start to understand what works and what doesn't. Hang in there. Happy Trails Cynical One |
|
edvard
Meter Reader 1st Class
Posts: 51
Likes: 0
|
Post by edvard on May 22, 2016 14:55:32 GMT -5
I don't know what part of the world you're in, but ... I'm in the U.S., so I'm not suffering for lack of tool suppliers. Looks like I can get a decent quality Forstner at my local shop for 10-20 bucks. Not bad, do you have any sizes you recommend? Good idea, I was wondering what to do with the old one. I would 100% agree with you on this if I were considering any number of Fender or Gibson Clones. If I wanted a custom Strat, I'd just fiddle with my thrift-store-find Squier rather than trying to re-invent the wheel. Considering that most of the tools I have were bought for doing stuff around the house, an original Breadwinner is right around $1000 on eBay (give or take a few Benjamins depending on condition, case, etc.), and the Eastman Breadwinner is still way beyond my budget, I think I can better afford the time and extra tools to make one that is to my specifications. Thanks, I'm taking your advice to heart and making justifications to my wife as to why I need to throw yet another sawbuck or two at the local or online hardware merchants. |
|
Deleted
Deleted Member
Posts: 0
Likes:
|
Post by Deleted on May 23, 2016 8:24:33 GMT -5
Thanks, I'm taking your advice to heart and making justifications to my wife as to why I need to throw yet another sawbuck or two at the local or online hardware merchants. Cause guitars and tone is your therapy man! And hanging around hardware shops also helps with stuff done in the house  I started with guitar mods now I am capable of doing semi-decent mid-level woodwork and other works in the house. |
|
|
|
Post by cynical1 on May 23, 2016 15:45:04 GMT -5
This will make things much easier and cheaper. My apologies to the rest of the world...
Unless you're planning on a huge swimming pool route with this project, you could get away with a 1/2" dia. Forstner bit and cover everything, but a 1" Forstner bit is a time saver for neck pockets, control cavities and large cavity routing and a 3/8" is nice on small cavities where you're going to use a 3/8" router bit, however, they're not a requirement. Same thing with the router bits. A top bearing router bit at 1/2" and 3/8" will allow you to do most anything on a guitar from the big swimming pool routes to single coil pickup routing, provided you Forstner the cavity first.
The thing you want to look for in a top bearing router bit is the length. Most come in 1" lengths, but if you find one in 1/2", 9/16" or 5/8" lengths you can use most standard polycarbonate routing templates without using a spacer block. You can use MDF to make a thicker template for the longer bits, but why make more work for yourself?
On the router bits, I've always had good luck with Freud bits, but they're not the only one out there.
As with everything, there is a learning curve. In this project you will be making pickup routings, control cavity routings and most important, you're doing a neck pocket routing. And they all need to be aligned to the short hairs. I would suggest haunting the local home improvement stores looking for MDF cutoffs or scrap. The more practice you get in before you hit the final body the better.
Remember, your initial pass with ANY router is ALWAYS counter-clockwise. This prevents chips or tearouts.
And that's the rabbit hole we all fall into... I first got started in this addiction in the 70's in the back of a music store "trade-in" pile. Taking cast-offs and making them into better instruments than they were coming out of the factory has been something I get more satisfaction from than making my own basses and guitars these days. You'll never get rich doing it, but the first time someone picks up your reworked guitar and plays it...and gives you that "whoa, I gotta have it...how much you want for this?" look...well, then you're hooked...
For reference, some of the most over-looked vehicles for this are old Peavey, Yamaha, Fernandes, Ibanez and Aria. There are others, but you can score most of these on eBay for cheap and unless the neck is gone all corkscrew on you they are fantastic instruments to refurbish. The beauty of these models are that you're not tossing your resale value out the window my making design changes. You also have the advantage of 30+ year old wood, but that's another topic.
Justification. Yes. One of the cleverest things I ever came up with was when I wanted to buy a new router table. My old one was ancient and the damn thing just wanted to die. I explained to the wife that I could make custom picture frames for her. I coughed up some coin for a few fancy bits and made her about a dozen frames for her artwork the first week I had it. This made subsequent tool purchases much easier as all I had to do is find some tangential relationship to working on the house with whatever I needed and the guitar tool inventory expanded accordingly. You're on your own when you try to justify the nut files...but you get the basic idea.
Good wood working involves patience and planning...and guitar building is nothing more than precise woodworking. The biggest mistake I see people make when building their first guitar is setting unrealistic expectations on time to complete. Planning, building templates, fixtures and jigs, allowing time to also acquire tools and tooling...this all seems to compress...or worse yet, become discarded. If you have no parts purchased, tools or tooling available to you I would allow 2-3 years to complete this guitar.
[gospel]
ACT IN HASTE, REPENT IN LEISURE
[/gospel]
That said, estate sales, Craigslist and those stupid ad boards at the grocery store will be your best friends in locating most of the more expensive tools you'll need. Wait and look long enough and you can save thousands. For example, I scored a nearly new scroll saw and a nice table top drill press (with adjustable machinists drill vise) for $60.00...both tools, one estate sale.
My advise is to start making a list of everything you're going to need. Some things you can score used, but there are other tools you're going to have to bite the bullet on. I can give you a list if you're interested. Most of it will transfer nicely over to some common domestic usage with a little imagination, so convincing your better half should be a little easier...
Hang in there, we're all pulling for you.
Happy Trails
Cynical One
|
|
edvard
Meter Reader 1st Class
Posts: 51
Likes: 0
|
Post by edvard on May 24, 2016 0:09:18 GMT -5
My advise is to start making a list of everything you're going to need. Some things you can score used, but there are other tools you're going to have to bite the bullet on. I can give you a list if you're interested. Most of it will transfer nicely over to some common domestic usage with a little imagination, so convincing your better half should be a little easier... In my first post I detailed the tools I have. The big ones I would really like to have are a bench drill press, a vise, and a planer. I think I can get away with simply using a decent block plane, so the planer isn't necessary (... yet), but having a vise would make that easier. Looking at the task at hand, I refuse to Forstner anything without a drill press. The thought of trying to do that by hand is... messy. I have found a few of those drill press frames that allow you to strap in your average power drill (which I have three of), but none in the condition/price ratio that I like. I'd be much obliged to have a list of necessities, if nothing else, I'll at least get an idea of how deep I'll be at the end of it. As far as my wife goes, I've already built her two porches (the old ones rotted out practically from under our feet) and someday soon I'll replace the kitchen counter and flooring. Her acceptance factor is running a little higher than normal lately, so I've a good chance to pick up a few things with the next paycheck. So, bring on the list, and I'll report back in a few weeks with the next phase. One last question: I've been contemplating doing the neck pocket and pickup routs first, on the body blank, and basing the body around that. Or is that another kettle of fish? |
|
|
|
Post by cynical1 on May 24, 2016 13:35:29 GMT -5
OK, I went back and looked at your first post and saw what you have available. You're not as short on big things as you think you are. To be honest, it's all the small specialty tools that'll cost you. I'd been collecting tools for close to 35 years when a flood in 2008 wiped out about 90% of them and the trusty insurance company disallowed the claim...since it was a flood...but that's another story all together. The nut file collection would cost me more than a drill press and planer to replace, so I understand the position you're in.
Let me do it this way. I'll list everything I would feel a bare minimum to even contemplate building a guitar or bass. This is my list, other people should feel free to chime in with any other tools I may have missed. Anything with an asterisk will have an explanation after the list. That said, in no particular order:
THE LIST
BIG STUFF: Bare Minimum
Drill Press: With or without the drill vice*
Table saw
Router Table
Bench belt sander & disc sander
Drum sander*
Floor or large bench mounted jigsaw
Heavy duty wood vise, or heavy duty vice with oak or maple inserts in the jaws
13" planer*
Planer\joiner*
Workbench: The serious kind you can bolt vices and things to...not the Harbor Freight kind...
Clean bench: A clean place you can do wiring and final assembly
SMALL STUFF: Bare minimum
Clamps: This is where the money starts to evaporate. A good supply of c-clamps, bar clamps, equal pressure clamps...
Files: Everything from small files to rasps. When it all went underwater on me I had around 200 different files, including nut files.
Nut files*
Fret crowning files*
Drill Index: We're talking a standard and numbered set.
Forstner bits: 1", 1/2" & 3/8" *
Top bearing router bits: 1/2" & 3/8" diameter at 1/2" to 5/8" length maximum
Metal precision rules: Everything from long to short standard and metric.
Precision angle finder
Dial calipers and micrometers
Rubber mallet
Precision square
Precision level
Precision feeler gauge set
Soldering iron
Hand tools: This gets expensive too, as you want to good ones, not some hardware store knock off. We're talking everything from screw drivers to allen key sets.
Precision set of punches
Routing templates: Pickup and control cavity templates. Trem-Leo templates if necessary
Neck rest: For setups and etc.
Fret saw*
Fret press caul with brass inserts*
Radius sanding blocks*
SUPPLIES:
Sand paper: You're gonna go through a lot of sand paper. Everything from 80gr to 360gr dry and 400gr through 2000gr wet or dry. I buy this in bulk whenever someone puts it on sale.
Masking tape: This stuff gets used everywhere. Avoid the cheap stuff. I only use 3M blue or green tape for a reason.
Tack rags
Cloth rags
Wood: The nice planed ready made stuff and the home improvement store works. Oak or maple work for the areas that will see wear and top bearing router bits will be a factor, poplar can be used for the rest of the jig\fixture.
NICE TO HAVE STUFF:
Thickness sander
Nut shelf files
EXPLANATIONS:
Drill Press with or without the drill vice: You won't appreciate how useful the drill vise is until you have one. It's not a requirement, but if you find one cheap jump on it. Stay away from the toys that hold a standard drill in a similar fashion to a drill press. They don't work like it says on the box.
Drum sander: Since you have a router table, just buy the sanding drums and chuck them up in the router. Same same.
13" planer and Planer\joiner: While these are a requirement if you're going to do a lot of repairs and builds, there is a way around it. Find a good lumber supply house or cabinet making shop and pay for what you need. For example, on a project I'd started before the flood, I needed 3 pieces of alder for fills for a hard tail conversion and neck pocket repair, but no tools left to do it. I paid a cabinet maker $20.00 to make them for me out of his scrap. They were as dead nuts on and square as they could be, and I saved about $500.00 in the tools needed to make them up. For reference, stay away from hand planers. I've only seen a handful of people that could do it right...and I would not be one of them...
Nut files: These are one of those things that you don't appreciate until you don't have them. You can cheat and take a set of feeler gauges and cut serrations with a Dremel cutoff wheel. This works for guitars but is a total waste of time for bass. Torch tip cleaner files will also work, but I'd recommend the feeler gauge trick first.
Forstner bits: 1", 1/2" & 3/8": While the 1" is nice, you can live without it.
Fret saw and Fret press caul with brass inserts: If your neck already has frets you can pass on these.
Fret crowning files: It's not a question of "if" the frets are not leveled on your neck, it's a question of how bad are they. I have NEVER seen a replacement neck, or a new neck on a new guitar that was properly leveled and recrowned. Some are better than others, but count on doing some fretwork on your Warmouth neck. They sell these in sets and individually. You can just buy the file that fits your fret profile to save a few coins.
Radius sanding blocks: Again, if you already have a fretted neck, these aren't as important. You can use them to level the frets. You may also want to look for a good honing stone for that purpose. You mark your frets with a Sharpie and run the stone slowly up and down the neck until the marker if evenly removed along the length of the neck. Repeat as needed. Saves you a good chunk of change on leveling blocks. Then you just use your fret crowning files to reshape them. About the only place I regularly use a Dremel tool for is the final polishing on the frets. Use the soft wheel with the polishing compound and they'll shine like chrome when you're done.
OK, so that got a bit verbose...and in all likelihood I probably forgot something in there..CRS...
I'm living proof that most of the big ticket non-specialty tools can be had at estate sales and Craigslist. Another trick is to haunt the specialty tool stores. Guys love new toys, and normally their wives require the sale of the old tool before or immediately after the purchase of the new toy. You can pick these up for a song used, especially if the wife is in earshot of the negotiations.
You can also haunt any woodworking clubs or seminars offered by the better tool houses. Guys always have things for sale, you just have to find them.
For the specialty stuff Stewart-MacDonalds and Luthiers Mercantile are your best bets. Sometimes they have sales, but it's more likely these things will just cost you full price. Birthdays and Christmas are a good way to score some of this stuff. Provide exact links and just looked surprised when you open the box.
One caveat I will throw out, and it's the result of over 30 years of doing this stuff: Buy it right and buy it once. Buying it cheap will likely have a detrimental effect on your finished work, plus they just don't hold up.
Another point, frequently lost, is that the majority of the big stuff you need is for making jigs and fixtures. I won't go into everything here, as I'm already approaching novelette size in this post, but the distribution of work you do when building your first one is about 35% guitar and 65% jigs and fixtures...and most of your actual guitar work will be on the neck.
This goes right to your question on sequence of steps routing the neck pocket and pickup routings. With the right fixture you do them all in about 10-15 minutes...only because you spent 3 hours measuring and building all your fixtures.
Feel free to ask any questions for clarification.
Hang in there.
Happy Trails
Cynical One
|
|
edvard
Meter Reader 1st Class
Posts: 51
Likes: 0
|
Post by edvard on May 25, 2016 23:06:12 GMT -5
Well... shoot.  If I wasn't so ever-lovin' stubborn, I'd give up now. You're correct; the bare minimum you describe is WAY over my budget and would cost about what I'd pay just to buy the guitar I want off eBay. BUT... I did get as far as gluing up the boards and cutting out the body on my first attempt, and my second attempt isn't too far off. It may be slower, more difficult, even a bit ugly, but I'm determined to do this thing without busting the bank. Sorry, I get that from my father Just ask him how to make a perfect circle in plywood with nothing but a skilsaw and a pencil... Seriously, I appreciate the list and if I somehow manage to do better this year financially, I'll have a handy checklist in case I get bitten by "the bug". For now, I'm going to make do with what I have to get this thing done or else it'll be yet another 20+ years. |
|
|
|
Post by cynical1 on May 26, 2016 12:03:56 GMT -5
That's something you'll be pulling from quite a bit during the duration of this project. It will serve you well. Yeah, sticker shock chases most of them away... When I submitted my insurance claim after the flood it came up to just south of $11,000.00. Most of that was specialty tools and fixtures. Granted, that was 30 years of accumulation, of which most of the big stuff was purchased used. Look on the bright side. You already have a neck that's only going to require a nut and some fretwork. This will save you quite a bit of time overall. I used to build them myself, but after about 10 years I realized I was spending time and money where it could be better expended and started buying them all out in various states of completion. Just to continue my verbose streak in this topic, I joined here in January 2008 with two projects I needed wiring help with. Although Imageshack lost all the images from my postings here, Project #1 and #2 (aka Blue Murder) were made from bodies and necks I picked up on eBay. 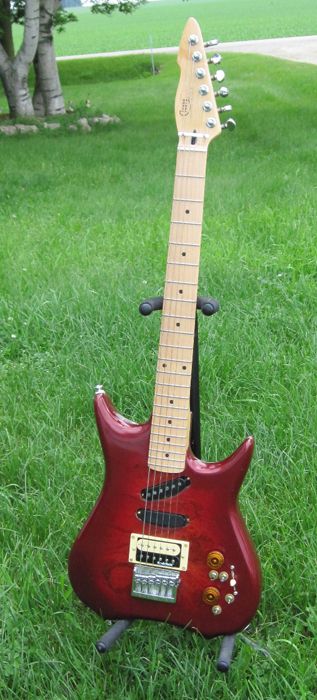 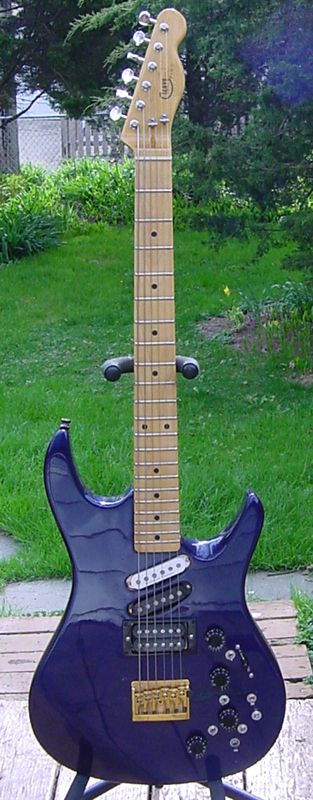 Projects #1 & #2 Projects #1 & #2Project #1 was all chewed up by big dogs and needed radical rework to become serviceable. Both needed trem cavity filling, new pickup routings and Blue Murder needed a bare CNC neck fretted and finished. Project #1 had some aggressive plans to take a plywood body and route it out to allow a continuous alder connection from neck pocket to bridge fill. By June 2008 every tool for these projects was under 5' of water. It took me 4 years to finish #1 and another year to complete #2. Neither one had benefit of anything but hand tools. In fact, my work bench was two 2" x 10" boards clamped to two water logged dining room chairs. The vice was bolted to a piece of railroad tie cutoff from a hitching post I built for the horses...but I finished them. I admit, I really missed having the right tools and fixtures for the job, but the old adage of "adjust, adapt and improvise" served me well. Along with stubborn, patience is going to be something you're going to need in large quantities, too. Remember Stalin took five years for his plan to work. Hell, my son is still on the 20 year plan for his Associates Degree... It might be easier to take the list above and break it down to what you need when you need it. Some of your largest expenses will be at the end when you're doing the final tweaks and fitting. What would be best now is to literally write out your entire build process. Write down what needs to be purchased and built. List the tools or supplies necessary to do the job at hand. Compare this to what you already have on hand and use this to guide your purchases as you go. For example, your routing table can also be used as a drum sanding station by removing the fence and chucking in a 2" or 3" sanding drum. For about $15.00 in wood at Home Depot you can build a fixture that holds a hand belt sander in a vice. Don't discount estate sales. Unlike garage sales where everyone dumps the crap they don't want, estate sales are EVERYTHING. I have rebuilt most of the small tool and some of the larger tool inventory within the last two years just by haunting estate sales. I doubt I've dropped over $200.00 in total. Dropping $20.00-$50.00 at a cabinet makers shop could save you hundreds in tooling expenses. Catch them on a slow day and they'll even give you tips on using the tools that you may never have thought of. For the record, you can Forstner with a hand drill. I don't recommend it, but that's how I did Projects #1 & #2. Please note, I am not encouraging or promoting working unsafely or recklessly. I'm just pointing out that there are other approaches, which may not be as fast, but can be just as accurate with a little thought an preparation. My father earned his degree in over-engineering from the School of Hard Knox and passed on more of that to me than he probably realized...just ask my wife... This will also serve you well, as mistakes are going to happen and it's how you fix them that determines the quality of the finished result. Building guitars is something you either have a passion for...or it's something that may lead to years of therapy... After totaling up the cost of getting started 99% of people surveyed went to a music store and said screw it. There is a damn good reason why a professional custom instrument is so damn expensive. Honestly, you can probably cheat and get most of the body done without breaking the bank. As I said, you already have the neck in hand. Since it's the most critical part of the whole guitar you've already jumped the highest hurdle cleanly. Wait until you add up the hardware and electronics... I would suggest that since you're in this for the long haul, find yourself a quality piece of wood for the body. Study Janka hardness scales and look for something that grows natively in your part of the world. DoubleYoi, a member here, used cypress for his top on a Tele project and it sounded damn nice. Don't be limited by traditional "tonewood" choices. Poplar is highly under-rated, harder than pine and basswood and if you're going to paint it, who cares what the wood looks like. Brian May used a piece of 200 year old oak for his fingerboard on his red guitar that he built. A little black leather dye and the world thinks it's ebony... You have a clean canvas to work with. Research your options. You will have this guitar for the rest of your life. Do you really want to hate yourself for going cheap in the beginning? The most critical piece of advice I can give you now is that what makes any instrument great is the tightness of your tolerances. Alignment and tight tolerances will cover a world of aesthetic sins. Hang in there, we're all pulling for you. Happy Trails Cynical One |
|


 .
. . All in all, spinning one's own pickups looks like a whole 'nother project to indulge in. Maybe I'll just keep my eyes peeled on ebay for some inexpensive pickups (I'm not very picky).


 ).
).


 I started with guitar mods now I am capable of doing semi-decent mid-level woodwork and other works in the house.