|
|
Post by cynical1 on Sept 14, 2015 12:15:57 GMT -5
As with all things, a picture of the current situation is always best. But I'll muddle on here anyways...
If I understand you correctly, the piece is now out of the neck, right? How much of the original piece is left? Can it be salvaged and glued back in?
Going under the perception that it's not re-usable, you're not completely screwed. The first question is what type of chisels or files do you have? It's not uncommon to have to fabricate a new piece to fill a gap like this. You will need to clean up the existing trench in the bottom of the neck heel. Ideally, you'll want to square it up as best you can, so your replacement piece can be more easily fabricated. Find some maple, oak, walnut or beech...anything hard to match the hardness of the maple. It doesn't have to be exact match as no one will see it and it's not as structurally critical as other places. Just don't use pine, poplar or basswood.
The piece can be reclamped either from the top\bottom, or the sides. It just needs to fill the gap. The dowel will be doing all the work. The filled gap just gives the dowel a place to attach to in this instance.
I'd really like to see a recent picture of the patient, as guessing is so random...
Happy Trails
Cynical One
PS: And yeah, I'm not a big fan of super glue on wood, but Dan does this for a living and time is money.
|
|
Deleted
Deleted Member
Posts: 0
Likes:
|
Post by Deleted on Sept 14, 2015 13:27:05 GMT -5
Cyn1, it is not reusable. I have no picture, in fact I am embarrassed to shoot any picture at this state. However, I must clean it up, and shoot some pic. I have some files, but no chisels. Thanx a lot for the tips on the woods!
On the dowel theory, wouldn't the new piece "be" the dowel by overlapping the whole damaged area with the hole included? I mean, I am planning to completely cover a bigger area like this shown in the latest pics.
Cause if the new piece is not tightly glued to the left and right, and does not fill the current hole, then the dowel will only have 1-2 mm on the heel end side as support from this region. Wouldn't it be fragile? Wouldn't the pull upwards (towards the neck heel pocket, under full pressure from the screw) actually have a disproportion between "bridge" side VS headstock side? Headstock side it will be fully consistent and supported. Bridge-side the load will only be on a thin stripe of wood between the dowel and the replacement piece. That's why I think there has to be support from all the greater area around the hole.
I cannot understand that. If you could elaborate a little it would be great.
|
|
|
|
Post by cynical1 on Sept 14, 2015 17:00:32 GMT -5
Cyn1, it is not reusable. I have no picture, in fact I am embarrassed to shoot any picture at this state. However, I must clean it up, and shoot some pic. I have some files, but no chisels. Well, along with all this you have a chance to learn something. You know more about locking nuts than most people, so here's a chance to learn something else. No shame involved, but a picture would help a lot. That is an option. The only thing you have to do is make sure the new screw hole goes EXACTLY where it's supposed to. You don't want to go through all this work and s SWAG the new hole. Make a template of the existing neck locating each existing screw hole. Save it for future reference and you can use it later as a template to drill the new hole. If you're going to use one large piece it might be best to build a fixture and route out a nice square groove to insert your new piece. This is NOT something to be done with hand tools. Maple is hard and working it by hand will take you an eternity and unless you have years of experience it's far from an exact method to fabricate precise work. OK, let's take a step back and look at what you had. The small piece of wood had separated from the main neck heel. Not good, but not as bad as you might think. The dowel pin would have about 85% of the existing neck to attach to at the deepest point of the crack. It would also go below the crack where it had 100% of the intact wood to attach to. As JohnH pointed out, the screws closest to the headstock have the greater force pulling against them. Granted, the neck pocket on your guitar is open at the bridge side, but it still holds true that the majority of the force exerted by tuning the strings occurs on the headstock side set of screws. So, if the small chip only attached at the point of the dowel pin, it was still tight enough within the crack to keep the rest of the wood at the base of the neck heel from going anywhere. Once the neck was attached it would have stayed there forever, unless you messed with it, due to the compression provided by the neck screw. Now you have to find a piece of wood to take the place of the chip that is now beyond salvage. No worries, as you can route, chisel, file the current channel to a nice uniform size, fabricate a nice clean right angle rectangle and glue it in. Once you chisel\file\sand it flush it'll be stringer than what you had. Now to the dowel pin. Unless you take your reworking down to the depth of the end of the screw hole you have a potential to push the two pieces apart by the same mechanical forces that drove out the ship in the first place. So, if it here me, I'd remove as little material as I could in the current gap to allow a nice clean and square piece to be re-glued, thereby filling the gap and reintroducing stability to the neck heel. I would still drill out for a hardwood dowel and re-drill the screw hole. The dowel is designed to go to the base depth of the original screw hole, where the replacement piece should only go the the depth of the split. Make sense? Let me know if I glossed over this, or got lost in verbosity. Happy Trails Cynical One |
|
Deleted
Deleted Member
Posts: 0
Likes:
|
Post by Deleted on Sept 15, 2015 1:10:44 GMT -5
Again I understand you fully! My (new) screws (I have them since Xmas, when I did the sawdust wood glue-> hardened by super glue : thread reinforcement trick) (not the original) are : 4.9mm external diameter (thread included) 3.1mm internal diameter 39mm length Now, the original screws were 5.1mm external diameter 3.6mm internal diameter headstock side : 40mm length bridge side : 45mm length <----------- The new screws (I bought them for .. free here in Athens) are supposed to screw smth like gyps, and are black, however they are much much stronger than the originals, judging from the deformation formed in their heads. The new ones although used more, look better. So the original peripheral hardware looked and I am sure was TOO EL CHEAPO : intonation screws , locking nut screws , trem springs : ALL were garbage. (BUT!!! The locking nut itself is not bad. The trem itself is not bad (I mean better than your average asian crap). The sound is good, and the sustain proved to be good. In short, I think this guitar is not worth the 1300 EUR it retails , but it was OK for what I got it.) Plus as I discovered 2-3 days before, the upper hole of the bridge side was not as deep as the lower side, thus definitely it would be unable to accommodate the initial 45mm screw. All in all, I am inclined to believe that the guitar's problem (and sole problem), since day one, was the inadequate depth of the screws. Nothing else. - Assumption : day 1 inadequate depth of the screws -> lousy joint -> neck heel pushes neck pup -> sustain sucks
- I eat up some wood from the heel's end for aesthetic purposes ->
- the pup slant gets a little better -> sustain and stability problems remain ->
- I do the sawdust fix, with shorter screws (around Xmas 2014->NY2015) ->
- stability gets perfect, sustain still sucks, intonation screws have to go way rightwards ->
- One day many months later I try to bring intonation screws to a more sane position, and I move the neck slightly to the left : intonation screws redone are now more sane, SUSTAIN IS PERFECT!! ->
- playing in order to further improve sustain, i try to use the larger screw.. and KRKRKRKR, the rest are in this thread
I am happy that this is solvable , but it would be MUCH MUCH better to have taken the thing to a good tech who knows Ibanezes in the beginning . Now I gotta make up my mind. I am more inclined to take it to a pro. I do not have neither the time nor the skills for anything more than simple setups. Cyn, thank you a LOT! If the tech proves bad, (I will judge by what he says, what he charges), then ... back to our usual business  , and we continue from the point of removing as little material, making a square groove and gluing a nice square piece back. |
|
|
|
Post by studiostriver on Sept 15, 2015 9:54:35 GMT -5
Hi bro,sorry to see you having a problem again.
I read few posts and I`m with cynical1.
Don`t overdue it.Quality wood glue can really fix the things.
If was you I would took this guitar to good guitar tech at the first place.
Good luck.
|
|
|
|
Post by cynical1 on Sept 15, 2015 12:12:42 GMT -5
Sonosammy did a great post on using inserts versus wood screws. Sadly, as I recall, the locations of your neck screws make using these impossible. Location, diameter and length of wood screws is something we could debate endlessly. I have my opinions, so does everybody else.
Long and short of it, what really matters is the tightness of construction, or the tightness of tolerances of the construction. You can use lag bolt to put the neck on, but if nothing aligns, the scale is set wrong, or there are other misalignments, the lag bolts will offer little to no improvement in tone...or sustain.
Don't take this the wrong way, but I really hope your guitar was a second, or blemish guitar. I've always been impressed with the build quality of Ibanez instruments. Even when they went cheap on the components to meet a price point, upgrading the components almost always yielded a very good instrument. I'd hate to think build quality and design were being thrown to the wayside at Ibanez just to make a buck.
There is no shame taking your guitar to a tech. Sometimes you just need another set of eyes to look at a problem to make the best decision where to go next. In this case, what you're going to spend on tools will probably be more than what a good tech would cost...and there's no learning curve to suffer through.
If nothing else, it may be wise to use the tech to get an honest answer to the question, "Is this thing worth fixing?"
Right now, let's table the technical discussion on screw sizes until you decide how you want to proceed. I would be interested in what the tech comes back with.
I'm pulling for you, Greek.
Happy Trails
Cynical One
|
|
Deleted
Deleted Member
Posts: 0
Likes:
|
Post by Deleted on Sept 15, 2015 12:14:52 GMT -5
@studio : kako si brate?
guess what the tech that i took my guitar to, is with cyn1 as well!!! He told me exactly what cyn1 said. the fix will be cheap as well. He will follow cyn's simple method.
i dont wanna say big words till i get the thing back to full playing order , hopefully next week.
and the biggest surprise is tnat the tech lives .... 15 mins by foot from my house.....
i guess i gotta go out more.
thanx guys,
Cyn1, I will report back next week. Techs are a solution if pain, agony and adrenaline are not worth the risk of actually meeting cruel reality. Playing the tech is fun while winning, if loss and disaster are near the corner then the fun is thrown out the window.
|
|
Deleted
Deleted Member
Posts: 0
Likes:
|
Post by Deleted on Sept 16, 2015 1:20:38 GMT -5
Cyn1, hello,
it seems the tech told me exactly what you told me :
- replace the lost wood, by removing minimal wood from the neck, making a groove with square angles and then gluing an also squared new wooden piece to exactly fit the missing wood.
- drill out the old hole, insert and glue a dowel about 8mm diameter, which also will bond the dowel to the new wooden piece
- re-drill for the new hole
- he also mentioned grain in various occasions.
For 30 euros. If this turns out good, it will be a steal.
Now, I assume you read the description on the screws. I am sure you have some interesting things to say on them. All I can say for now, is that by using the original screws I never managed to have any stability. The only intervention was the make up of new threads with fine sawdust and strong wood glue, and using shorter screws. However this was enough to destroy one hole when I tried the original screw. And I am not the type of guy that brings terror to the chopper bikers at traffic lights, so I dont think I am that strong. Maybe the Indonesian "American" maple was ...too weak? Compared to the sanding block I have, this thing can truly kill, so heavy, hard, stiff. This I could not break by screwing.
|
|
|
|
Post by cynical1 on Sept 16, 2015 13:14:04 GMT -5
OK, let me break this down with some Ross Perot chart stuff: Let's take a #8 wood screw, as this is probably the most common size for neck screws. Not exclusive, but about the most common. Pardon the American measurements, but my metric skills sort of suck:  | Screw Number | Max. Head Diameter |
Shank Diameter
| Root
Diameter | Threads
Per Inch | | Basic Decimal Size | Nearest
Fractional
Equivelant | Average
Decimal
Size | Nearest
Fractional
Equivelant | | 8 | .332 | .164 | 5/32 | .112 | 7/64 | 15.00 |
So, we have the details on the screw size. Now, here's the chart for drilling the hole for said screw: | Nominal Screw Size | Nominal Shank Diameter
(in) | Actual Shank Diameter
(in) | Twist Drill Size |
|---|
| Pilot Holes | Shank Clearance Holes | 80o Countersink Diameter |
|---|
| Hard Wood | Soft Wood |
|---|
| Inch | No. | Inches | No. | Inch | No. | Actual Head Diameter
(in) | Diameter
(in) |
|---|
| # 8 | 0.164 | 0.168 | 7/64 | 35 | 5/64 | 48 | 11/64 | 18 | 0.332 | 3/8 |
So, looking at the charts, you'll notice that there's a difference in pilot hole sizes based on drilling into hard or soft wood. When drilling into hard wood, like your maple\walnut neck, you drill to the a very thin hair less than the ROOT diameter. To be precise, our #8 screw has a design root diameter of .112" according to the top chart. A #35 Index Bit measures .1100. The difference being .002. When drilling into softwood you subtract quite a bit more. Again, to be precise, take our .112 root diameter, and the recommended #48 drill bit, which is .0760. This is .036 smaller than the root diameter. As you found out, repeatedly inserting and removing the screws opens this hole to the point where you have less purchase for the screw to grab, and since wood screws are a low torque fastener, it doesn't take super human strength for the screw to go deeper, or in your case, for a larger screw to split or displace the wood at a weak point if the pilot screw is too small. And the tip about using beeswax, or even scraping the screw on some bar soap, prior to inserting is gospel on hardwood. I typically jump to a #9 or #10 screw, but everyone has their own ideas on this practice. Mine is typically to over engineer the Hell out of it. If you look around the Internet, you'll soon discover there really is no hard and fast set of rules for determining screw sizes in wood. The machine screw inserts, which are detailed in the Sonosammy post, are far superior to wood screws, if you can use them. Engineering lesson over. For 30 euros you're exactly right, that's a steal. I'd charge you more than that. You might want to call him and ask him to redrill the other holes out to a larger size as long as he's got it in the drill press. He was probably pointing out that the screws originally went in cross grain into the maple, while they will be going into the end grain of the dowel, unless he turns his own dowels...which I doubt he's gonna do for 30 euros. He mentioned this as the end grain is weaker than the cross grain...and he's seen what you've done screwing into the cross grain maple... Might want to leave the Ironman suit in the closet when working on the guitar... Any wood, maple, oak, rosewood...you name it, will always have inconsistencies across its length and breadth because it is an organic material. Bone nuts suffer the same inconsistencies, which is why I always use TUSQ nuts...but that's another post entirely. I think your main problem was the location of the bridge side screw holes. You have very little meat between the screw hole and the end of the neck heel. Couple that with mismatched screws, larger screws inserted with no proper pilot hole drilled and it was just an accident waiting to happen. It could have been much worse. So, today's lesson is that nothing is as simple as it looks. Guitars are amazingly complex devices the closer you look at them and the slightest deviation can cause bad things to happen. All in all, this guitar has turned out to be a good learning experience. Keep going like this and you can open your own shop. Happy Trails Cynical One |
|
Deleted
Deleted Member
Posts: 0
Likes:
|
Post by Deleted on Sept 16, 2015 14:44:06 GMT -5
thanx for the detailed description on the screws. i've read all that a bazilion times over the net, but now it is all clear. the screws you refer too are about 4mm external and 3mm internal diameter. mine were about 1mm larger.
the guy said he makes his own dowels. he also said that inserts ..... weaken the sound..... well i didnt argue .... the guy is a strat purist, old with white long hair, i let it go.....
sorry for being laconian .... my laptop is at the tech as well, i am using a little evil device i cant write much.
|
|
|
|
Post by cynical1 on Sept 16, 2015 15:57:04 GMT -5
...the guy said he makes his own dowels. Well, that's impressive. If the guitar comes back in good shape you might want to take this guy to lunch... The whole point is to increase the surface area between the neck and neck pocket to allow a better transfer of string vibration. If inserts make this transfer more efficient I'd be hard pressed to argue against them. But, as with most things "guitar", opinions vary. Watch the "old with white long hair" crap... HTC1 |
|
Deleted
Deleted Member
Posts: 0
Likes:
|
Post by Deleted on Sept 17, 2015 1:56:09 GMT -5
About pluggin/re-drilling all the holes, I for got to mention, he told me, it would cost 100 EUR. So we made a deal with him to use this first assignment as a "test drive" and if this goes well, we can discuss further improvements.
About sustain, I firmly believe that two factors can do harm :
- loose construction by having elements that dump the movement of the string
- by having vibrations that work against the movement of the string
- ideally the "wood"/metal/bone/tusq/etc... components should be totally stable, allowing no vibrations in the media.
Inserts might help, maybe not, IMHO.
What he also told me, which I didn't buy at all, and again I did not argue, was that sustain is a matter of the .... screws, and that screws provide the media, between the woods, and not their contact. Again I believe that as long as the construction is robust and there are not harmonic vibrations of the media against the string, all are well.
PS
About "white long hair" : deal, consider it done!
|
|
|
|
Post by cynical1 on Sept 17, 2015 11:47:35 GMT -5
About pluggin/re-drilling all the holes, I for got to mention, he told me, it would cost 100 EUR. So we made a deal with him to use this first assignment as a "test drive" and if this goes well, we can discuss further improvements. Fair enough. Even so, re-plugging all the holes for 100 euros, especially if he turns his own dowels, is a steal. That pretty much sums it up. Anything that diminishes or "bleeds off" the energy of the sting will effect sustain. From my experience, the tightness of tolerances and quality of construction makes all the difference. I know I've flogged this video out before, but all Gary Moore uses is a '59 Les Paul and his fingers. The quality of the build and the strict attention to tolerances is what makes this guitar seem to ring forever. Again, anything that contributes to preserving the energy of the string vibration helps. The old guys with long white hair thank you. Happy Trails Cynical One |
|
Deleted
Deleted Member
Posts: 0
Likes:
|
Post by Deleted on Sept 18, 2015 2:56:27 GMT -5
Fair enough. Even so, re-plugging all the holes for 100 euros, especially if he turns his own dowels, is a steal. What would be the price in the US? For the moment he will only do the one screw hole in question. Then I am considering either selling it (and going for another 7-string) or ... keeping it. There is something that tells me to keep it, since it plays/feels so good, and that if I sell it, I will go through the same Golgotha with the next guitar. 7-strings in Athens/Greece are too few to try out. Sellers do not accept returns. Online, unfortunately is the only way. The only thing that tells me to sell it, is a stupid move I had done, while being consulted by the wrong forums (lets not name them), when I reached the conclusion that all are well with the guitar, and the only problem is a very long neck heel. That made me sand down some 1mm from the fretboard->middle of the neck, in order to solve the slanted pickup problem, which I found aesthetically disgusting. And the question is : was this removal of 0mm->1mm from the mid->fretboard of the end of the heel detrimental to the necks robustness and strength? Maybe the problem with the guitar was very simple to solve, and I made a whole drama out of it. So, Cyn1, this is a hard one, : a) Did I harm the heel's end strength by sanding this 0mm->1mm b) can I glue back some sort of wood to the end of the heel to make up for this lost 1mm and make it stronger? Or am I talking BS? |
|
|
|
Post by cynical1 on Sept 18, 2015 3:59:22 GMT -5
Just to use a standard end grain dowel here would run you between $30.00-75.00 a hole. Not many people turn their own dowel anymore, as most of the shops with a lathe are long gone. If they jobbed it out you'd probably be looking at a minimum of $10.00 a dowel. Normally I marked up jobbed work at 10%, but that varies from shop to shop. So, a good ball park for the whole job would run you between $165.00 to $350.00. I've been out of it for a few years, but there are still pirates afloat in these waters. While the guy you found may be opinionated, he appears to be honest and competent. Well, those are the two most common options...  No. Sure. I can't think of a good reason to do so. Anything past the last fret is cosmetic. You? Perish the thought. If that's the worst thing you ever did to this guitar we'd have nothing to talk about. Look, if it comes back, plays as good or better than it did before you took it in, put your tools away and just play it. Don't make me trot out another worn out "old guy with long grey hair" cliche here. You can obsessively seek out perfection, but I'm here to tell you that it just doesn't exist. You've said before you liked the feel of the instrument and the way it played. Go with that, because that's the best standard there is. Happy Trails Cynical One |
|
Deleted
Deleted Member
Posts: 0
Likes:
|
Post by Deleted on Sept 18, 2015 5:54:22 GMT -5
No. Sure. I can't think of a good reason to do so. Anything past the last fret is cosmetic. I understand, I might be splitting thin hair here, but anyway.... Hmmm, maybe this is not so innocent as it seems. In order to keep a good intonation, and still have the saddles look like that (this is how I want it to be and think this is optimal - right-side hole only used for low B): 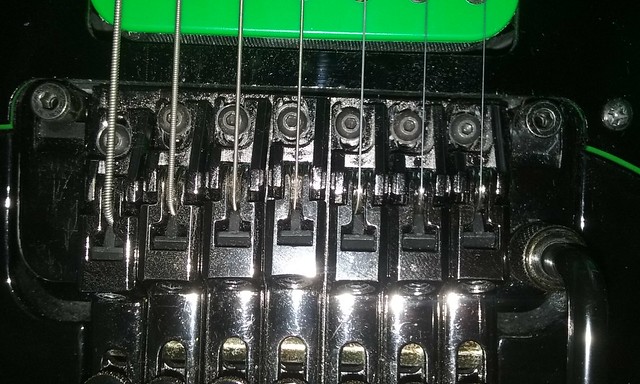 in contrast to that (all saddles moved to the right) : 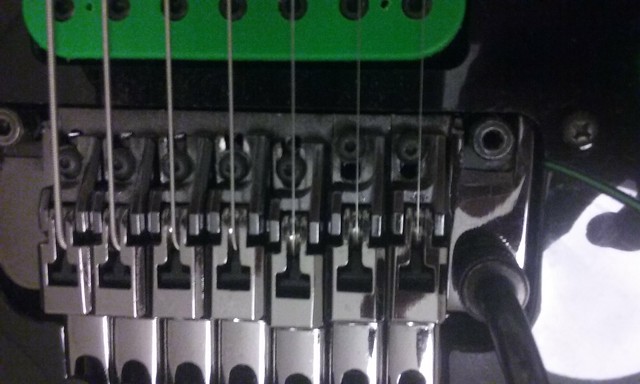 *** read further as to why I have to at least, MARGINALLY, keep the neck heel screw holes exactly where they are. Just 1mm to the left to gain more purchase on the wood would move the whole system (including the saddles) to the right, in order to keep good intonation. So I am on a dead lock : - If I move the neck heel screws ideally 0.5mm to the right, to have perfect intonation without changing anything on the saddles, the stability in the heel screws is heavily compromised due to lack of wood, a result of my stupidity to sand the heel's end - If I move the neck heel screws some 1mm to the left (as you commented roughly in a previous post) to gain maximal purchase and stability, as the offset between the heel screw hole and the heel's end would be now large enough, then I would adjust the saddles to look like the 2nd photo, and this is bad as is explained in *** *** Why is the 2nd photo bad? Because it increases the chance of tuning instability, since the movement of the strings on their contact to the saddle will be greater in the second photo, than in 1st photo, by the pivot movement around the trem's knife edges. This means that tuning for sensitive strings like the G or low E,B will be less stable than if the saddles were closer to the neck-side. A slight damage to the knife edge would be more pronounced in the 2nd photo than in the 1st. PS Man, what were you doing at this time? Usually your messages come up when here is evening/night. I am at +3 Time zone in the east. You are some 6-8 hours West! |
|
|
|
Post by cynical1 on Sept 19, 2015 21:37:29 GMT -5
Let me see if I understand things here. Are you talking about walking the neck left or right in the neck pocket? When you say you're moving them 1 mm or .5 mm, are you using a shim, or just SWAGGING it as you tighten the screws?
I thought you mentioned taking the 1 mm off the end of the fingerboard past the last fret. From what you're saying, if I read it right, is moving the neck left or right in the pocket. Am I close, or just lost again? Help a brother out here...
And I was just up late. Happens some nights.
HTC1
|
|
Deleted
Deleted Member
Posts: 0
Likes:
|
Post by Deleted on Sept 20, 2015 0:28:51 GMT -5
Hello Cyn1! Let me see if I understand things here. Are you talking about walking the neck left or right in the neck pocket? When you say you're moving them 1 mm or .5 mm, are you using a shim, or just SWAGGING it as you tighten the screws? Well, I am talking about leaving the neck where it is, or to be more precise, about the fear of having the tech letting it move it to the right. There can be no shim, since there is no heel pocket in the strat-sense, the neck can move all the way into the control cavity freely. So my aim here is to stabilize the neck, by moving ONLY the headstock-side screws holes (left screws) by just a tiny 0.x mm to the right, thus eliminating any tolerances that the body holes might have while screwed all the way, so that it "locks" between the screws and the body holes. I thought you mentioned taking the 1 mm off the end of the fingerboard past the last fret. From what you're saying, if I read it right, is moving the neck left or right in the pocket. Am I close, or just lost again? Help a brother out here... Yes I did take off 1mm at the end, from the center to the fingerboard, and IMHO this now further dictates that I could not move the neck to left by just a tiny bit as I would like to ideally (in order for the intonation to be 100% perfect, while keeping saddles untouched). (That's why I say I want to keep it where it is exactly - in the 1st paragraph above : the enemy of the good is the better right!) When fully seated if I pull up the trem all the way, I hear this krkr and it moves by some 0.x mm to the right. I want to eliminate this. Moving the neck any further to the right will be detrimental for the bridge saddles position, If I want to keep some good intonation, I should move the saddles to the right as well. And I was just up late. Happens some nights. I had this for years, till I decided it is getting chronic. When I stopped dealing or thinking about it, it stopped  Basically rest is the answer! |
|
|
|
Post by cynical1 on Sept 20, 2015 1:16:08 GMT -5
If the tech is worth his salt, he'll center the neck, verify the scale, check the intonation and all should be right with the world. Or, he'll tell you what he found and ask you what you want to do to fix it...as in how much more do you want to invest in it. This guitar, IMHO, is suffering two fates. The first is a lack QC at Ibanez, coupled with what appears to be a poor design; the second being several well intentioned attempts to correct the first fate. Correcting the design\QC flaws, as I recall, (and correct me if I got it wrong) was something the vendor, or Ibanez (don't remember the specifics) tried, but never quite got right. When you first posted the problems you were having I remember thinking it was time to drop this thing like a bad habit. I reserved judgement, as you seemed to have a love\hate thing going and seemed on the fence about what to do. Now, after several ambitious attempts to make things right we arrive at where we are today. The one thing I always found to your credit is that you're never afraid to experiment. You always get there, regardless of the pain and suffering involved. This is how people learn. And you have learned things along the way. Without getting into the bloody specifics, you did fix your locking nut issue and learned more than you wanted to along the way. With this guitar you've reached a point where your tools and knowledge are stretched to their limit. To your credit, you took it to a professional. Now it's time to take a step back and be honest with yourself about this guitar. It's like going to school for psychotherapy. No matter how much you learn, it doesn't work when you try it on yourself. Not that you're crazy...it was just an analogy... By this, I mean it's time to take yourself out of the equation. When you pick up the guitar, ask the tech. You may not have to, as if he's been around he'll see what's right and what's wrong. Ask him about what you believe to be wrong...and listen to him. I'm certain he'll do whatever you ask, but only you can answer the question of whether it's worth it. It's the whole "point of diminishing returns" thing. I'm not trying to bail on you, but where you are now takes the ability to put hands on it. We can float ideas and theories forever, but sooner or later you have to fish or cut bait. Every guitar or bass has its own unique feel. From that feel you will find you play it differently. You know this. If the instrument is always an object seeming to need "just one more tweak", the odds are you'll never be happy with it, as it will never be what you want. At that point the decision should be easy what to do. Before we float anymore theories, let's see what you get back. Sound fair? Happy Trails Cynical One PS: A wise man once said "I'll get all the sleep I need when I'm dead". Just testing the theory... |
|
Deleted
Deleted Member
Posts: 0
Likes:
|
Post by Deleted on Sept 20, 2015 1:41:27 GMT -5
fair enough again! I am mentioning the tuning stability, cause the tech might very well never had any such instrument with such a sensitive floating trem, hence he cannot imagine the possible side-effects. Ok, I know I am splitting thin hair here, but I can't help but looking for the better. About the inherent design problem of this specific Ibanez. For sure it is a delicate design which leaves much room for errors. But there are players with Ibanez 9 strings like this one : www.ibanez.co.jp/products/eg_page15.php?year=2015&area_id=3&cat_id=1&series_id=1&data_id=129&color=CL01 , with the exact same design with no problems. So I guess the implementation at the Indonesian factory was very wrong, and not so much the initial design. Most people praise the Ibanez prestige lile (Made in Japan) and bash the premium like (made in Indonesia). Most probably mine falls in the general category of guitars of indonesian origin and all the problems they have at the factory. But granted, it is Ibanez's problem, not specifically of the Indonesian plant. I have another guitar from Indonesia and it is great. Anyway, I will wait to get the guitar in my hands, and inspect the work of the tech. If this is good and the guitar is stable, then I will send it for the rest of 3 holes fix/re-drill, provided that he has understood my speculation about increasing stability and preventing this extra shifting to the right while pulling up all the way. |
|
|
|
Post by cynical1 on Sept 20, 2015 11:13:12 GMT -5
The guitar in the link has several significant differences from your guitar. First off, it's a hard tail. Secondly, they didn't employ the Ibanez habit of wedging the neck pickup right against the heel of the neck. They did still use only 4 screws on a 9 string guitar. I keep coming back to this, as I personally feel this is a poor design. In your case, the one additional string, and in the case of your linked guitar they're putting three additional strings on the guitar, which introduces significant stress on the neck attachment, and adding nothing to the point of attachment to strengthen it. They sure understood this in 1995 when they built the ATK305 bass and designed 5 screws at the neck pocket. Ibanez isn't the only one doing this, so I'm not trying to vilify them for this practice. However, I can't help but wonder what they're thinking using a basswood body, employing 7 strings with a tremolo capable of multiplying these additional stresses, as every lever** does...and only using 4 #8 screws to do it. I've got two Ibanez Mikro instruments, one bass and one guitar, both from China. Granted, the fret work was the worst I'd ever seen and the electronics and hardware were horrible, but after addressing these issues the shell of the guitar and bass proved to be quite a good platform for the upgrades. If ASmith ever comes back, he can testify to the tone and playability out of the Mikro bass. In your case, the shell seems to be the problem. Again, I'd like to think yours was the guitar that slipped through QC early Monday morning or late Friday afternoon... Give the guy a chance. You might want to consider asking for an additional screw. Sure, there's the cosmetic issue to address on the body, but if you're working the tremolo\LEVER** hard the need for additional stability at the neck pocket becomes even more critical. I've got my fingers crossed for you. And if it doesn't come back as you'd like, you've already said that the scarcity of 7 string instruments in Greece will help keep the price up so at least you get your money back out of it. Happy Trails Cynical One ** A lever is a simple machine that allows you to gain a mechanical advantage in moving an object or in applying a force to an object. It is considered a "pure" simple machine because friction is not a factor to overcome, as in other simple machines.
A lever consists of a fulcrum, applied force and load. There are three common types or classes of levers, depending on where the fulcrum and applied force is located. The mechanical advantage is that you can move a heavy object using less force than the weight of the object, you can propel an object faster by applying a force at a slower speed, or you can move an object further than the distance you apply to the lever. |
|
Deleted
Deleted Member
Posts: 0
Likes:
|
Post by Deleted on Sept 25, 2015 15:51:35 GMT -5
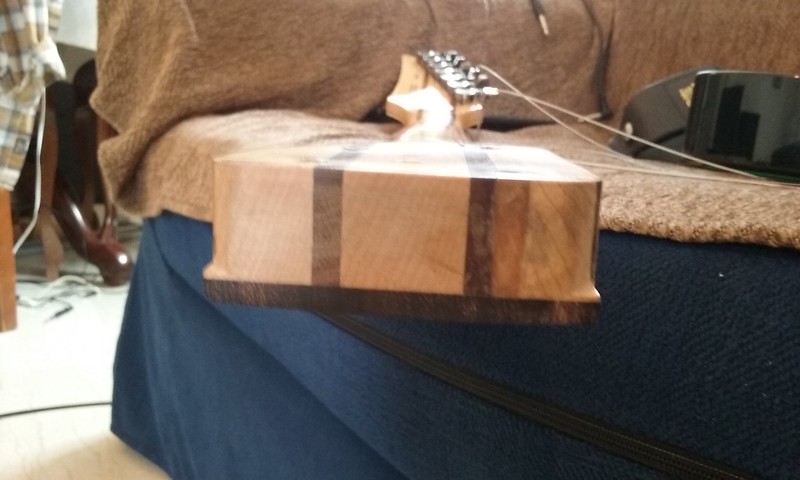
back from the tech! Well, he did a fine job, the new piece was glued so well, and the new ROSEWOOD dowel which he cut with his hands!! very very hard and tight! Now next step he told me, what would be best is to plug the body holes, since they allow too much movement. And I could leave the rest of 3 neck holes as is. Or do all in once : body dowels (maple) + neck plugs (rosewood). All for some 100 EUR..... seems like the next mod what's so good about it, is that I DONT SWEAT AT ALL!! it feels SO nice having someone else doing the job, after ALL THOSE years of pain and agony.... Now the guy seems pretty cool! He has lived in Holland/Sweden and 10 yrs in Poland (!!!) not the average greek guy for sure! I think he knows what he is talking about, he talks a lot, shows a lot, shows all his equipment. I think I'll just stick to what he does, and maybe just add my personal touch to it..... Freaking irony, his workshop is 1k meters from my house, If I knew that, all the drama with the Ibanez for a full year now would not happen at all..... I'll shoot some pics tomorrow for the Boss (Cyn1) to approve ! Its been a very long day, good night to all! |
|
|
|
Post by cynical1 on Sept 25, 2015 20:29:47 GMT -5
Glad it all ended well. The idea of plugging and re-drilling the lot is a good one. For 100 Euros it's not out of the realm of possibility, and if it gives you a solid guitar you can play...versus play with...it's money well spent.
These days, if you can find a tech that knows his stuff and doesn't try to re-finance the National Debt on your dime, keep him.
I'll be looking for the pictures.
Happy Trails
Cynical One
|
|
Deleted
Deleted Member
Posts: 0
Likes:
|
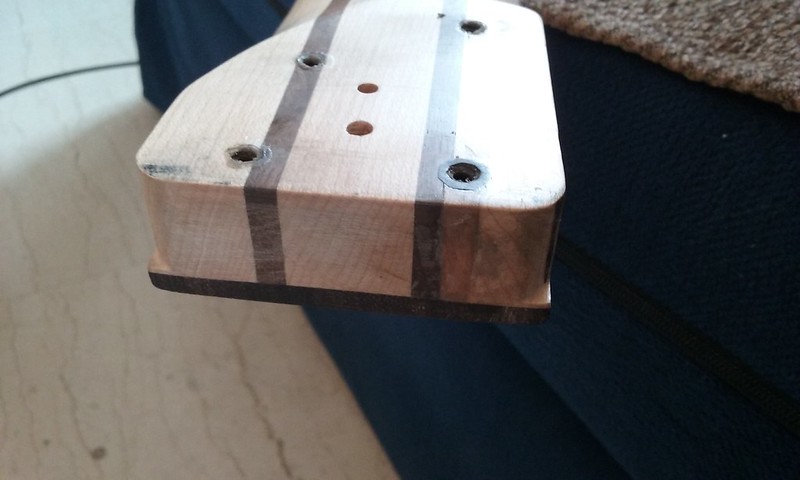
Post by Deleted on Sept 26, 2015 11:04:02 GMT -5
|
|
|
|
Post by cynical1 on Sept 26, 2015 11:24:51 GMT -5
the fix  Yep, that's the way I'd have done it. You mentioned rosewood in an earlier post for the plug. That's some hard stuff, but probably more available than maple over there. That's even more impressive, as rosewood is some very hard stuff. If he does those by hand for 30 Euros I think you found your tech. I've done a few fretless bass conversions on maple necks using crosscut rosewood strips. That stuff is tough to work, needs to be wiped with acetone prior to applying the glue and has a tight fine grain and should last you the rest of the guitar's life. If you do manage to strip that one out, you might want to consider a career leaping tall buildings in a single bound... So, did the neck line up right? How does it play now? Any noticeable differences? Happy Trails Cynical One |
|
Deleted
Deleted Member
Posts: 0
Likes:
|
Post by Deleted on Sept 26, 2015 15:29:20 GMT -5
Yes, I did some screwing unscrewing, till I centred it 100% (bass side offset = treble side offset), and I tightened it like the tech instructed me. When I tested with pulling up the trem arm all the way, there was no movement of the neck right-wards. It feels good. I changed strings as well, sound seems improved. In some variations I got those lousy 3 secs sustain on 24th fret, but I always had those nice 5 secs occasions. Now as is, I think I get guaranteed 4 secs, on the 24th fret, which is IMO superb. Yes I found my tech. That is for sure!
Cyn1, the guy told me and did exactly what you had suggested. I don't know why he switched from maple to rosewood. Rosewood here is plenty but our rose trees are small. I never heard of local rosewood used in lutherie, I gotta check this out. A variation of maple-like exists (beech) in huge amounts and very cheap. Most of decent but very cheap Buzukis are made of beech. I will ask the tech, he likes to talk !
|
|
|
|
Post by strat80hm on Sept 28, 2015 0:46:46 GMT -5
Cool fix - and all-wood, nice!
|
|
Deleted
Deleted Member
Posts: 0
Likes:
|
Post by Deleted on Jul 10, 2016 15:17:54 GMT -5
The curse of greek dude goes on. The fix proved a scum : 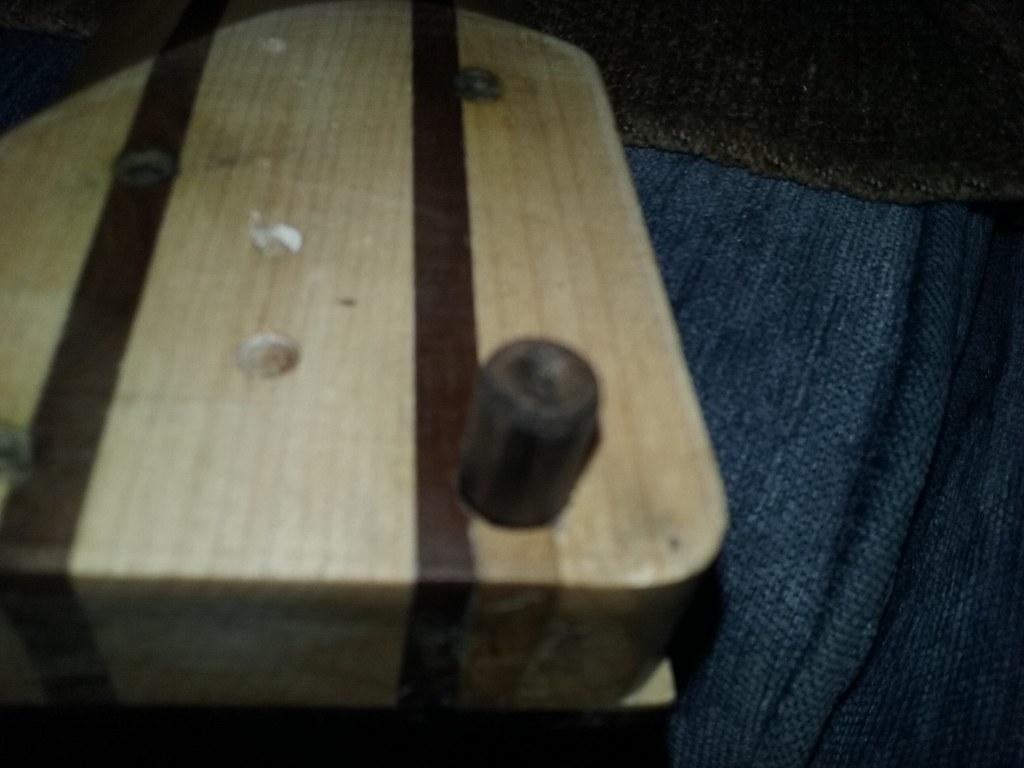 As you can see HARDLY any glue in there. How I figured it out. I started noticing that the neck had taken an angle towards the lower bout. It just wasn't centered as it was supposed to be. After the sandpaper shim mod, it was supposed to never ever ever again move. Alas, it did. I tried to see if I can move it by hand, and ....I could. Bad sing. Then I tried to fasten the screws. The 3 half-assed done by me screws were fine. But the 4th screw, the super duper rosewood dowel put by my super hero tech .... started to creek creek .... I thought the guitar delivered its soul to the ancient place of Valhala (or whatever the equivalent), but I was (luckily??) wrong. The dowel would turn in place, "unscrewing" it self from its hole/bushing. I removed the dowel. It is some 8.15-8.2m top ->7.9+ mm bottom. I am thinking of redoing this with birch dowel of 10mm cut into 8.2->7.9mm shape. Then I will do the rest of the holes, cause they stand still with the .... sawdust fix. WITHOUT A TECH. My family is away for the summer. Without wife/kids in the greek summer, a man needs to keep himself busy, to keep away the sirens of evil. (if you know what I am saying). It seems this is a fix meant to be done by me. Cyn1... tune in pls!!! There is work to be done! PS I cannot sell the guitar in Greece. Maybe I would if I could. I am tired of fixing this every 6 months. |
|
|
|
Post by cynical1 on Jul 11, 2016 12:58:30 GMT -5
The curse of greek dude goes on. I have to admit, you and this guitar do seem to have a dark cloud following you... OK, correct me if I mis-remember anything here, but this is the infamous Ibenez 7 string, AKA "Bane of Your Existence" guitar, right? From the picture, and what you describe, it looks like the dowel just came unglued. If there isn't much glue in the hole and on the dowel your easiest fix is to just clean the dried glue up and re-glue the dowel. The tech used rosewood for the fix, right? Rosewood, by nature, is an oily wood. Gluing it can be problematic, as the natural oils tend to weaken with the glue bond, especially if the piece was recently sanded or worked and the heat produced by said working started the oils flowing again. Taking a rag and some acetone and wiping the piece prior to gluing reduces the risk of the bond letting go...as is what appears to have happened here. European birch can be as hard as maple, and I doubt Ibanez used Grade AAA hard maple in their neck anyway, so a birch dowel is not a bad option. However, since the original rosewood piece is there, a good cleanup of the dowel and the hole may be all you need to do to re-glue it back in place. [rant] Adhesives. If it's wood, use a premium wood glue. Super Glue, Crazy Glue, or whatever you want to call cyanoacrylate adhesives, do not work as well as Tite-Bond II or III (Cross-linking PVA and Proprietary Polymer respectively) on wood...especially in a high stress bond. Prove this to yourself. Take four pieces of identical wood from the same board. Glue two together with cyanoacrylate and two together with a Tite-Bond type glue so there's an offset and one of the pieces can be clamped into a vice. Let them dry overnight. Now, clamp them in in the vice and hit them with a big hammer. Cyanoacrylate will always break on the glue joint and the wood glue will always break on one side or the other from the bond. The Tite-Bond glue joint is stronger than the wood. [/rant] Just because I'm that kind of guy, I'm going to go back to the best fix for this guitar. Threaded inserts. I know, here we go again... Here's my reasons for going this way. You have a 7 string guitar with only 4 screws holding the neck to the body with an open neck pocket. Add to this the additional force the Floyd Rose puts on the neck and you have a guaranteed point of failure...and I don't have to go into any detail on that point as you already know this first hand. Ibanez is famous for thin fast necks, I'm guessing yours is no exception, so you wind up with a thinner neck heel. My wife's Ibanez neck heel is a hair over 3mm thinner than the Tele heel on my Blue Murder guitar. The fact appears to be that this neck\body joint design is not strong enough to withstand the forces applied to it with only 4 conventional wood screws. Do you have a friend with a drill press? Happy Trails Cynical One |
|
Deleted
Deleted Member
Posts: 0
Likes:
|
Post by Deleted on Jul 11, 2016 13:35:00 GMT -5
Hey, just in time before I started to worry Yes it is this 7-string guitar. About the dowels, looked again and it writes "Beech", which is from the same box that I used to fix the Carvin's nut. I think it went good, so beech will be the next dowels. In case I ever sell it, it will look better with the beech than the rosewood. I could not think rosewood would be so oily. Truth be told the temperatures (in the house) were well over 30 Deg Celcius, for well over a month now. About CyA, I am 100% with you. Tell this to Dan Erlewine who uses super glue in every vid doing dowel repair. CyA sucks for wood, no elasticity, very brittle. I am using this one for a very long time (since the Carvin, or even before) : Bison super wood glue : www.bison.net/en/products/651-wood-glues/product/2217-super-wood-glue/ . Made many repairs with this, even chairs in very weak spots, and this is stronger than wood indeed. When I had to break a joint it broke on the wood not the glue. About threaded inserts, I would do it if I had the space. The margins are not adequate on this one. I had done many measurements in the past, even bought the inserts, but decided that it might kill the neck, and I hesitated to go that route. Besides, after the rosewood dowel (and a little before), the guitar started to sustain really good. So I know good sound is already there. Also, while the rosewood held, for some months now, the stability was also very good. The neck did not move at all, no tuning problems, no creeks, and wreeeks while full trem pull ups. About drill press, if you recall, you had convinced me to buy one back in the Carvin days. |
|


 , and we continue from the point of removing as little material, making a square groove and gluing a nice square piece back.


 Basically rest is the answer!