|
|
Post by newey on Mar 2, 2010 0:24:57 GMT -5
I just got the body for my stereo Tele project back from Jim Jaeger at Roxy Guitar Finishes- very nicely done! This is the mock-up, nothing is mounted yet. I have to fab the control plate as well. But this gives an idea of what it will look like, although my lousy pix don't do the finish justice. 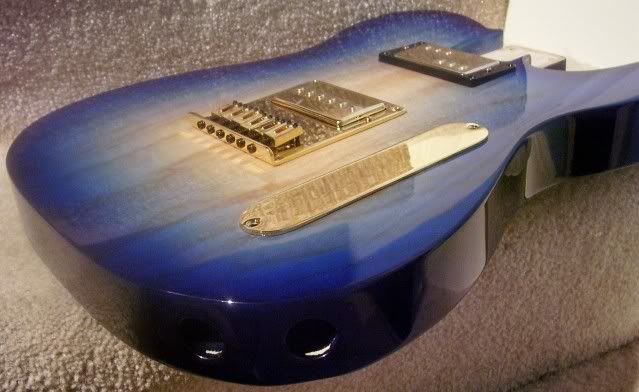 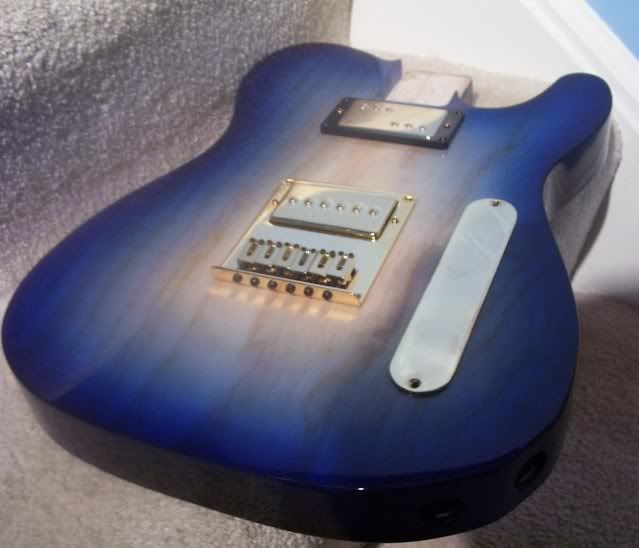 The neck HB is getting a gold HB ring, so the black ring will be gone. The body is a 1-piece Swamp Ash from Best Guitar Parts, and Jim took it from there for the finishing. I think it'll build out real sweet. Choice of neck is still under debate between my ears.  The pups are both GFS, Tele Custom at the neck, and Dream 90 at the bridge. You can sort-of see that it's drilled for dual jacks. This starts the build thread for this project, then. |
|
|
|
Post by lpf3 on Mar 2, 2010 1:12:04 GMT -5
That's a beaut newey- What?  2 pickups? Ya gonna have enough wire & everything?  ;D I don't know if you have any other Dream 90- equipped guitars but FWIW I have one & love it .......... Keep us posted, looks great so far. -lpf3 |
|
|
|
Post by D2o on Mar 2, 2010 9:42:58 GMT -5
From what you've done so far, I've a feeling this is going to be something special*.
Very nice!
D20
* and I don't mean that KIIMH brand of special
|
|
|
|
Post by necksnapper on Mar 2, 2010 18:46:30 GMT -5
I don't speak up very often, but you have my attention, sir. I'm already diggin this.
|
|
|
|
Post by ijustwannastrat on Mar 2, 2010 20:56:39 GMT -5
I would say no tint quilt maple neck. Tele style, of course!
I must say, Jim does amazing work. I may have to look at best guitar parts if I decide to make a tele ever. Are they alot cheaper than warmoth?
|
|
|
|
Post by newey on Mar 2, 2010 21:34:53 GMT -5
Cheaper, yes. What constitutes "a lot" depends on one's wallet. They are giving a discount to our members, too,- look in the Hock Shop section.
As far as Warmoth, I have only ordered a pickguard from them, and I had no complaints, the service and product were good. However, read ChrisK's Warmoth rant, which is stickied at the top of the Coffee Shop.
Question for lpf3- Did you shield those Dream 90s? I'm not going to shield the neck HB, since it's a HB and since the neck rout is so small it'd be like wrapping the pup. But I'm wondering about the 90. I can certainly shield the bridge cavity, overlapping the foil under the bridge plate. My inclination is to shield that and the control cavity.
And I don't see any reason why the bridge ground wire can't do double duty and be used to connect the shielded areas.
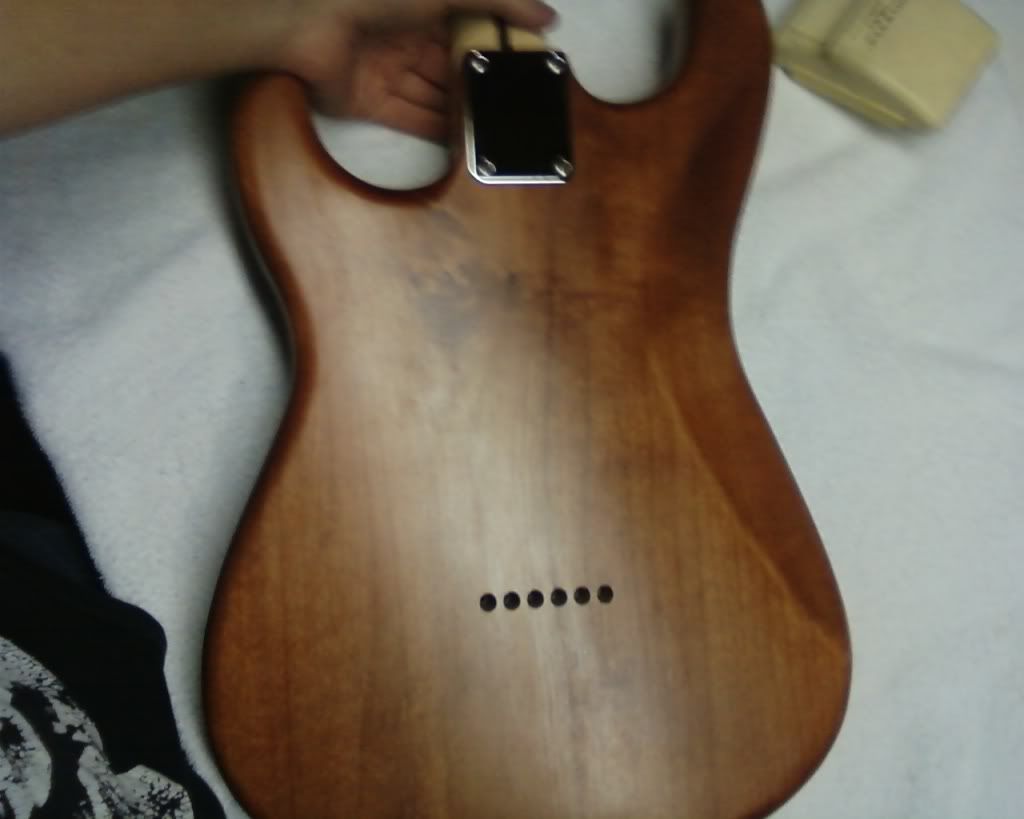
I did take a drill to the body tonight and mounted the strap buttons. (Off to a roaring start, I know!). But, unlike many nutz, I always mount strap buttons first, so that the buttons become the high points for the heel and upper bout. Just in case I drop the thing, better to damage the buttons.
|
|
|
|
Post by ashcatlt on Mar 2, 2010 22:45:29 GMT -5
Aren't those actually metal covers on the pickups? Are they actually just shiny plastic? Does that metal go all the way around like the PAF types, or is it open in the back like a Tele neck pickup? Is there a shield braid or bare wire coming from the pickups, and does this make contact with the metal covers?
I think those pickups are already shielded.
|
|
|
|
Post by newey on Mar 2, 2010 23:26:43 GMT -5
Probably so, the covers are metal and they have a bare shield wire. Maybe I'll forgo that and see how it sounds.
|
|
|
|
Post by lpf3 on Mar 2, 2010 23:43:09 GMT -5
newey-
I did shield the Dream 90's cavity, but to be honest I had it shielded from back when I had a Vintage '59 in there (GFS).
I agree, especially if you've got good contact between the pup cavity & the bridge plate. You could always add a separate ground wire later if need be.
My best description of the Dream 90 would be fuller than a SC but clearer than a Humbucker. Kind of a generic description, I know, but I think you'll be really pleased with it.
Are you planning any S/P or split coil switching with the HB?
-lpf3
|
|
|
|
Post by newey on Mar 3, 2010 6:29:48 GMT -5
Not with the HB itself. In mono mode, it'll use a rotary switch to select N/ N+B/N+B OOP/ Br. But I have yet to find a suitable rotary with 4 positions. I may end up with a 5-position one, in which case I'll add series. In stereo mode, the Bridge pup goes to channel B, Neck to channel A, (which is also the mono out). The wiring thread is here. The design went through several iterations , and originally I was thinking of using 2 HBs, but I changed my mind and went with the 90 at the bridge. So the diagram has to be reworked a bit for the 90. |
|
|
|
Post by newey on Mar 6, 2010 0:32:02 GMT -5
I failed to notice that the bridge plate I bought didn't come with screws! So, pending receipt of same, the bridge is just sitting there. But the neck pup is mounted, with the matching HB ring. 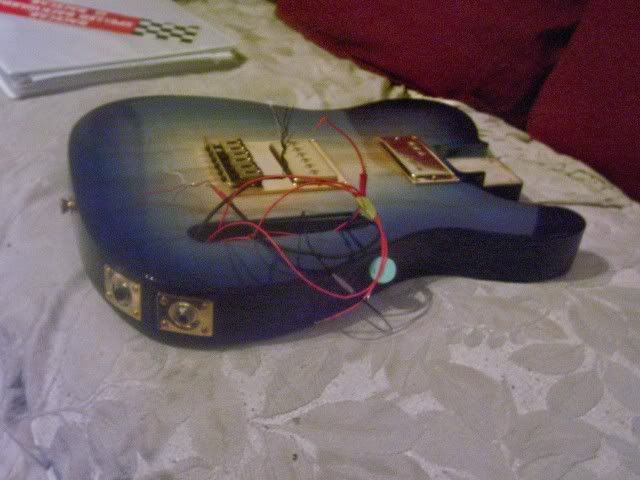 I also got the stereo jacks mounted and wired. Kinda bass-akwards to start at the jacks, but there's a lot going on in there on this project. So I left long leads to work with, and they're ready to go. Made sure to label the wires, "switched" vs. "unswitched". 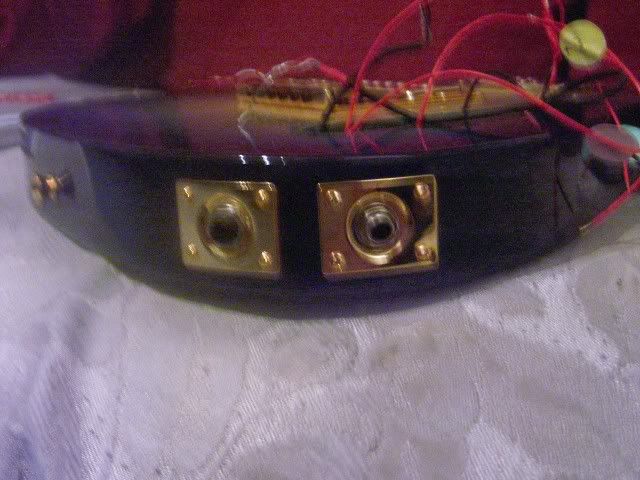 Once again, lousy flash pix. I need a Nikon! |
|
|
|
Post by Double Yoi on Mar 6, 2010 7:42:25 GMT -5
That thing is purdy!
|
|
|
|
Post by JaegerGuitarFinish on Mar 7, 2010 1:21:15 GMT -5
Newey it was a pleasure working with you on this project. I really liked the way the finish came out. Not many people do blue burst like that. It was a great break from the normal vintage bursts that I do all the time. I really wanted to post pictures of this guitar but I didn't want newey to see it before he got to open the box for the first time.
As far as the price difference between warmoth and best guitar parts. Warmoth has some great deals that you can find. Best guitar parts is fairly new company. But the owner of best guitar parts used to work at warmoth and he created a lot of stuff for them. So he knows his stuff and can build great custom guitars. He also has some amazing wood to choose from. Like newey's guitar was an amazing 1 piece ash body. Even an average paint job would have looked good on that. If your looking for a guitar check them out. Their website isn't as fancy as warmoth's but they do great work. Check out the hock shop and see what the discount is!!! Nothing like getting some money off of a project. If anybody has any questions feel free to get in contact with me.
|
|
|
|
Post by newey on Mar 7, 2010 9:22:33 GMT -5
Thanks again, Jim. It was great working with you, and with the guys at BGP.
BGP did the stereo jack routing for me on this. I was expecting just a second hole, and was expecting that I might have to do some extra wood removal once I got the body to be able to instal the stero jack, since I'm using a switched jack which is quite large compared to a regular jack.
But BGP had not only routed a second jack hole, they also routed a sort of "atrium" connecting it to the original jack hole. Everything slid right in, no extra work needed!
And Jim and I had quite a long string of emails and PMs back and forth, as he zeroed in on what I wanted.
I, too, get tired of the standard guitar finishes, and wanted something different- and I got it! There are so many nice guitars on the market that seem to be sold on the "Model T Principle"- you can have any color you want, as long as it's black!
Can't tell you the number of times I've looked at a guitar, thinking "nice, but I'd have to refinish it . . . "
|
|
strattones
Rookie Solder Flinger

Posts: 15 
Likes: 0
|
Post by strattones on Mar 30, 2010 21:24:31 GMT -5
That's a beautiful guitar. I'd love to see pics of it once you get it finished.
|
|
|
|
Post by newey on Apr 10, 2010 13:48:50 GMT -5
Well, I got the control plate drilled for the 3 pots + rotary switch. Hopefully, it will look all right, one of my holes is just a hair off as my centerpunch slid a tiny bit. I don't think it's enough to be noticeable. But I have encountered my first problem. A std. Tele control cavity is supposed to be 1" wide, meaning a 24mm diameter pot should just fit- but mine is a shade narrower (probably due to the finish)- and both my rotary switch and dual-gang tone pot are 24" diameter. I ordered 17mm pots for the individual volume controls, so should be no problem there. So the search starts for a 3P4T rotary switch that is less than 24mm wide, and likewise for a dual-gang pot. No luck at Mouser on the dual-gang pot, still searching . . . Things were going swimmingly up until this!  |
|
|
|
Post by sumgai on Apr 11, 2010 3:28:10 GMT -5
So, since no one is likely to be "looking under the hood", i.e. taking the control plate off to look at the goodies (except you, of course), then just "rub away" the offending finish on the sides of the control cavity. The plate is (supposed to be) a quarter inch wider than the cavity, so I don't perceive that there'll be a problem with this "corrective procedure".
HTH
sumgai
|
|
|
|
Post by newey on Apr 11, 2010 8:07:52 GMT -5
Yeah, I thought of that, but I'm reluctant to do it. I'm afraid I'll slip and screw up the finish. Also, I'll need a few mm of "slop" on either side, unless my holes were dead on, or the plate won't sit straight on the body.
I found a 17mm dual-gang pot at Small Bear Electronics; I was planning on using 500K pots all around, but after all, this is one HB and one SC, so 500K volume pots with 250K tone pots sounds like a decent compromise.
As far as the rotary switch, rather than modify the cavity, I'll try to modify the switch- the decks stick out a couple of mm beyond the contacts on either side, so I figure I can try to file/sand/shave the edges of the decks a bit and get it to fit.
If that doesn't work, then I've got an issue- all the smaller rotaries I've found are the Greyhill mil-spec sealed ones- and there's no 3P4T ones, so I'd end up with unused poles at about a $30 price tag!
The other alternative would be to rethink the design. I could use a p/p on one of the volume pots for the phasing, and move to a 3T rotary, for which there are more selections.
|
|
|
|
Post by cynical1 on Apr 11, 2010 10:24:02 GMT -5
I would have to defer to SG on this one. Making a little more elbow room keeps the project as designed... If you don't have a Dremel tool, then the $30.00 (plus freight) you'd spend on the compromise switch will buy you one. Working on a guitar with power tools can be intimidating...especially of you've had bad experiences in the past This may get a bit involved, like I've never done that before...but stay with me… If your finish is over 30 days old it’s probably as tough as it’s going to get. This is a good thing. Trying to do something like this with an uncured finish tends to spell disaster. Jim is a professional, so you can rest assured that whatever he used is first rate stuff…this is good too. Before you grab any instruments, you need to prep the patient. First thing you do is grab all the cardboard backing you can find from the back of some legal pads. Next thing you do, if you don’t have any already, is grab some automotive green masking tape. Looks like this:  Don’t screw around with the $.99 roll…get the good stuff. Any automotive supply store will have this. 3/4" or 1" wide tape is sufficient. If you have a Dremel tool the first thing you need to get, if you don’t have one already is one of these:  A #565 Multipurpose Cutting Kit A #565 Multipurpose Cutting KitThis fits on Dremel tool models 400, 398, 395, 300, 285, 275, 200, 100, 800, 780. I don't have mine in front of me at the moment (it's in Chicago...and I'm not) but the base is about 2" to 2-1/2". This is important later. For bits, my thoughts run along these two lines:  A #502 3/8” 80 grit flap wheel A #502 3/8” 80 grit flap wheelOr a:  A #407 1/2" Sanding Drum A #407 1/2" Sanding DrumActually, just get both...they're cheap. Now that we have the tools and supplies, it's off to the dungeon for the actual surgery. As with most projects, the prep work takes 5-10 times the actual working time...but, if you don't take the time you're looking at the error of your impatience for years to come... First thing is to go all around the outside of your control cavity with the green tape. Lay down 2-3 layers of tape right at the edge of your control cavity. Feel free to fold the tape over in the areas where you’re not going to be sanding. Next, take the cardboard from the back of the legal pads and use them as a shield on top of the masking tape around the control cavity. Feel free to let them extend over the control cavity in the areas where you’re not sanding. Tape these down with the green tape so they don’t move. Make sure they’re flat…this is important. Now you’ll need to secure your work. I keep an old shelf board for this, but you can improvise accordingly. What I do is take the 10” shelf board and suspend it, then clamp it to the bench. Lay a towel, or something similar to protect the guitar's finish, lay the body on said board. Then I take two wood spreader clamps (see below), a 1” x 3” scrap board, long enough to span the guitar body, lay the board over the guitar, away from where you'll be sanding, obviously, and use the spreader clamps to hold the board over the guitar body and clamp it to the shelf board. This does not have to be gorilla tight, just enough to keep it in place while you’re sanding.  ...looks like this ...looks like thisMake sure to put some of the legal pad cardboard, green tape or a towel under this 1” x 3” board before you clamp everything down to protect the finish. Now for the “more power” stuff. If you’re still here, and paying attention, you’ll recall that the base of the #565 Multipurpose Cutting Kit was around 2”. Your sanding bits are a minimum of ½”. This means that if you applied the cardboard flatly to the guitar body, you will not need a stop or template to do the sanding, as your control cavity is only 1" wide. The base of the attachment will rest safely on either side of your control cavity, allowing nice 90 degree line of material removal. I'd start with the flapwheel, as all you're probably removing is the finish and not much wood, if any...and it doesn't remove as much material as the sanding drum. If it were me, I’d make sure there was a 1/16” gap between the top of your sanding bit and the base of the tool attachment. This will ensure that you don’t burn the finish. You can hand sand the gap away once you have your final clearance established. Work slowly, sand both sides equally and check your clearances frequently. You may have to adjust the height of the #565 attachment to work down far enough to accommodate your switch. Once you have it to where the switch drops in with room to spare, or you run out of adjustment in the #565 attachment, then stop, unclamp your body and slowly remove all the extemporaneous tape and cardboard…except the tape around where you will be hand sanding. Take a small piece of wood, some 180 or 200 grit sandpaper, wrap said paper around said piece of wood, and gently sand away the gap you left so your switch drops in when mounted to the control plate. If you need to sand deeper then the #565 tool allows just work slowly, both hands on the Dremel tool and keep checking your clearances. Start to finish, once you have all the tools and supplies, is around 30 to 45 minutes. I hope you were all paying attention, as there will be a test on Friday... Happy Trails Cynical One |
|
|
|
Post by sumgai on Apr 11, 2010 11:29:59 GMT -5
You can always tell when c1 is home with his horses - his verbosity quotient goes way up! +1 for the helpful lesson plan that reads more like a Cliff Notes version of Woodshop 101.
And that reference to a dearly departed member..... "another city". That's gonna get you another +1 just for the 'viral meme' value. ;D
sumgai
|
|
|
|
Post by cynical1 on Apr 11, 2010 11:46:30 GMT -5
Thank you for the kind words...and yes, I am home with the horses...I'd have gone into more detail, but I had to fix a fence...
Now I have to catch a train.
HTC1
|
|
|
|
Post by JaegerGuitarFinish on Apr 13, 2010 12:21:41 GMT -5
Newey you should be able to sand inside of the route with no problems. If you have any questions shoot me an email and we can go into more detail on this.
Jim
|
|
|
|
Post by newey on Apr 13, 2010 19:10:47 GMT -5
Thanks Jim- and everyone else who jumped in on this.
But the first thing I'm going to try is changing components. Easier and less risky.
I had already ordered 17mm size volume pots to buy extra room for wiring, and now that I've located a 17mm dual-ganged pot for the tone control, the only problem is the rotary switch. I think I can shave enough material from the outer edges of the decks to allow for fitment of that.
My concern with sanding the cavity is that, at 24mm diameter, and a nominally 1" cavity. there's only about ½mm clearance on either side. That means, if one of the holes in the plate is off-center even a fraction of a mm, the plate won't sit parallel to the strings. So I'd probably have to take 2-3mm on either side, just to give myself some "wiggle room" to align the plate.
To recap, this is a custom (by me) control plate with 4 holes for the three pots and a rotary. It's made from a blank Tele control plate from Guitar Fetish.
There are individual volume pots for bridge and neck pups, to allow some level adjustment particularly in stereo mode. There is a master tone control via a dual-gang pot, and a 3P4T rotary switch to give the pickup selections for the mono mode only.
The goal is a no-switch "knobby" look, with 4 barrel knobs in a row on the control plate.
The Nutz part of my brain is telling me to get another blank control plate and go for 5 knobs, with the extra one being a separate tone or perhaps another rotary, for some as-yet unascertained purpose.
I probably won't do that, but I am inclined to use a push/pull switch for one of the volume pots, and move the phase reversal off the rotary, thus freeing a position for a series setting. Originally, this was to be 2 HBs, and thinking a series combo would be too much, I planned on parallel only. But now that it's going to be a neck HB and bridge P-90, I'm thinking series might be utile.
|
|
|
|
Post by JaegerGuitarFinish on May 15, 2010 3:52:19 GMT -5
How is this project going??
Any new pics of it yet?
|
|
|
|
Post by newey on May 15, 2010 13:18:59 GMT -5
Jim-
I'll get some pix up soon. Still have to get a neck. I've got the rotary to fit as well as all the pots, so I'm ready to wire it up, soon as I can find a few spare hours!
Still sourcing the neck, though.
|
|
|
|
Post by Teleblooz on May 28, 2010 21:39:47 GMT -5
Wow - what a gorgeous finish! Can't wait to see this all put together.
|
|


 2 pickups? Ya gonna have enough wire & everything?
  ;D
;D