|
|
Post by flateric on Dec 14, 2010 14:44:57 GMT -5
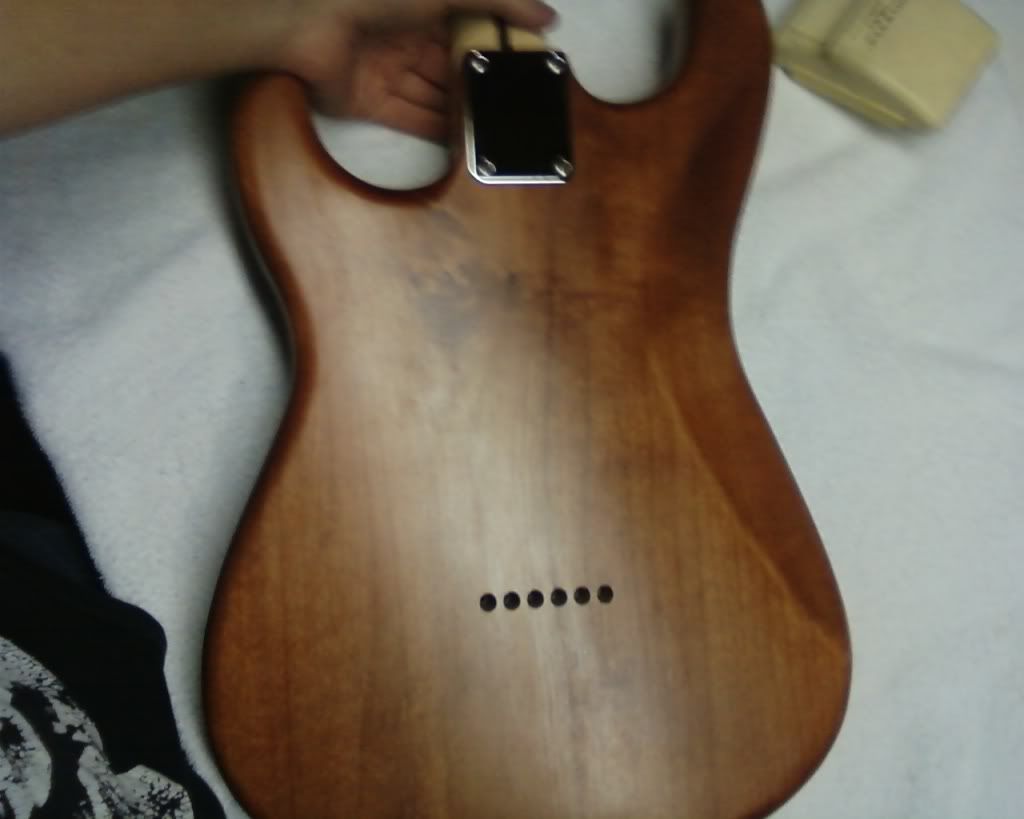
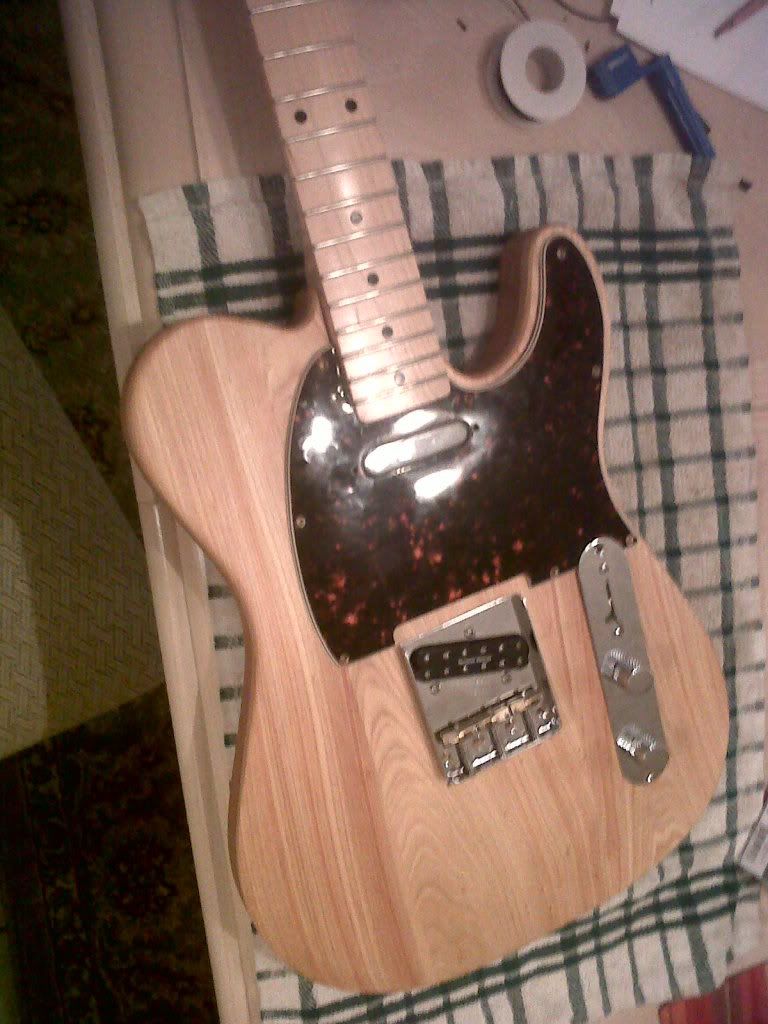
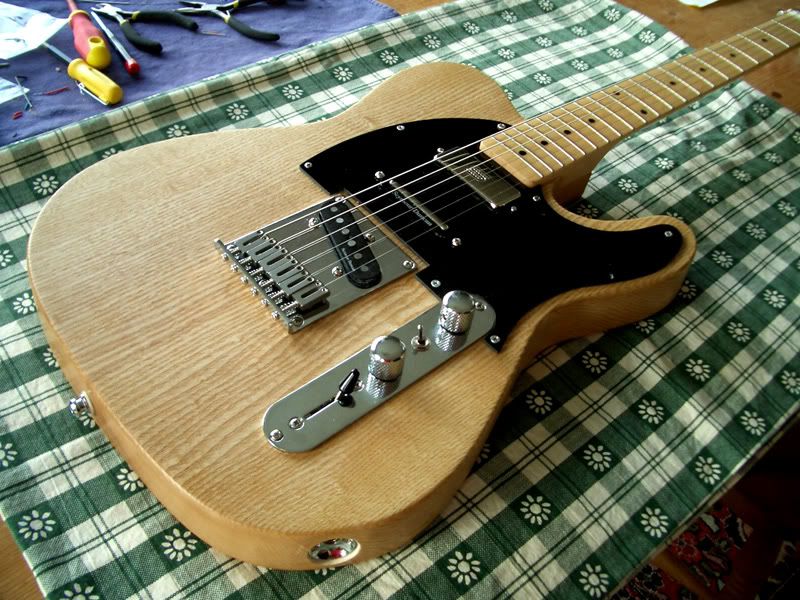  I put this together a couple of years ago for my fellow band member - I must say it was a great piece of ash and with a Mighty Mite neck made a great tele. It has a superb array of pickups, I particularly love the mini humbucker at the neck - so sweet, and I contoured the body for comfort like the version above - also cuts down the weight a bit but so much more gig-friendly. Fitted with a reverse polarity mini switch for the middle pickup to get that out-of-phase strat like rhythm tone, a very versatile instrument. Finished in natural with 5 or 6 light rubs of tru-oil. |
|
|
|
Post by newey on Dec 14, 2010 15:26:03 GMT -5
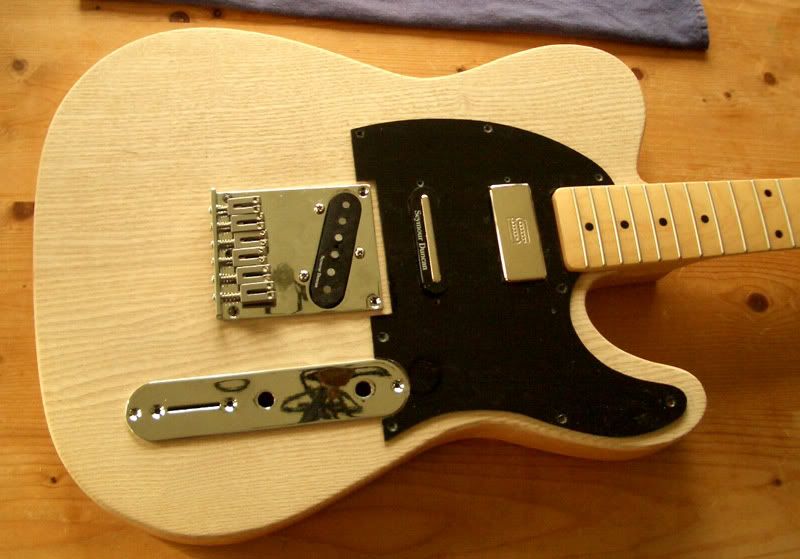
You didn't mention the reversed controls, or the Strat switch tip. I think reversing the Tele controls is useful. The V knob is still not accidentally accessible like a Strat, but you can sorta/kinds pull pinkie trem/fades with it. This assumes you also switched the positions of the V & T pots.  I went to do this on my "Esquire-ish" Tele (with a single GFS "Cool Rails"), but the import-style 3-way switch wouldn't fit without cavity modding that I wasn't willing to do. The circuit board is asymmetrically mounted and thus can't be turned board-side out without contacting the cavity. Faced with having to rewire the switch in reverse so as to avoid flipping the switch around, I gave up and just went back to standard Tele.  |
|
|
|
Post by 4real on Dec 14, 2010 17:35:51 GMT -5
Love the look of that top ash tele and features...considering putting a middle pickup in my tele too... 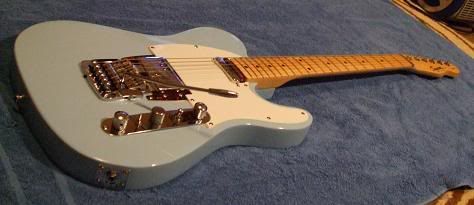 The pickup I am considering is a wider bridge pickup noiselsess...so I will have to 'slant it' steve morse style...doing a few tests to see if it would be worth the permanent mods. I've always loved the reverse tele control plate, even the look...but especially the volume control placement. I had to add a third control in the middle for the sustainer drive and p-p harmonic switch and have a neck phase switch p-p in the volume control. If adding a middle pickup it would be on a fade from the 'tone control' instead of a tone in this guitar. Anyway, beautiful looking and functional guitar with a nice combination of different pickups...very nice...i want one but with a trem! |
|
|
|
Post by newey on Dec 14, 2010 21:49:57 GMT -5
Do tell.
|
|
|
|
Post by ijustwannastrat on Dec 15, 2010 10:36:49 GMT -5
+1. And on a side note, that is a lovely table cloth. |
|
|
|
Post by flateric on Dec 15, 2010 10:54:51 GMT -5
Thanks guys, my wife hand knitted it from the pelts of dead Gerbils she collected on her travels round the Mexican tundra.
|
|
|
|
Post by cynical1 on Dec 15, 2010 12:09:05 GMT -5
...sounds like you've been using just a bit too much lead solder recently... ;D
|
|
|
|
Post by Double Yoi on Jan 1, 2011 8:54:27 GMT -5
Sorry it took so long to follow up with these, but you know how it gets around the holidays. First things First, We joined and planed the top and then glued and clamped it down. 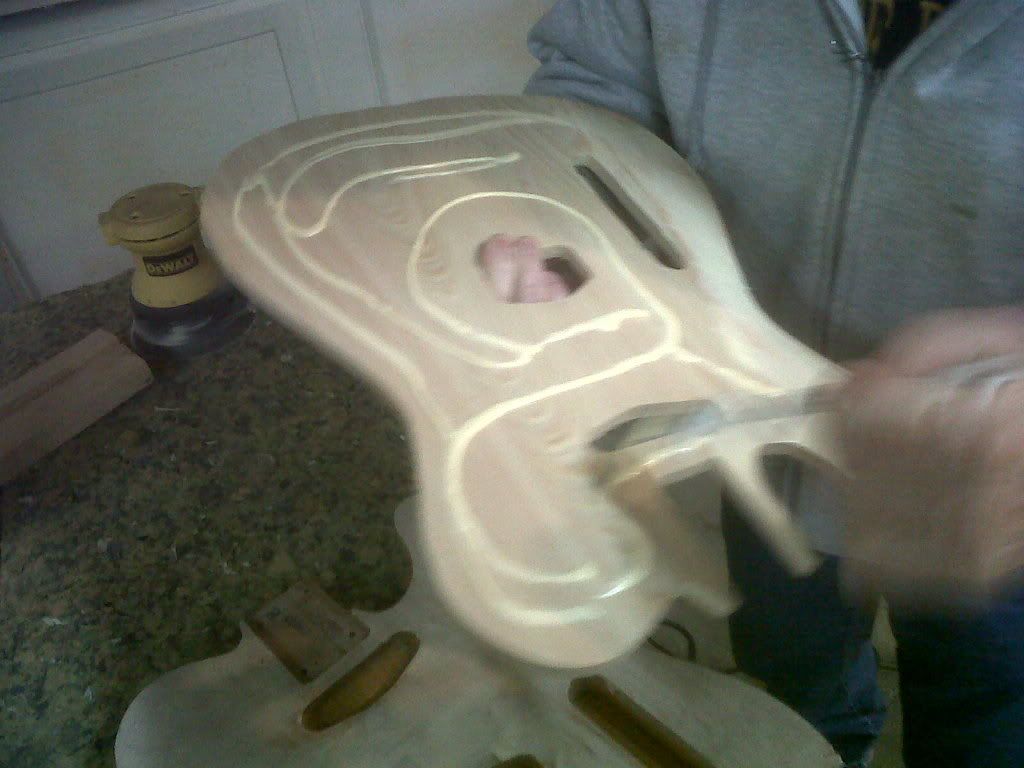 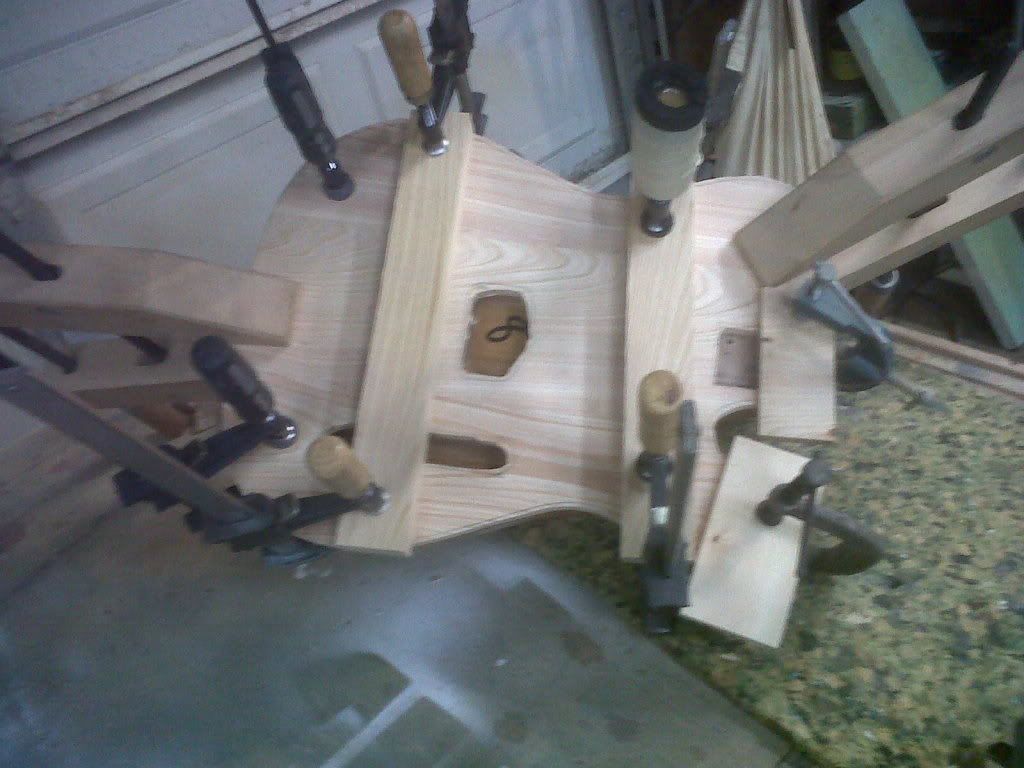 24 hrs later final route of the outside edge and cavities. This is were we hit the first snag, The hex head screw on the bottom bearing bit would not allow us to follow what was left of the original neck pocket. After some sound advice from the all knowing [glow=red,2,300]1[/glow] a solution was evident. The results minus alot of sanding yet to do 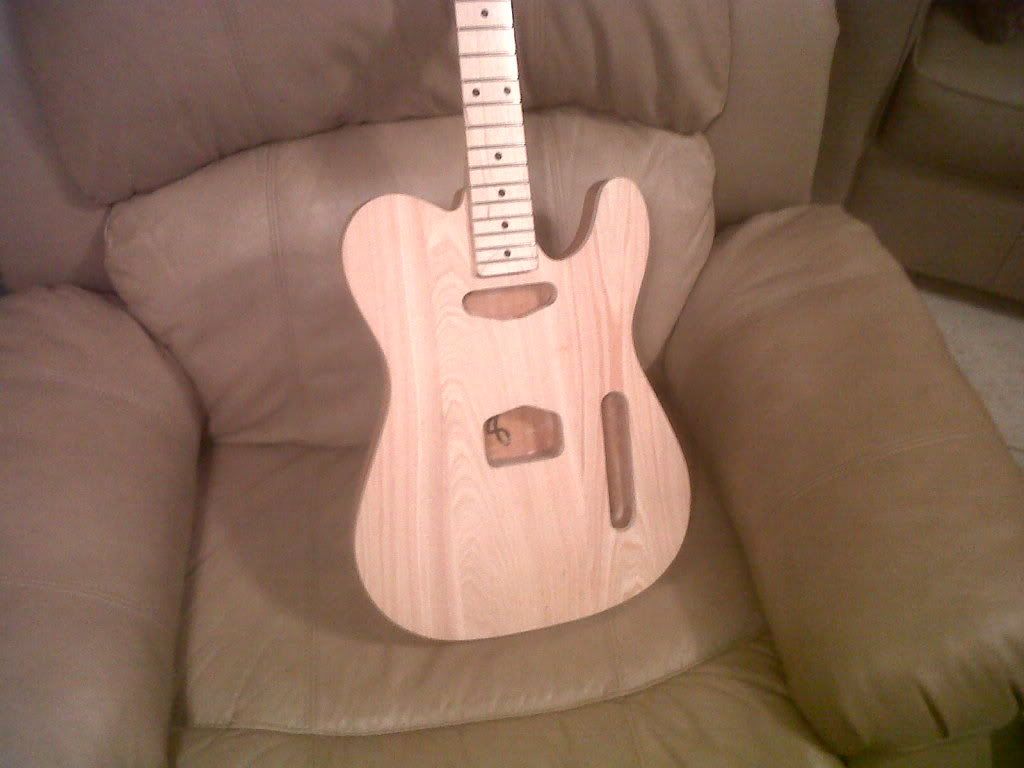  And the layout 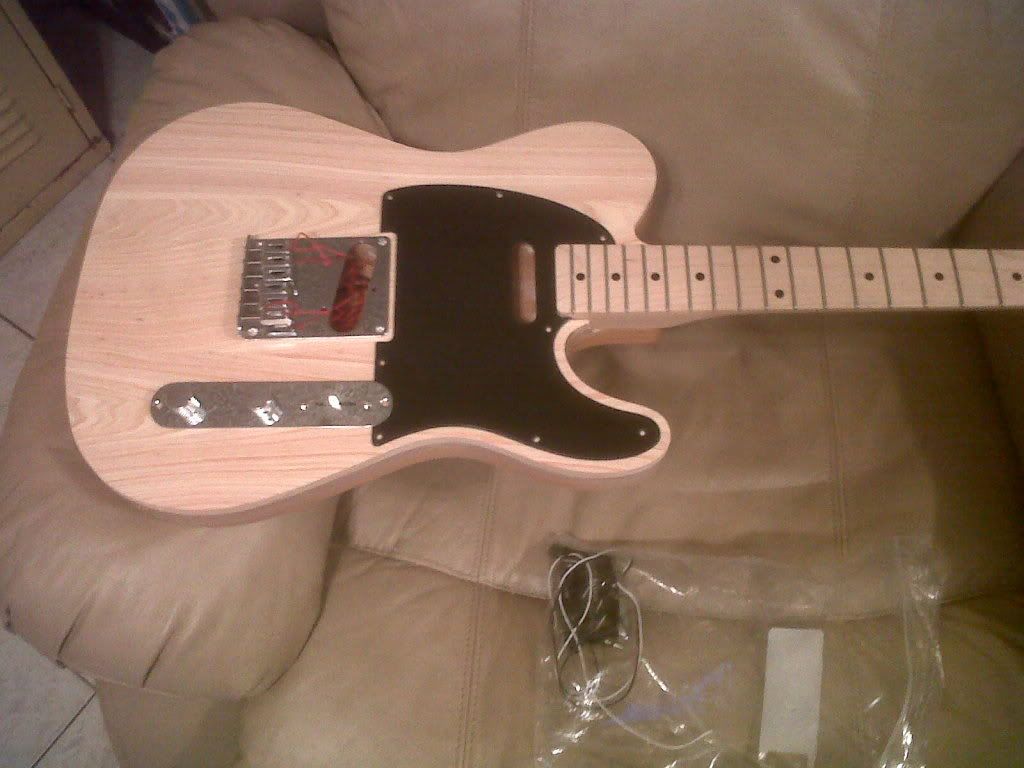 Still doing the binding, still need to pick the material. Recieved a SD Lil 59 tele bridge for Christmas. Honestly, Im not sure what the cypress will add to the tone of this guitar, or if I will use it in the future because of how soft it is, But the beauty of the wood is evident and should age nicely after finishing. Best wishes to all for 2011, more pics as they come! |
|
|
|
Post by cynical1 on Jan 1, 2011 12:25:45 GMT -5
Ahoy Yoi, That is a very good looking job on that top. And I must admit, while I've never seen a cypress top on a solidbody guitar, you may be on to something there. The graining is very appealing. And from what I can find, cypress is almost identical to poplar, which is a very under-rated wood for making "piano tone" basses out of. For example: Poplar (Liriodendron tulipifera) Average Dried Weight: 32 lbs/ft3 (515 kg/m3) Basic Specific Gravity: .40 Hardness: 540 lbf (2,400 N) Bending Strength: 10,100 lbf/in2 (69,660 kPa) Elasticity: 1,580,000 lbf/in2 (10,900 MPa) Shrinkage: Radial: 4.6%, Tangential: 8.2%, Volumetric: 12.7%, T/R Ratio: 1.8 Cypress (Taxodium distichum) Average Dried Weight: 33 lbs/ft3 (525 kg/m3) Basic Specific Gravity: .42 Hardness: 510 lbf (2,270 N) Bending Strength: 10,600 lbf/in2 (73,100 kPa) Elasticity: 1,440,000 lbf/in2 (9,930 MPa) Shrinkage: Radial: 3.8%, Tangential: 6.2%, Volumetric: 10.5%, T/R Ratio: 1.6 I can't tell from the pictures, but if the end grain is smooth, or easily fillable, you might just want to consider dropping the idea of binding it. You appear to have a very good glue joint which will be invisible once the finish goes on. Doing a small radius around the edges with a router and working in the Tele "ala Jeff Beck" relief (though perhaps not as extreme, as you don't want to sand through the cypress and into the original body) would make it functional, and avoid having to deal with the wood mismatch on the sides of the body below the binding. Just a thought, and not everyone share my opinion on this. Here's what a friend of mine in MA did with binding his build:  Long story behind that guitar...it's actually made from an old book shelf his father made in high school from a tree that came down on their farm back in the 40's. Granted, he sandwiched a piece of mahogany in there, but the choice is always yours to make. I'm anxious to see the progress, and especially if you notice any difference in tone. I'm also glad the neck pocket issue resolved itself for you. Happy Trails Cynical One |
|
|
|
Post by newey on Jan 1, 2011 17:19:36 GMT -5
Nice work so far, DY! Is that a Steelers skateboard under the tree? (Boo, Hiss! ) |
|
|
|
Post by Double Yoi on Jan 1, 2011 22:51:41 GMT -5
Cyn, The flame sound holes on your friends build look really cool,the whole thing does. I used to like the wicked paint jobs, guess I was a product of the guitar scene of the 80's with tiger stripes,skull and cross bones, blood splatted and I remember one that looked like the packaging of a Trojan condom..Nowadays I find that a interesting piece of wood is more than enough.....well in most cases its enough. I may have to scrap the binding on this one as you advised, I guess the end grain will break out if I route it? Maybe dark stain whats left of the original body, leave the top natty and clear coat? Plenty of time to mull it over.....Thanks for the encouragement and information on the cypress. Mr. Newey, Its a boogie board under the tree. . If I lived in Ohio I hate them too.  |
|
|
|
Post by cynical1 on Jan 2, 2011 0:14:08 GMT -5
If you think this one is extreme, this is one of the more docile guitars Mike ever did. This one was a gift for his father. He's made battle axes, iron cross guitars, flame guitars...Mike can go over the top if given enough room...but I digress
I don't think you're going to have any problems routing the cypress for your binding. It's not that hard of a wood, and if it didn't present any problems with the pickup and control cavity routing it'll be fine for routing the binding grooves.
My point was this, since you have a 1/2" top, and your binding is around 1/8"-3/16" you're going to have somewhere between 5/16"-3/8" of cypress showing on the sides before you get to the original body wood. Traditionally you'd spray the entire bottom half of the guitar, or put binding on the back of the guitar and just plain the sides.
Staining may be problematic as the two different woods will absorb the stain at different levels. A very dark wood dye can do the trick, but you're screwed if the dye gets on the cypress top as you'll never sand that stuff out once it penetrates.
That was why I tossed out the marquetry idea in an earlier post. It makes up the gap and provides a bit of interest and uniqueness to the build.
Sometimes just staring at the body for a time will sometimes spark an inspiration. There are an unlimited number of options you could pursue. Carving the body is still not out of the questions. All it would take is a slight modification to the pickguard (who says it "has" to look like every other Tele pickguard...) and you could carve the top to allow your binding to hit right at the glue seam. (that's how it works on a Les Paul...)
Well, guess I rambled enough...time to put another coat of clear on the neck and sand project #1 a bit more.
Happy Trails
Cynical One
|
|
|
|
Post by Double Yoi on Jan 16, 2011 18:18:09 GMT -5
So Sorry for the delay in the progress of this project.
It is on hold for the moment, as I await the arrival of new tools.
The final decision is to contour the body and not bind it. I feel the contour will add a unique twist on this project. I also couldn't decide on a binding color for a natural finish that i was satisfied with.
The contour will proceed after a round over of the edge to ensure a smoother transition in the contour itself....hopefully!
|
|
|
|
Post by cynical1 on Jan 17, 2011 0:23:49 GMT -5
The final decision is to contour the body and not bind it. I feel the contour will add a unique twist on this project...The contour will proceed after a round over of the edge to ensure a smoother transition in the contour itself....hopefully! I would have to agree with you. The endgrain on your cypress is so pretty it would be a waste to bind or cover it. Determining the radius of the edges and the body relief is going to be determined more by the thickness of the top cap then any standard formula. That said I found some shots, not mine, that detail the same exercise you're about to undertake. Keep in mind this is a one piece sycamore body, but the process is identical. 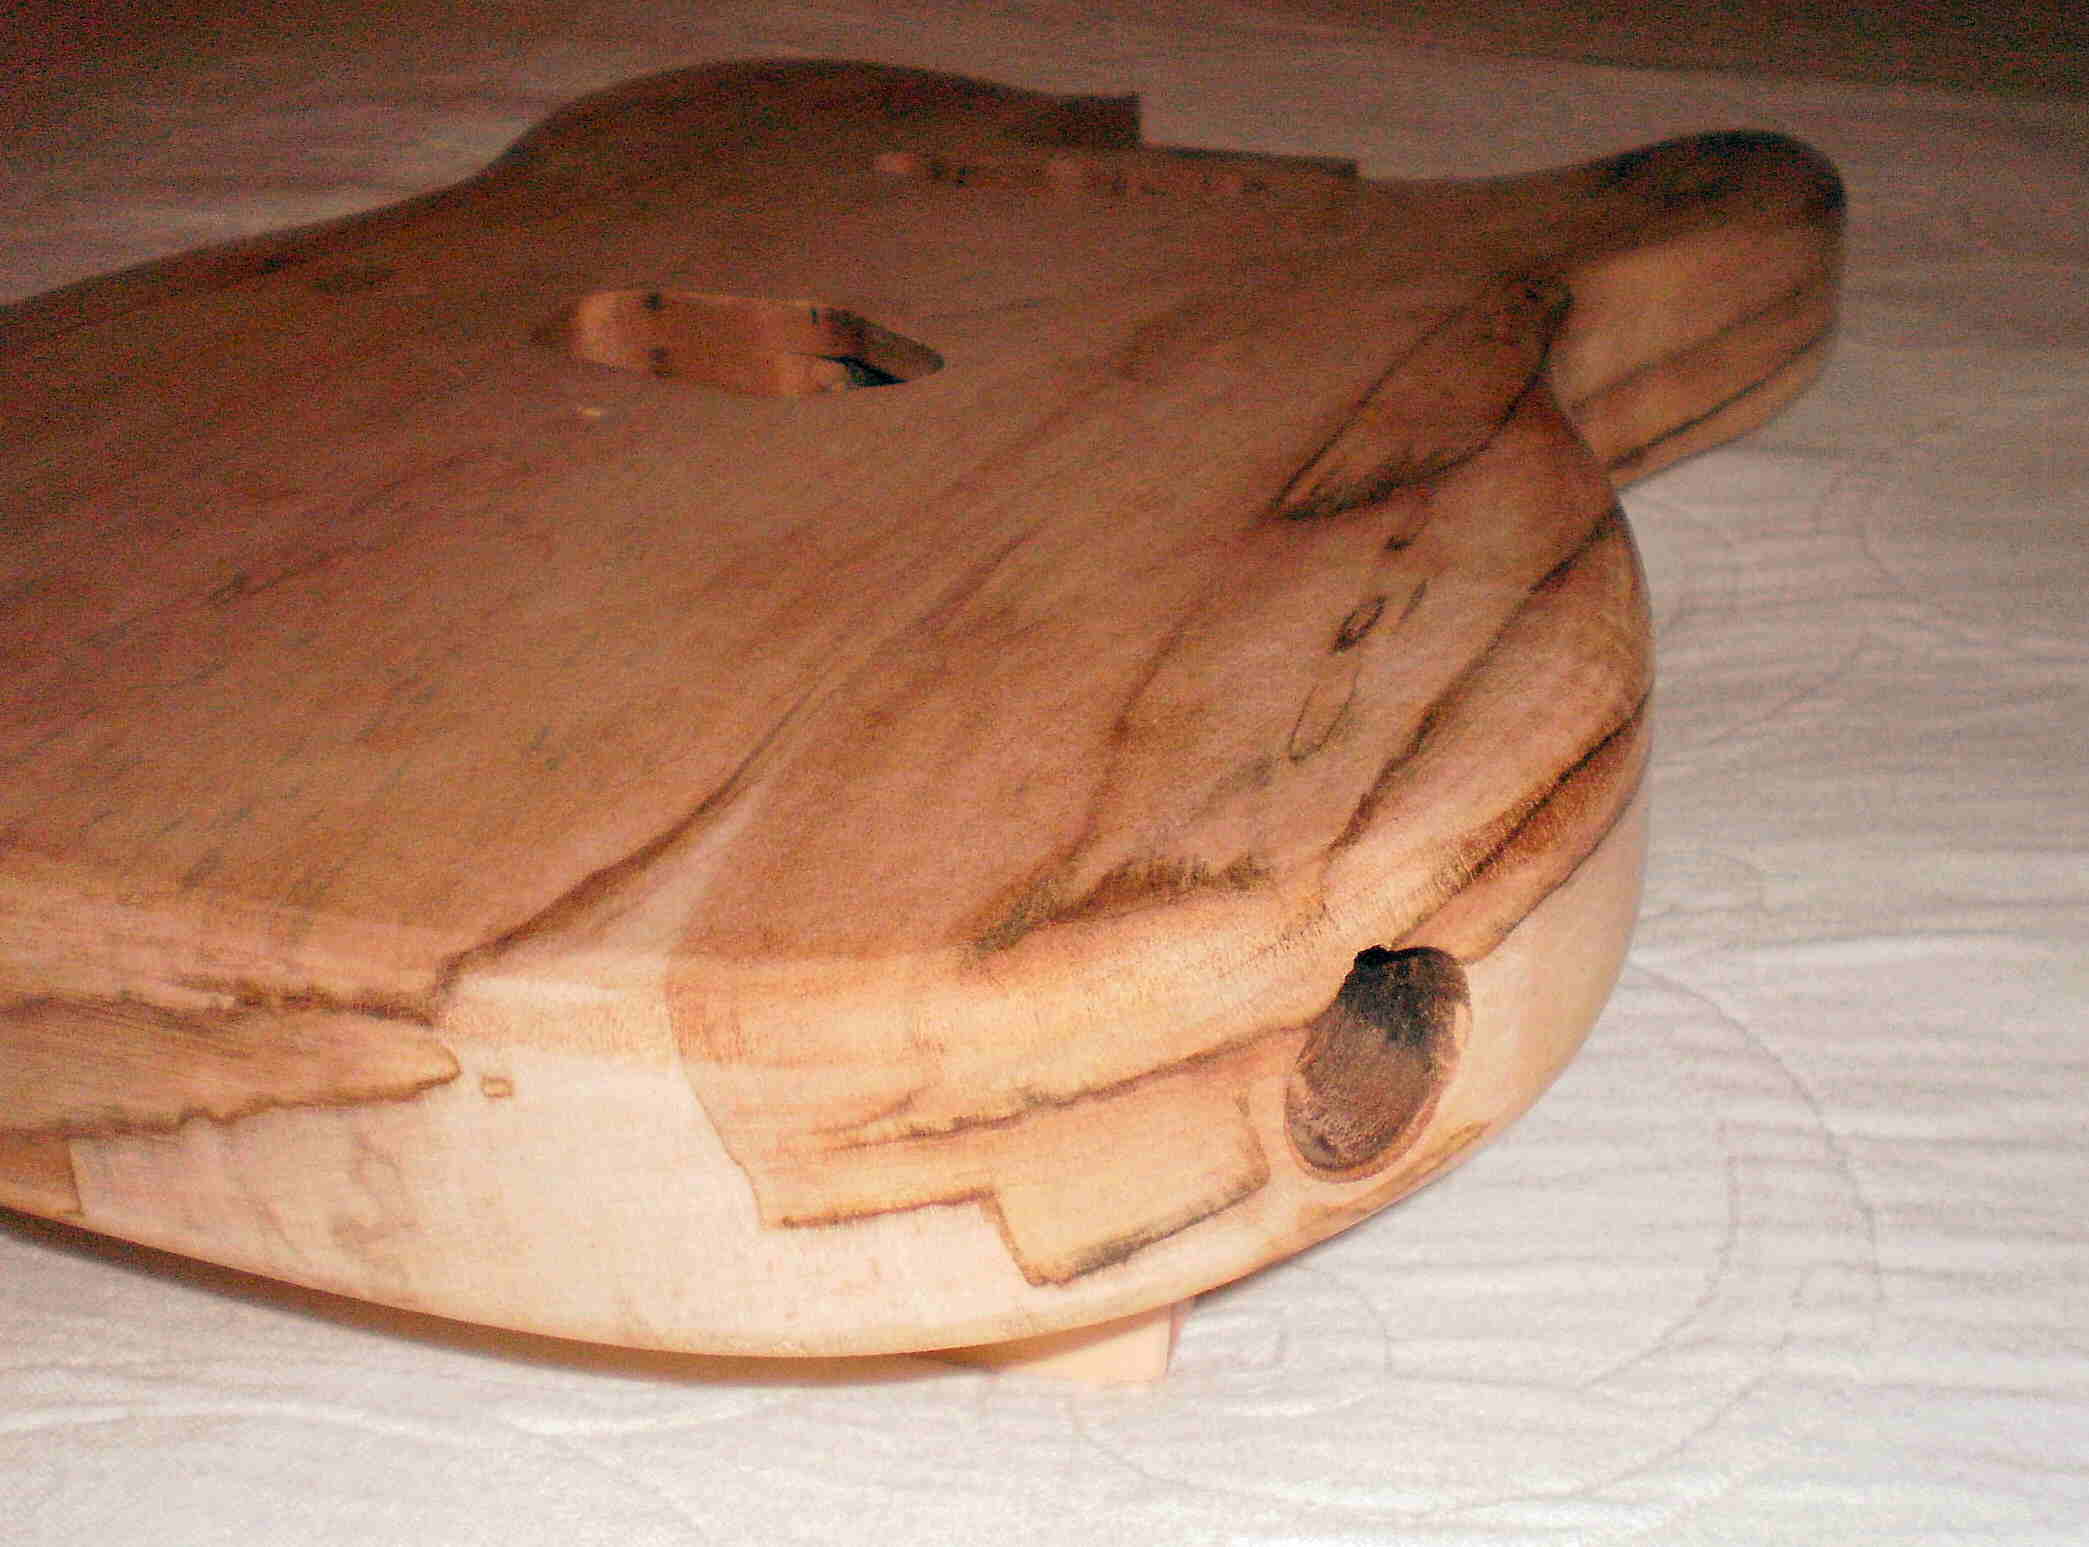 This is the radius with just the router table. Hand sanding will blend this seamlessly. Go slow, buy a quality router bit, always route counter-clockwise because burning it here will cause you a lot of sanding later...and we don't even want to talk about gouging it... This is the radius with just the router table. Hand sanding will blend this seamlessly. Go slow, buy a quality router bit, always route counter-clockwise because burning it here will cause you a lot of sanding later...and we don't even want to talk about gouging it...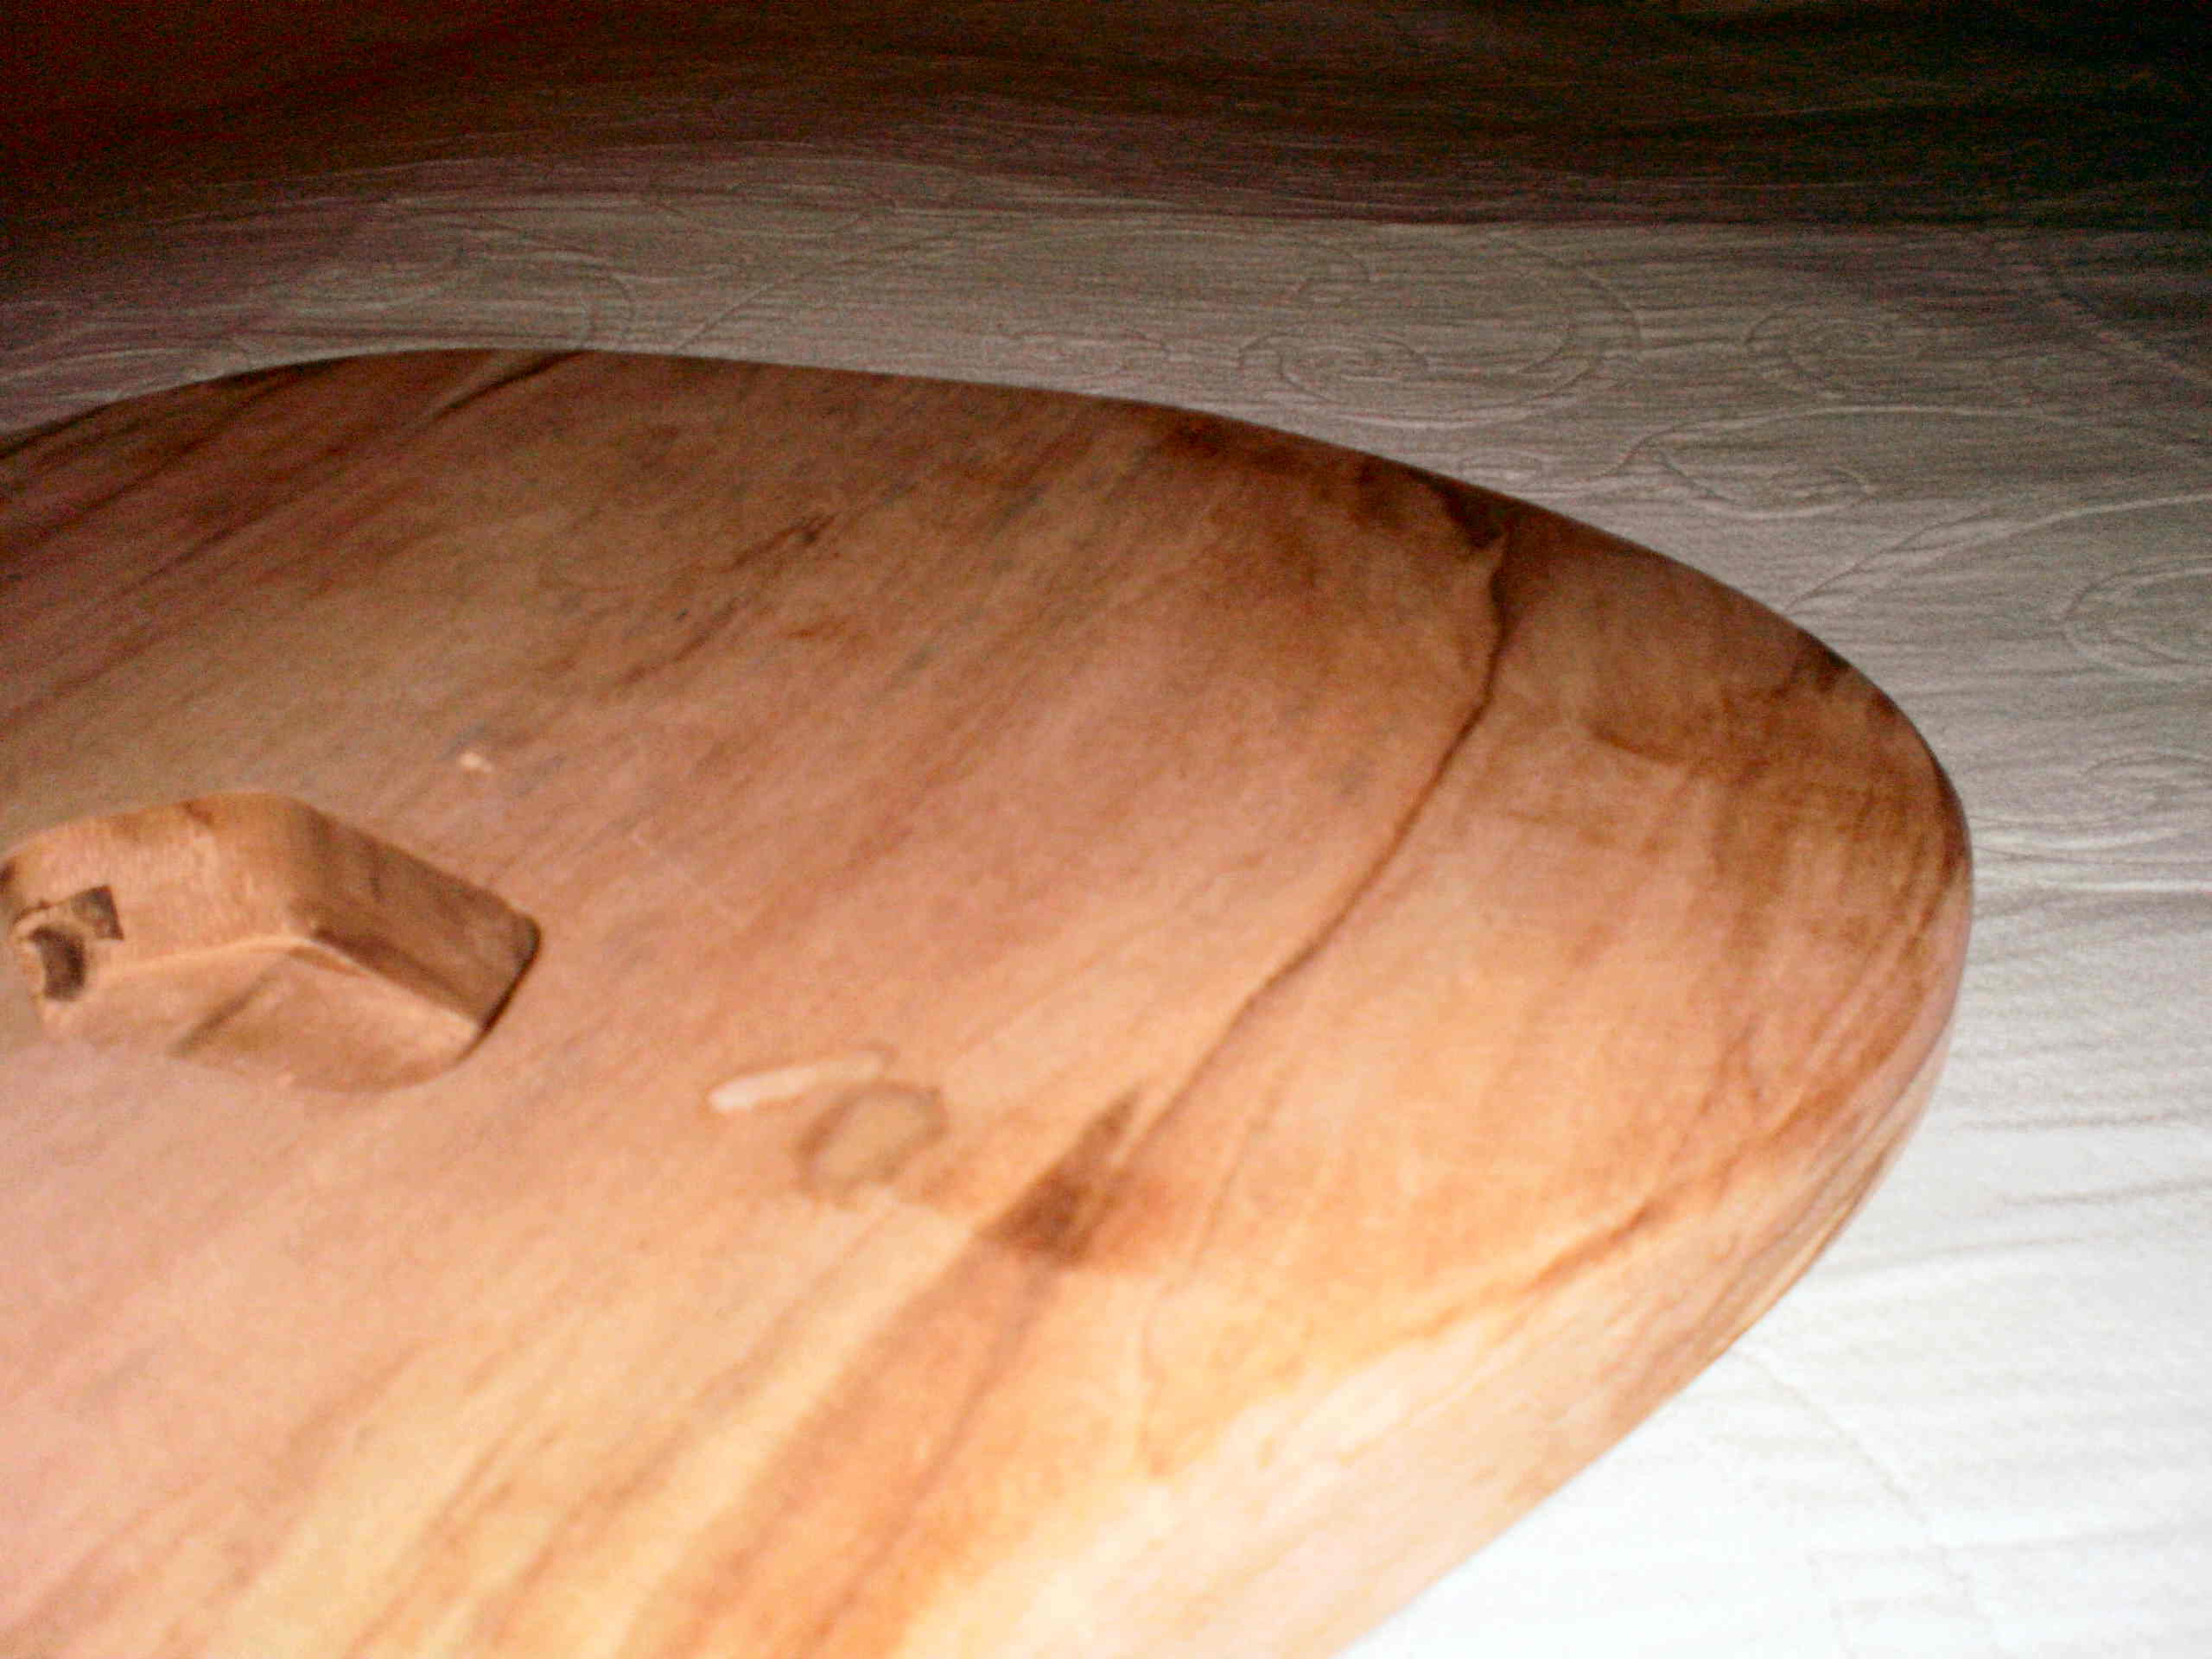 A little too much flash, but what you need to look at is how much real estate he uses to make his relief. Nice and gradual, but not walking into the bridge mounting location. A little too much flash, but what you need to look at is how much real estate he uses to make his relief. Nice and gradual, but not walking into the bridge mounting location.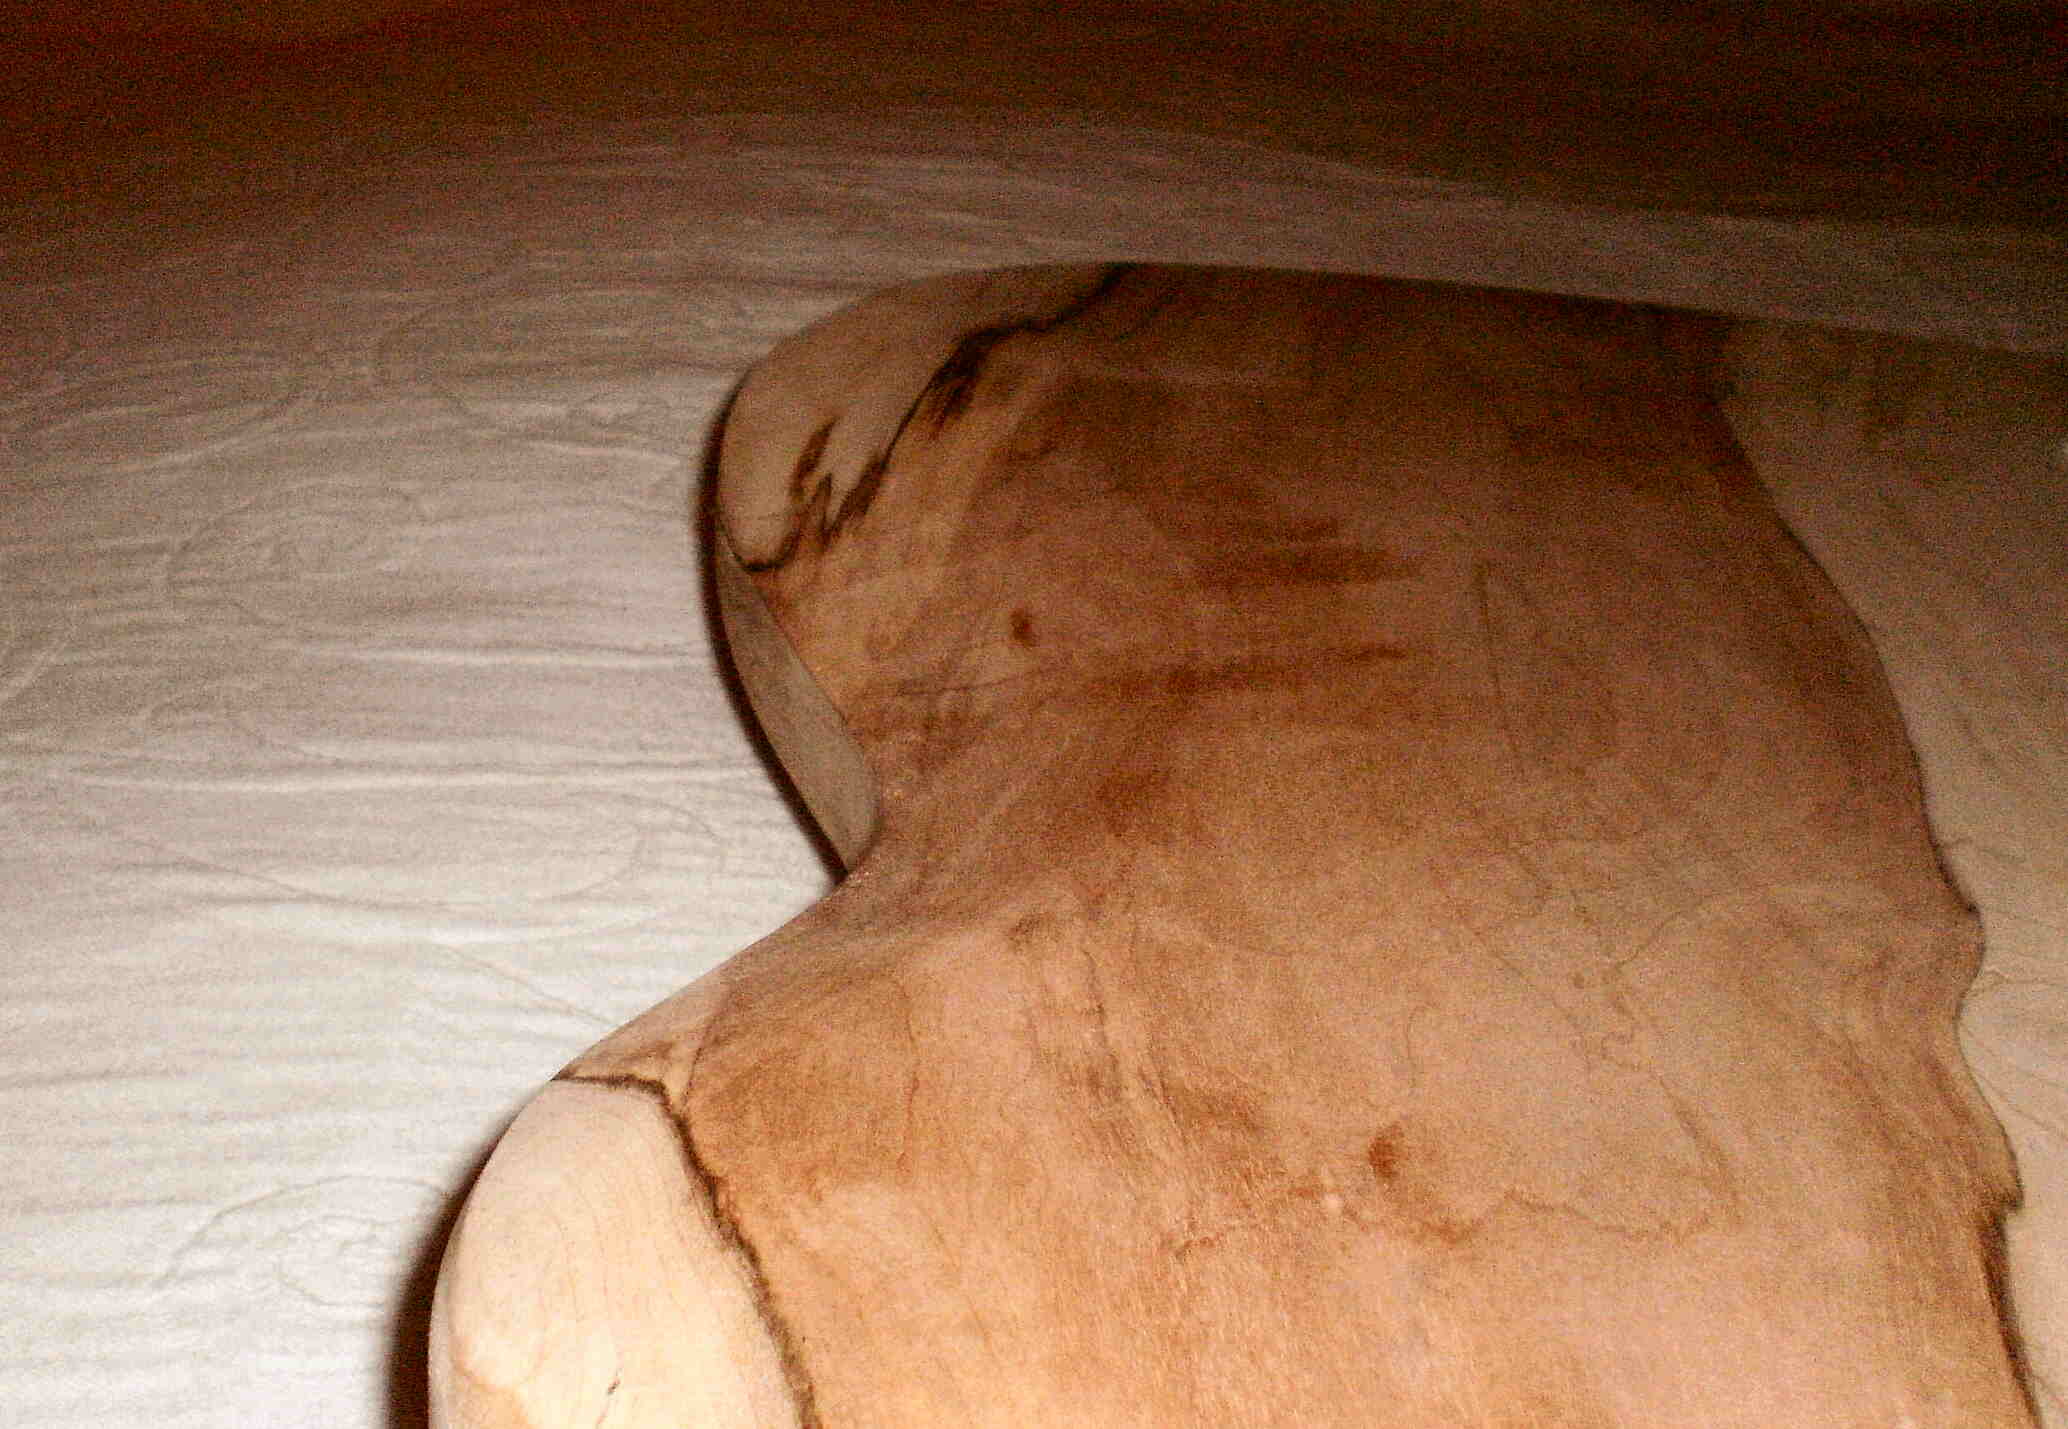 This gives you some idea of the belly cut relief. You've got more room to play with here, but keeping a long radius clean here is important. The last thing you want here is to get too happy with the power tools and create waves or ripples. This gives you some idea of the belly cut relief. You've got more room to play with here, but keeping a long radius clean here is important. The last thing you want here is to get too happy with the power tools and create waves or ripples.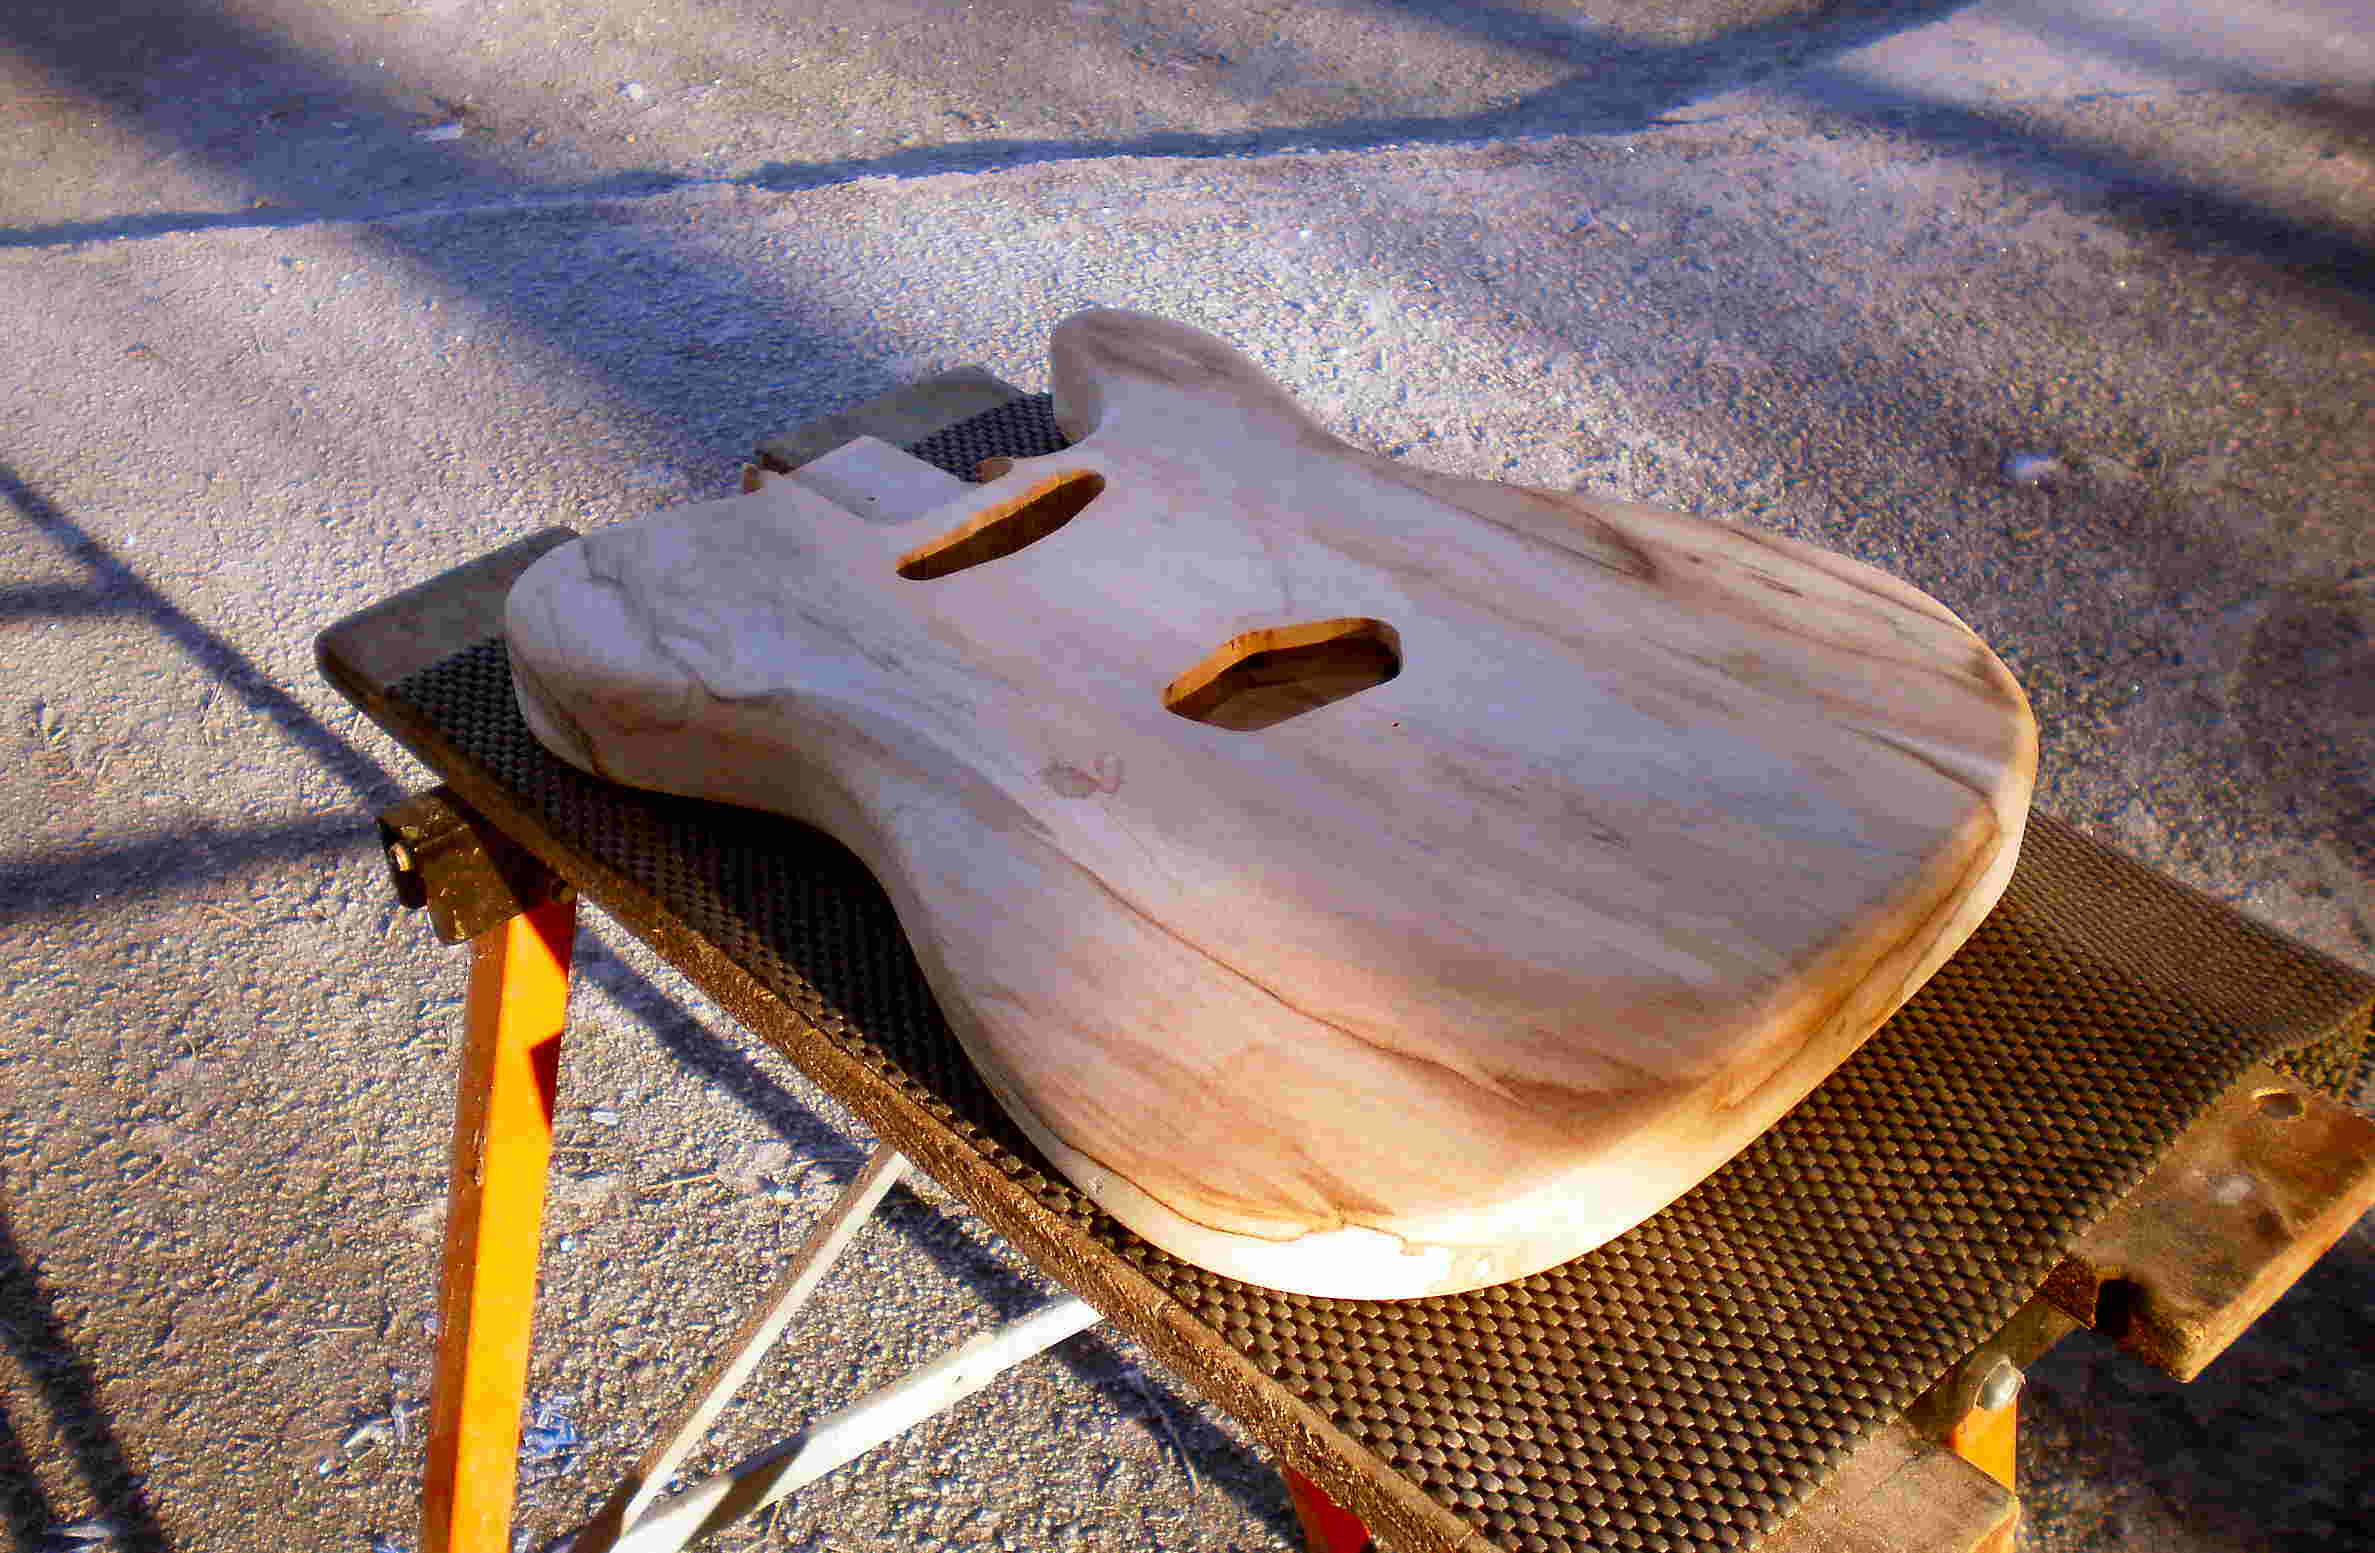 Top, after sanding and relief cut. Top, after sanding and relief cut.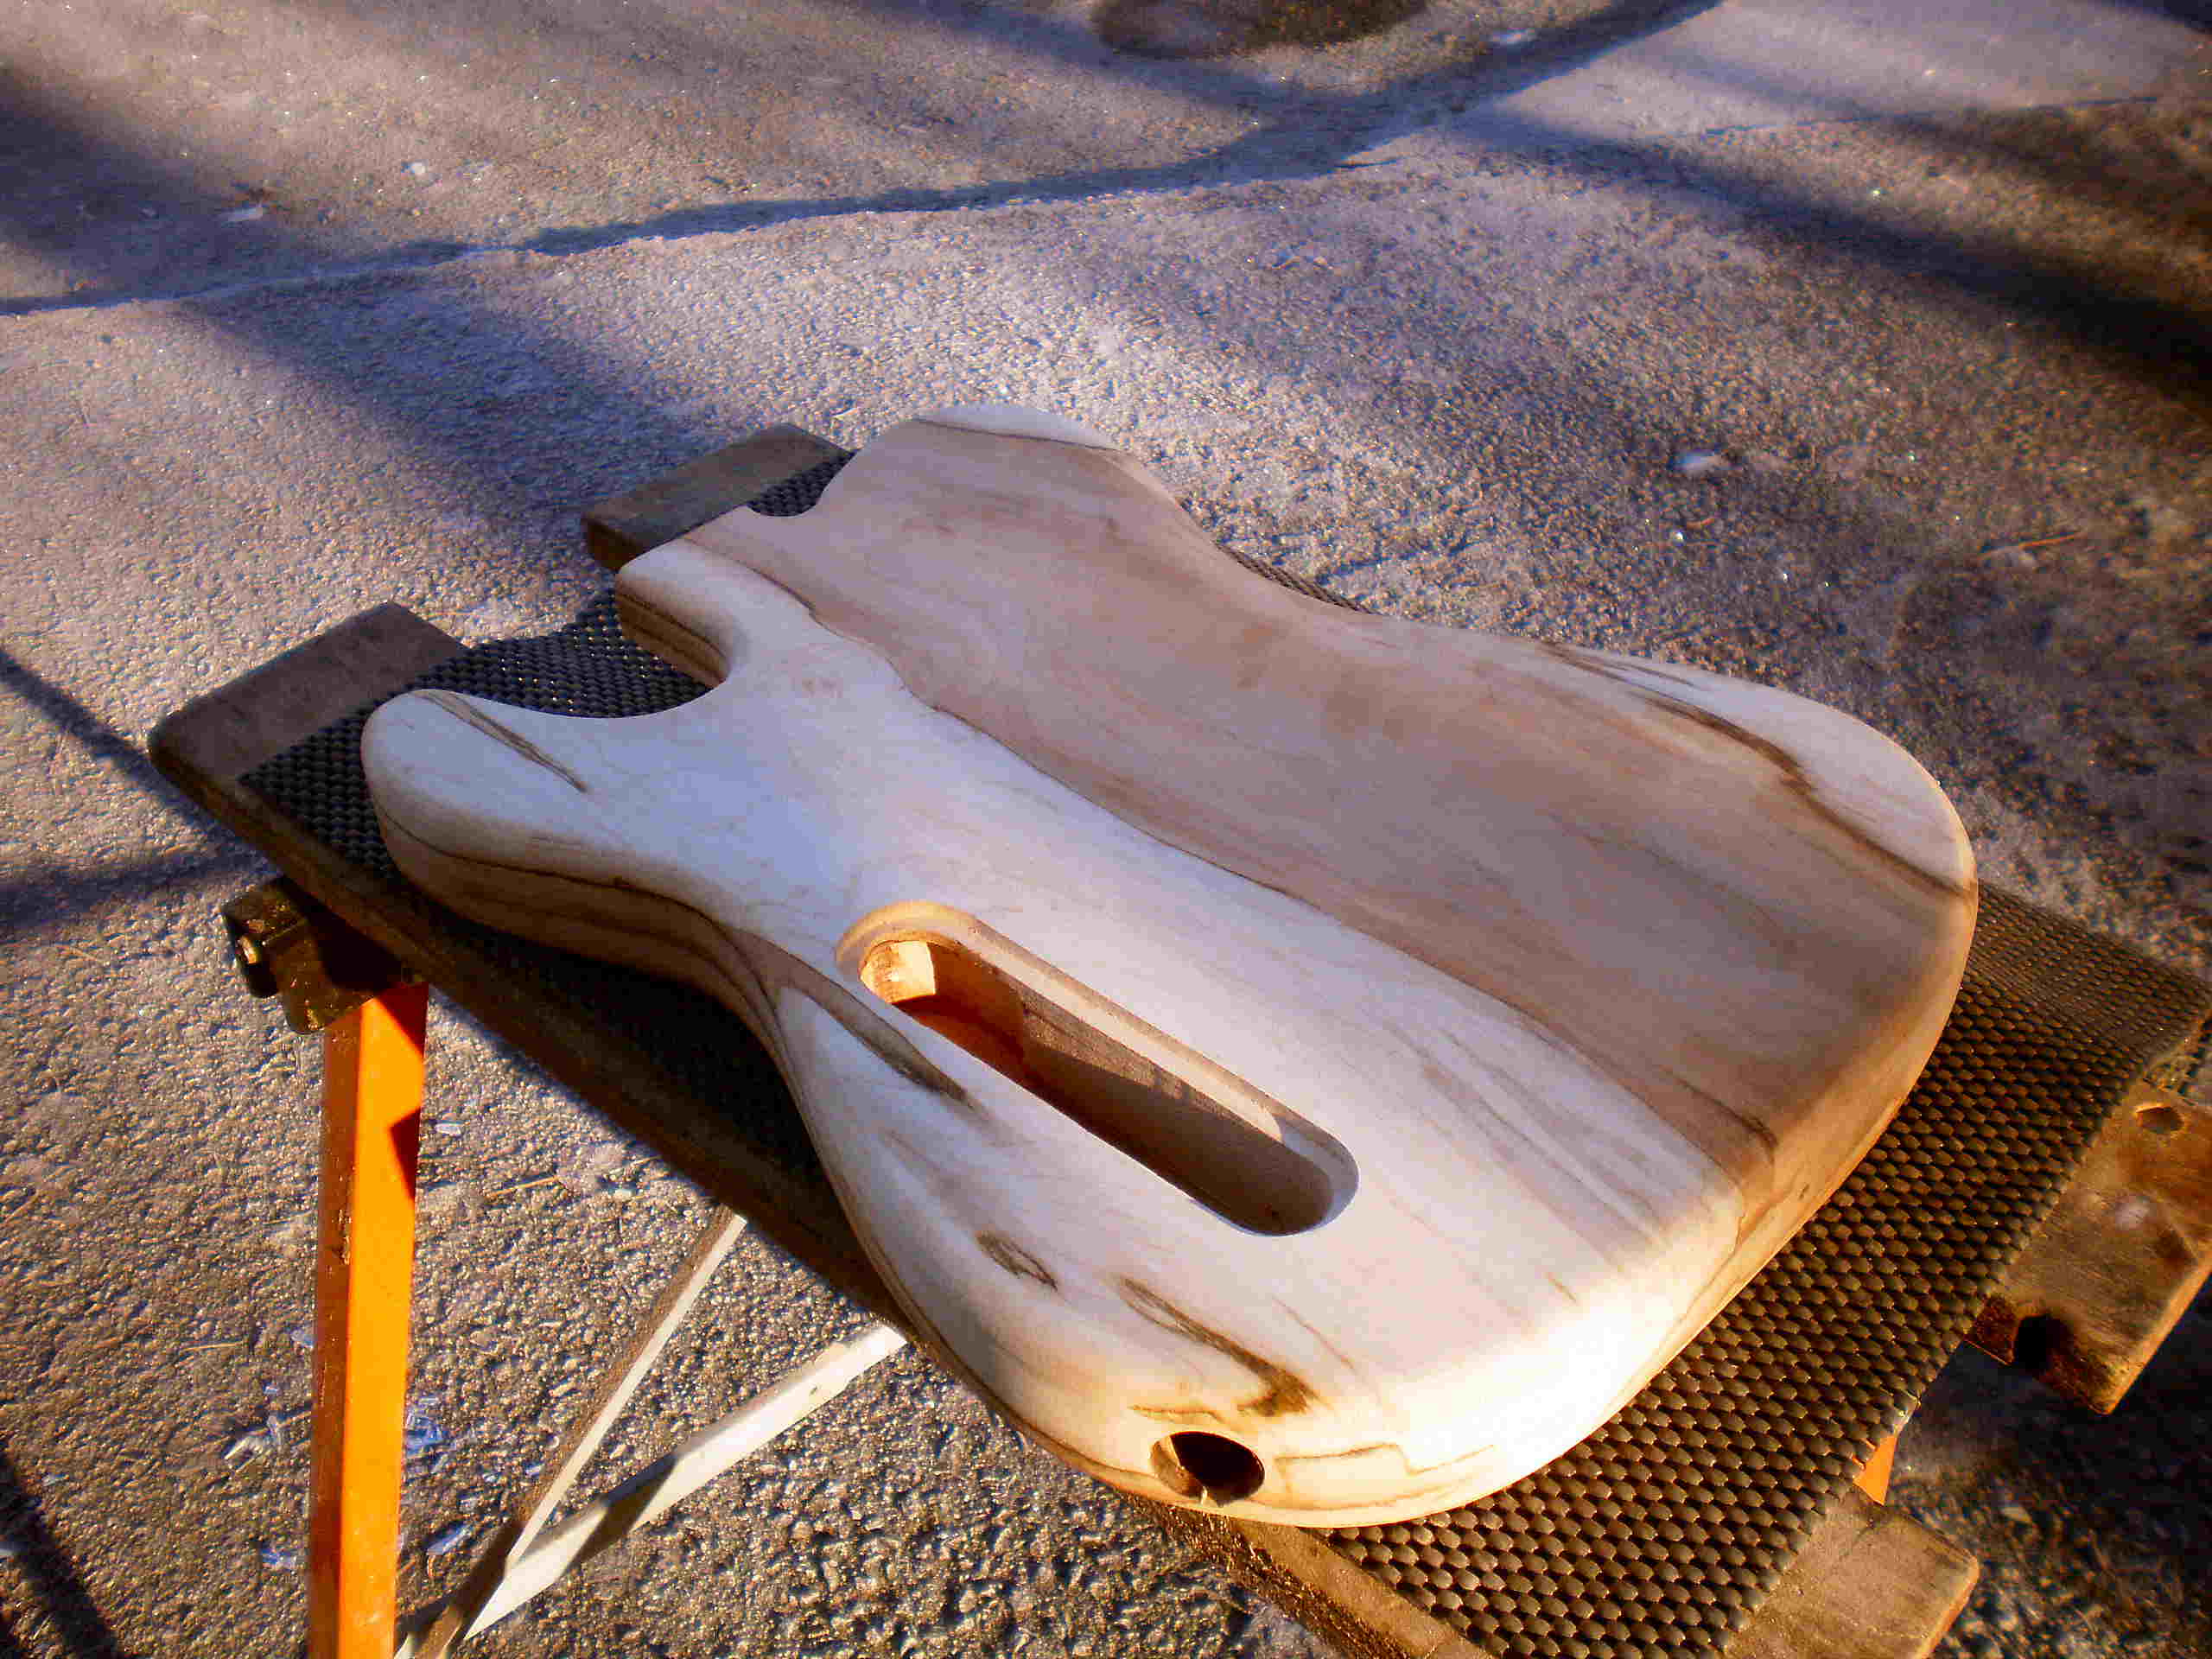 Back, after sanding and relief cut. Back, after sanding and relief cut. Nice shot of the side with both relief's shown Nice shot of the side with both relief's shownYou'll notice he left the edges relatively sharp on this top side, which is fine. If you'd like, you can work them down to match, or match closer with the rest of the radius you cut. Take some time and mark this out on the body BEFORE you start the surgery.  This is a good example of what I'm talking about with matching the radius through the relief. This is a good example of what I'm talking about with matching the radius through the relief.If you want to follow the entire thread it's here. He really does give a good walkthrough on the process of building a body from scratch. And that is one really pretty piece of wood, too. Happy Trails Cynical One |
|
|
|
Post by 4real on Jan 17, 2011 2:27:37 GMT -5
I've got a thing for those conkin guitars...if you are after wood porn they do do it well and in interesting ways... ... Good to be taking your tome and seeing how it looks upon the way...remember you can remove wood in stages (best) but you can't put it back! A tele does tend to have fairly 'sharp edges' and I like the idea of contouring and rounding...but in moderation...take note at how a strat is done with the belly and arm carves if you are going that route. Round it over in a small amount and see how it looks... to me a lot of these things look like a sucked boiled sweet (the satriani guitar is a classic of that look) and I'd include the example given from appearances. The Conkin however still has a defined 'shape' without going overboard and making better use of the 'top'...in my opinion. Personally I'd be going very subtle on the rounding...particularly as the scratch plate is so close to the edge and a small routing is expected on a tele. A back rout and arm carving though would look sweet and make it more comfortable to play. Having played my tele for a couple of years extensively and recently gone back to the strat, you really do notice how comfortable the strat is and lighter too. All in all though, you are set to be making one fine guitar...take your time as you have done and you will have something unique. Oh...and when thinking about the controls...I'm quite taken with the idea of reversing the control plate and having the volume closer at hand and the selector out of the way as featured in a guitar above. Mine has three controls and the volume forward and there is no real risk of hitting it. Not sure if you might one day want to mess with different pickups either..say middle for strat like sounds of something different like a mini HB...might be worth considering routing suitable holes if this is likely before you get to finishing the thing, they will be well hidden under the scratch plate and make little or no difference to the sound. |
|
|
|
Post by Double Yoi on Jan 17, 2011 9:58:04 GMT -5
Thanks fellas!
I always appreciate the encouragement esp. with the amount of waffleing on this project.
I plan on the belly countour to be very similar to the sycamore example provided by C1, the arm relief will not be as drastic due to the thinness of this top.
I do have new router bits on order and expect them this week.
I kinda dig the idea of the reverse controls, might even try it out on blckwlnut tele to see whats up.
Another huge up side of this project aside from the lessons learned, it the template I was able to make. I have a good selection of walnut, cherry , red oak, and of course cypress, So anything is possible as far as pick up combos in the future. I do like that Nashville tele tho 4Real.
|
|
|
|
Post by cynical1 on Jan 17, 2011 11:37:19 GMT -5
...I have a good selection of walnut, cherry , red oak, and of course cypress... Man, that gets the mind working... I've been thinking about a chambered oak\walnut and cypress\cherry guitar ever since you started this project... Like I need another guitar/bass project... How is the oak cut? See image for explanation and examples:   Flatsawn Flatsawn Riftsawn Riftsawn Quatersawn QuatersawnIs any of the walnut or cherry burled? Inquiring minds want to know... Happy Trails Cynical One |
|
|
|
Post by Double Yoi on Jan 17, 2011 13:14:19 GMT -5
Not too sure, we got the lot at Christmas time, stacked in the shop.
Next time I visit, I will get the skinny for sure.
I do believe some of the walnut is claro tho.
|
|
|
|
Post by Double Yoi on Jan 22, 2011 9:04:01 GMT -5
Sorry for the delay on the updates, I finally got to work on the tele a bit. As previously posted, The deiscion to contour vs. binding came after some serious waffleing, I am very happy with the results so far. Bottom view toward the front, all of the original finish removed:  Top view toward rear, you can see the begining of the arm relief:  Top view toward front, as you can see lotsa sanding left to do: 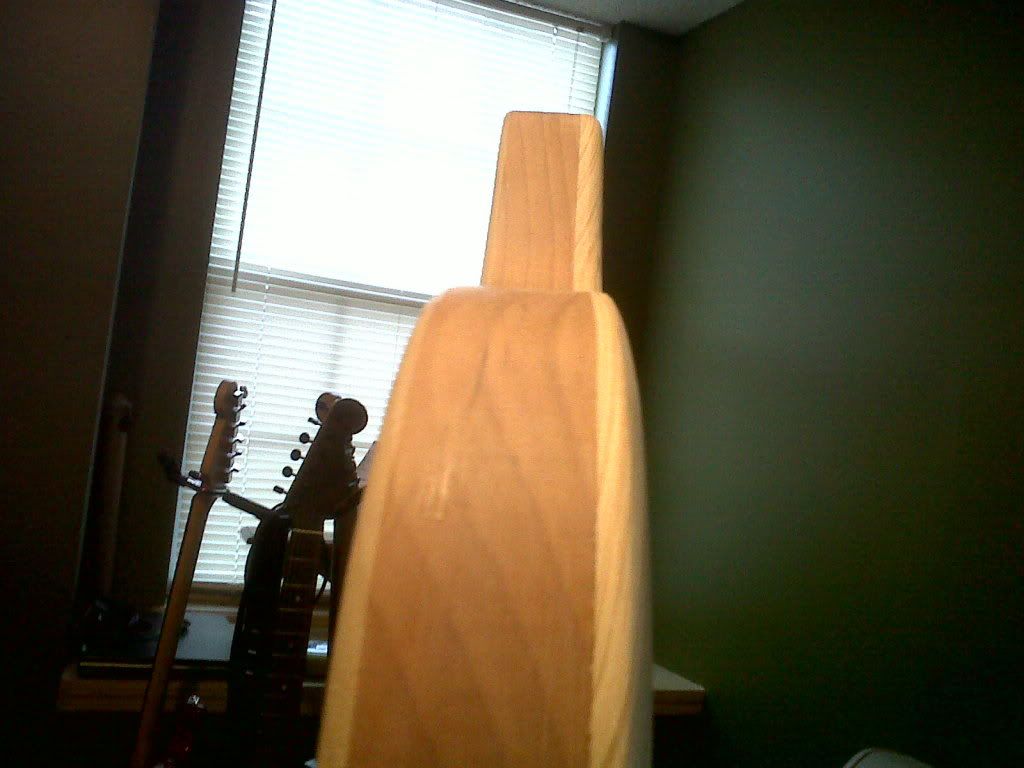 I am considering a strat style sc in the neck position with no pick guard, the grain is just to pretty to cover up. Thank you all for the advice and encouragement on this project. |
|
|
|
Post by cynical1 on Jan 22, 2011 9:41:55 GMT -5
DY -
You definitely made the right decision, in my mind. The grain in both halves compliment each other by appearing to "meet" at the seam. I don't know if that was intentional or not, but it's a very nice detail that many builders consciously work for and can be tricky to accomplish when using different species of wood.
I would also agree with mounting the single coil into the body sans pickguard. I've always preferred that to a pickguard anyway with a natural finish where the grain is intended to show through. I always felt they were hiding a knot otherwise...
Your arm contour is looking good. By design it was going to be subtle, and with the final hand sanding it'll blend right in to where you'll just notice it. One of those "second look" details.
Have you made a decision on a belly contour for the back? You certainly have enough meat back there to do one...and I'm sure you're just lovin' all the sanding so far...
All in all you're on the road to a very nice and unique guitar. It's looking very good so far. And vitamin E is real good for the hand cramps that come with all that sanding...
Happy Trails
Cynical One
|
|
|
|
Post by Double Yoi on Jan 22, 2011 9:53:47 GMT -5
Belly contour is still on, just had some rough spots to sand out from the knurled "rollers" from the planer. Thanks for the vitamin E tip!
|
|
|
|
Post by irwired on Jan 25, 2011 17:36:08 GMT -5
Hi Guys I've been following this thread and thought of your project when my cousin Dave sent me this: Some cool old footage from Leo's house ;D Interesting thread and project all the best. IRW |
|
|
|
Post by Double Yoi on Jan 26, 2011 5:18:48 GMT -5
That is an awesome video, looks like it would have been fun working there, Osha wold $H1t their pants if they saw this stuff today. I like the guy smoking 25 ft from the nitro spray station,shirtless!! Thank you for posting this IR I obviously need a six foot beltsander to cut in the arm contour on my tele, should look nice in the living room.  |
|
|
|
Post by newey on Jan 26, 2011 6:14:07 GMT -5
Right at the beginning, all those stacks of straight clear lumber. . .You couldn't find that today at any price!
|
|
|
|
Post by Double Yoi on Jul 16, 2011 20:03:42 GMT -5
 [glow=red,2,300] TEASER ALERT v2.o[/glow] |
|
|
|
Post by newey on Jul 16, 2011 21:28:06 GMT -5
Well, it really is a teaser since we can't see your image . . .  |
|
|
|
Post by cynical1 on Jul 16, 2011 22:28:54 GMT -5
Well, from what I hear, this one is worth the suspense...and that's all I'm sayin'...
HTC1
|
|
|
|
Post by Double Yoi on Jul 17, 2011 7:38:38 GMT -5
Here she is, fellow nuts, I give you REMEE. 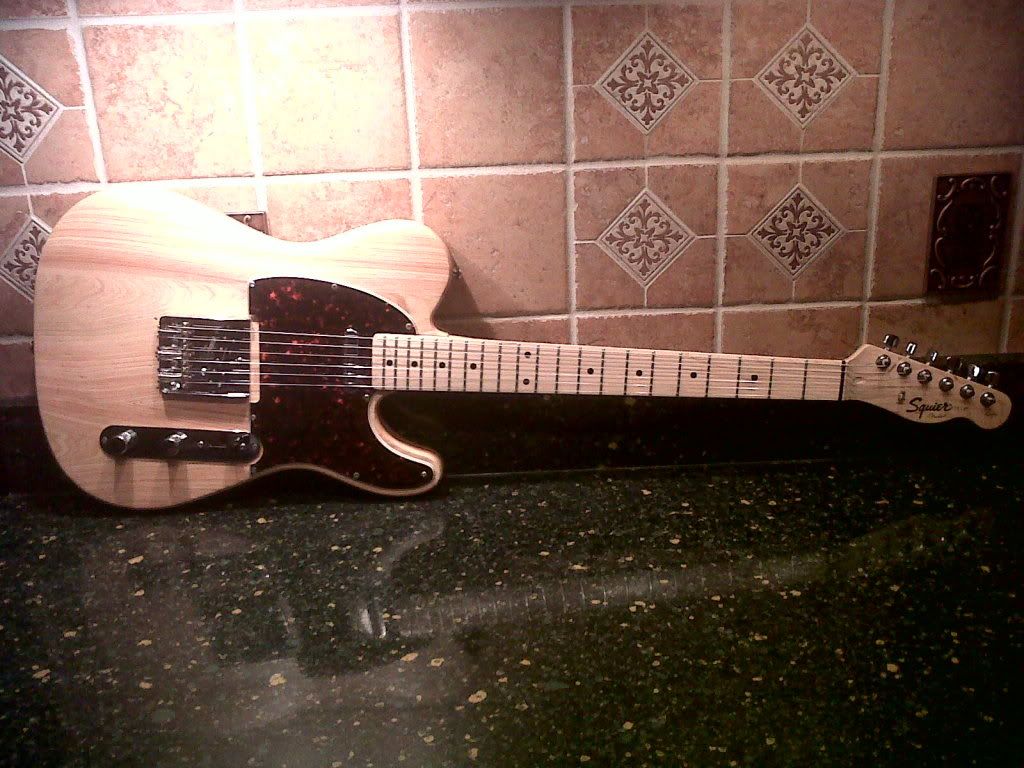 She's sporting a wilky bridge loaded with a SD little 59, stock neck pick up, and tortoise shell pick guard. 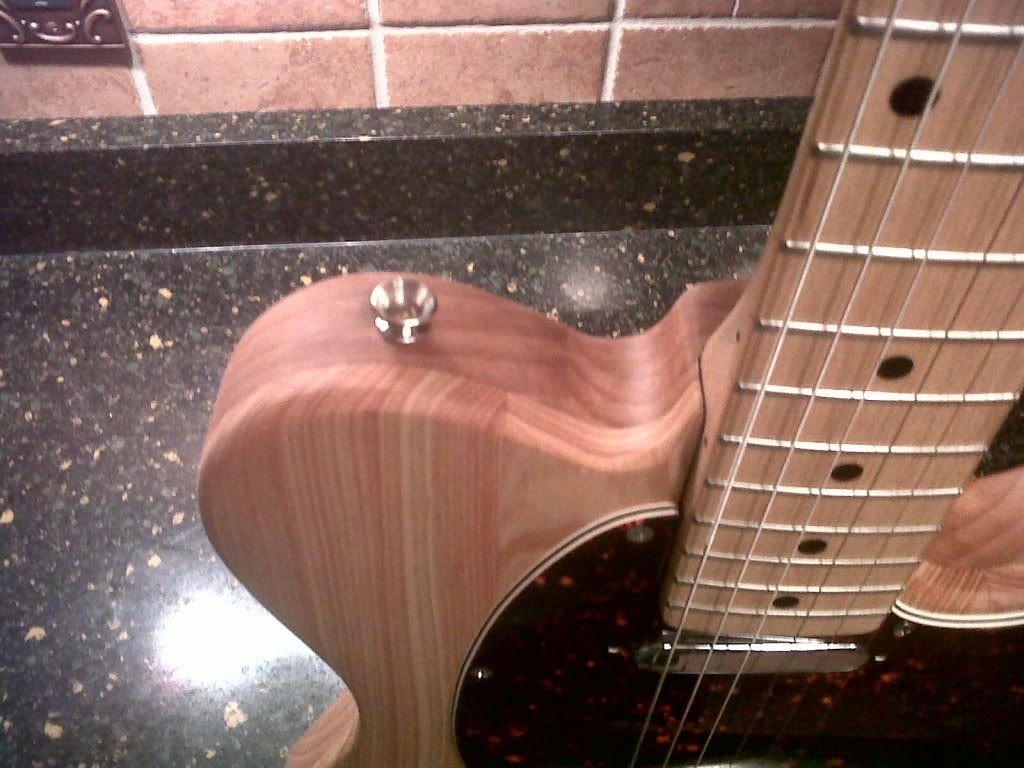 I am very pleased with the contrast as it lends a faux binding effect. It was achieved accidentally, the absorption of the beeswax/mineral spirit finish really differentiates the woods 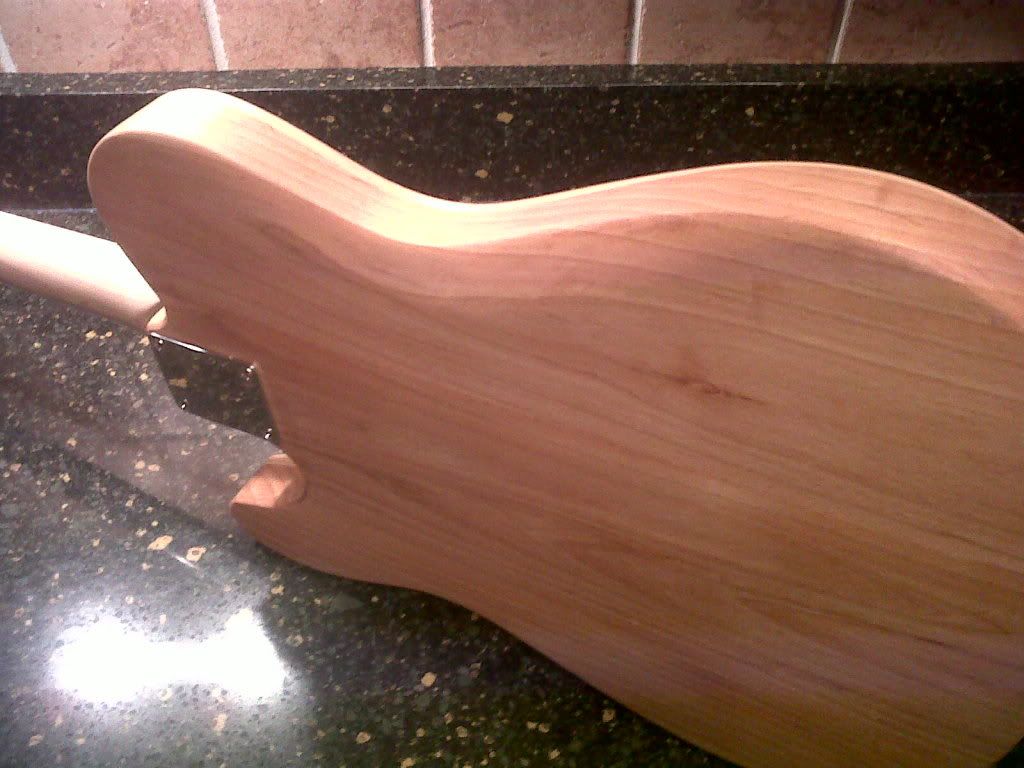 I added a belly contour, as well as a arm contour... hard to get a good picture of it.  This is beautiful wood with red,pink,orange and green grain. I have had many reservations because of its softness, but I am actually planning to use it again. The sound is very mellow on clean channels with manipulation of the tone and amp settings. The pickups are 11k bridge and 7k neck so its a hottie! It screams with a little crunch and can handle the distortion channels easily. |
|
|
|
Post by cynical1 on Jul 17, 2011 10:31:49 GMT -5
DY - That really came out nice. Very subtle on the relief and belly cuts. And the grain on the cypress is sweet. I imagine the pictures don't do it justice. A very solid +1 to you sir. And you're being very modest about the amount of work that went into this guitar. I'm not going to relay all the gory details, but everyone here should know that this was not a simple cut and paste job. There were a few obstacles along the way that DoubleYoi worked through that might have sunk those of lesser desire. And as far as the cypress goes for guitar wood, I think it was an inspired idea...even though the circumstances in it's selection may be a bit more a matter of convenience to begin with. I believe this is what the word serendipity is meant to define... You actually piqued my curiosity with this guitar, so I did a little research. Rather then clutter things up here, I posted it under Diatribe: Top caps and other voodoo...Again, very elegant looking guitar...but whatz it sound like? Happy Trails Cynical One |
|
|
|
Post by Double Yoi on Jul 17, 2011 13:12:21 GMT -5
First off, this project would have been impossible without access my Father In laws shop.
I'd bet we used $250 worth of clamps just to join top to bottom, not to mention his planer, router and bits, and hand tools. I ended up building a router table and ordering tools myself.
You are right about it not just being a cut and paste job. AND I SANDED FOR EVER!!!!!
The planning process could have been a little better concieved as well to save me the wasted hours debating what I wanted....but that was fun too I guess.
All in All well worth the hand cramps....I think I will noodle around with the wiring after I get to know her a little better in this form.
|
|