CAUTION: War and Peace refretting excerpt to follow. This might get long...
Well, asmith, you have a couple of options here. You can do a partial re-fret, a full re-fret...or pay someone to do it for you.
Before we get too involved here, there's a few things I need to know in order to properly advise on a course of action.
If you were to take a 2' (60 cm) precision metal straight end and laid it on the neck where would you spot gaps? Also, taking a 3" (76mm) metal straightedge at what frets would you encounter rocking?
I heard you say you don't want to level the frets...well, if you re-fret you'll be doing just that as part of the process...
Another thing to look for is frets that have loosened. It's not uncommon, and many times you can reseat them to solve your problem.
Many times, if the 5th fret is buzzing, it's something higher up the neck causing the buzzing. It's a common practice to put shallower frets higher on the neck to allow for lower action. Shredders will scallop the neck and put smaller frets past the octave, or at least from the 15th fret up, to allow a lower action.
What is the overall condition of your frets? Is there a section of the neck where you tend to live more then others? Are the frets from 1 to 7 worn, but the octave and above is still reasonably good...or visa versa?
Rhythm players tend to wipe out the lower frets, while lead players wipe out the higher frets. This is compounded if you play stainless roundwounds and like to bend a lot of notes. This is why I use flatwounds on all of my guitars and basses. I hate doing re-frets I'm not getting paid for...
A bit more insight in these areas will allow a better course of action for you.
Generically speaking, a maple neck costs more to re-fret, as you'll need to re-finish it when the new frets have been installed. Maple necks generally have the finish shot before the frets are leveled and dressed.
Fret wire. This is like cigars, women and music...only opinions count as there is no hard and fast standard...merely recommendations.
If you've been playing this guitar since before you had facial hair, you probably never noticed the frets wearing down. Any fret job you do will present a noticeable change to the feel of the neck. Most times this is a good change, and for the most part the comments I got back were more along the lines of "man, I should have done this ages ago..."
I would suggest hitting the local music shops and playing a variety of guitars similar to your own. Check the radius and the gauge fretwire and make your decision on what size to re-fret with accordingly.
Pulling the frets is a very straight forward. There are tools, that look like this:

They run about $20.00 US and will do the job. Myself, I use farrier's nippers, they look like this:

Once the frets are off you'll want to clean up the fingerboard. Radius sanding blocks are cheap, and a necessary evil for this project. They look like this:

Obviously, the numbers at the end denote the radius. You will want to match the radius on the block to the radius on your neck.
You'll want to clean up the fingerboard surface as much as possible without getting all the way back to bare wood. Now is also the time to clean up and dings or string gouges. If they're especially deep fill them with gel crazy glue, let it dry and resand flat with the radius sanding block. Final sanding is done with 400 grit dry sandpaper.
This is the time to take the straight edge out and make sure your neck is completely level and has no warp or twist in it. Adjust the truss rod if necessary. Proceeding with the re-fret on an out of adjustment or twisted neck is a recipe for disaster.
Now, depending on what size frets were in there to begin with, and what frets you replace them with, you will need to clean up the fret lines. This is exactly what I use:

These'll set you back about $40.00-$50.00 US. The plastic guide is great for preventing the cut from going too deep. These will be 0.023" wide at the teeth to allow a nice clean slot and still remain tight enough for the new fret to seat.
Now, there are two schools of thought on how to get the fret into the neck. A fret press is a very nice luxury. By the time you buy the fret press and the cauls you could have bought a new neck most often...
Something like this will set you back around $100.00-$125.00 US

A search for DIY fret presses can lead you to something like this:

Probably $15.00 US for the clamp and another $30.00-45.00 US for the caul...and some creative machining on your part. If you're clever you can also adapt the caul to a drill press. Remember to match the radius of the caul with the radius of your fingerboard.
You can also just hammer them in. A fretting hammer is cute, but a hammer like this from any hardware store will work.
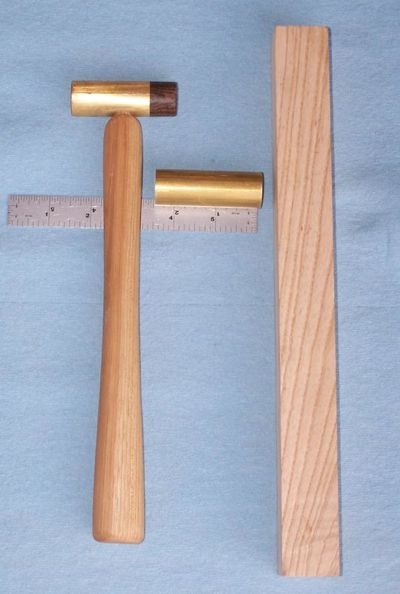
Probably around $20.00 US.
Hammering frets is not difficult, but there is a learning curve. Tap too lightly and you'll never get it to seat. Whack it too hard and you distort the fret. A firm single shot works best, but that does take some practice.
One thing you'll want to do is radius your frets to a tighter radius then the fretboard. For example, if your fretboard is a 9-1/2" radius, you might want to bend the frets to an 8" radius. This will allow the fret to seat better when you hit it.
Since you cut the fret longer then they needed to be you'll then need to trim them flush once seated firmly. That's why I use farrier nippers, but there are fret wire cutters, or a very good pair of side cutters will also do the job. Cheap tools here will kill you, so go big or stay home...
Now that the fretwire has been cut flush you'll want to dress or file the ends. You can buy all kinds of flashy little tools and accessories, but honestly, I just use a fine 8" flat files and file them flush with the wood, then c[img src="http://i173.photobucket.com/albums/w51/fnulnu/nutz/smilies/censored.gif~original" class="smile"]k it at a 45 degree angle and take the burr off and shape it by hand. You do enough of these and it's not that difficult. And on maple you're going to sand and refinish it anyways...and the nickel frets file very quickly with a good file.
Now that you've got the frets seated, the fingerboard sanded, the ends flush and beveled it's time to shoot the finish.
The tone Nazi's will storm the castle on this, but the last thing you want to reshoot this neck with is nitro...or any lacquer. It just doesn't hold up.
This is how I do it. I take a matte poly and mix it 50/50 with mineral spirits. I tape off everything but the fingerboard and wipe about 10-15 coats on it. Lightly scuffing the poly between coats. Then I walk away for a week.
Then I pull the tape and sand anything that bled through the tape. If the headstock is fine, then I tape off the fingerboard and the headstock and do the same thing only with semi-gloss poly on the back of the neck and heel. Make sure you get the finish into any gaps on the sides of the fretwire.
After a few days I pull the tape and walk away for 2 weeks. Let the poly fully cure before you start working the neck.
After the poly has cured I'll use a 400 grit wet or dry paper to blend the various finishes together smoothly. I take rubbing and polishing compound and work only the semi-gloss until it's slick as ice on metal stairs. On the matte poly I just use a 3M abrasive pad to knock the high spots off. I personally don't like a glossy fingerboard, but if you want to put a high gloss here feel free. You may also polish it out prior to leveling and crowning, but that's your call.
Now for the fun part. Leveling and crowning... There are many tutorials and methods of doing this. If they work out in the end, then they're all valid.
To be brief, take your metal straightedge and look for gaps. Then take the small straightedge and look for rocking. I should have mentioned this before you shot the finish...but hey, hopefully you read all the instructions before you started...
What I do is tape off all wood surfaces prior to leveling. Then I take a Sharpie marker and mark the tops of all of the frets. then I work from heel to nut and watch where the ink lifts and where it stays. you're gonna have more then a few passes before you get past the finish, but stay at it. Re-apply the ink as needed.
You can preform this task with the geewhiz type leveling beam, for a fast $100.00 US, or you can use a new clean honing stone about 10"-12" long. The honing stone that large might set you back 1/5 of the cost of the sanding beam. Your call.
Now that the frets are level, now it's time to crown them. There are dozens of tools out there and all of them will work. Which one depends on your skill and comfort level. The guy that taught me just used a flat jewelers file and his frets came out immaculate.
The last thing you're going to do is polish the frets. I take a 400 grit wet or dry and make about 10-12 passes to take the rough stuff out. Then I take a Dremel tool and some buffing compound with the little white polishing wheel and put a nice shine on them. done right they'll shine like chrome.
After all of this diatribe, you need to be aware that I just barely touched the surface of what's involved in a re-fret. Problems can crop up. But this will give you a very good oversight of the process and what's involved in a re-fret.
Happy Trails
Cynical One
So, now you know why re-frets are sooooooo expensive...


