yellerdawg
Rookie Solder Flinger

Posts: 21
Likes: 0
|
Post by yellerdawg on Nov 3, 2020 10:11:40 GMT -5
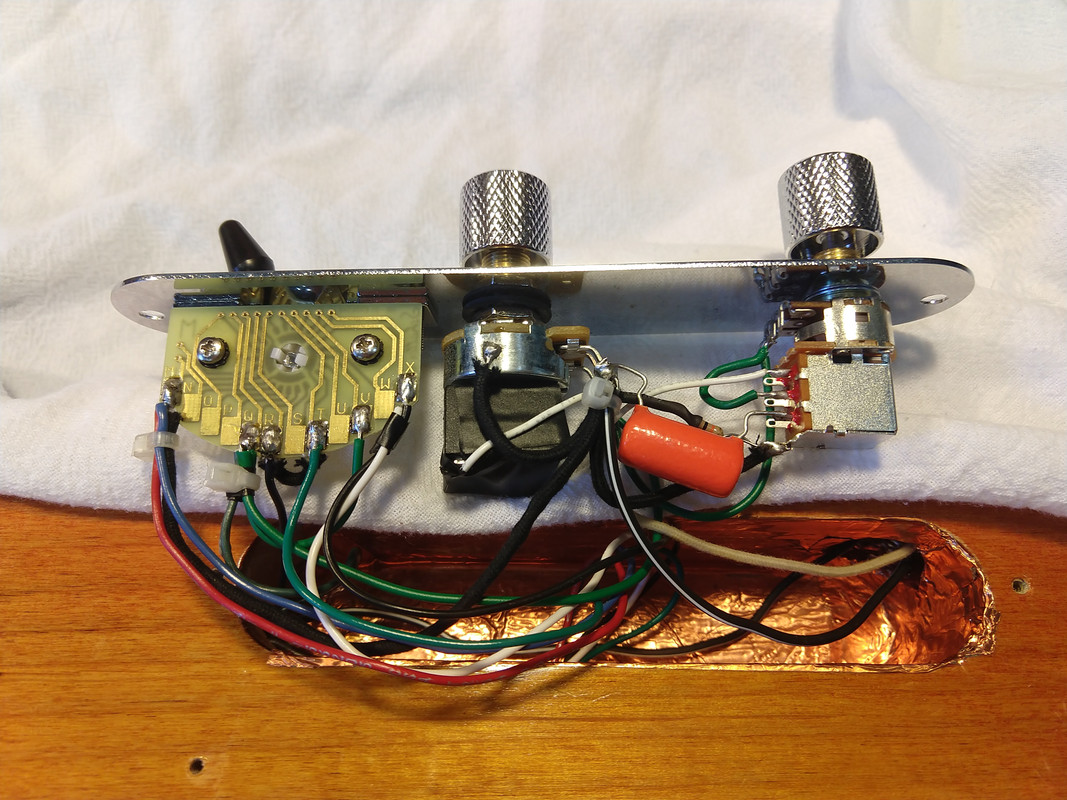
A couple of hours of soldering project turned into a couple dozen hours... Here's a bit of why. Feel free to share this as it would have been a time saver to know this stuff beforehand! For more info on the build check out the process on this threadShielding- the copper foil shielding is a great feature, but you should be careful to over-do it. many great sounding guitars have no internal shielding at all.
- the first time that we final-assembled the guitar, the signal output went dead. this was caused by the output jack shorting against the copper foil. we took some of the foil out and this was resolved. ...it is important to ensure that there aren't any little pieces of foil floating around inside the guitar.
- i used electrical tape on the back of the control plate and pickup assemblies to avoid accidental shorts to the copper foil.
Buzzing- after initially sounding great, the guitar started making a consistent loud buzz. I hunted for a wiring fault, tested and researched for hours. i made numerous wiring changes, but the buzz was unaffected. this ended up being caused by the soldering iron that was plugged in on the same electrical circuit as the guitar amp.
Cavity Routing
- on a future project, if larger cavities in the guitar body are an option, that would be great.
We ended up jamming the wired up plate into the cavity.
Assembly- initially, the neck had to be removed before the pick guard could be come off. taking the neck off repeatedly wouldn't be good and we trimmed the pick guard to make disassembly/reassembly easier.
Grounding- it's good to keep the ground path from the pickups to the output jack as direct as possible. sometimes it would be easier to daisy-chain grounds, but not as good. this is just my opinion.
Specs don't always match reality
- The wiring info from Wilde Pickups didn't match the actual pickup.
- after the guitar was up and running, a luthier suggested that the SC was out of phase. we made the change and it transformed the "mix" positions on the switch. ...expert advice is gold
 |
|
|
|
Post by newey on Nov 3, 2020 12:43:01 GMT -5
Glad you got it up and playing! All of your advice is sound, most of us have learned these lessons the hard way over many projects.
Tele cavities are very limited to deal with, and they require a good deal of "housekeeping" with one's wiring to be sure everything fits. It's hard to tell from the pictures, but it looks like you used a fairly stout wire gauge, and solid core wire? Using stranded wire and a smaller gauge can help with fitment in small spaces like a Tele cavity. I usually use 22 gauge stranded for most guitar wiring and 24 gauge works fine as well if space is an issue.
|
|
|
|
Post by unreg on Nov 5, 2020 17:31:51 GMT -5
- the first time that we final-assembled the guitar, the signal output went dead. this was caused by the output jack shorting against the copper foil. we took some of the foil out and this was resolved. ...it is important to ensure that there aren't any little pieces of foil floating around inside the guitar.
- i used electrical tape on the back of the control plate and pickup assemblies to avoid accidental shorts to the copper foil.
Thank you yellerdawg! Happy you got it to work!  I’ve experienced the same... the neck pickup is absolutely silent after I removed my tone pot from the guitar cavity, soldered two resistors, and put my tone pot back. (The bridge pickup sounds wonderful after adding resistors.) Need to check if there are any shorts... maybe add electrical tape; thank you for sharing your earned wisdom! edit: and, it also seems I need to re-solder all ground wires to the star ground paperclip bc maybe one of those wire’s solder is not doing a decent connection job. |
|
darrenvox
Apprentice Shielder

Posts: 34 
Likes: 5
|
Post by darrenvox on Nov 6, 2020 15:15:12 GMT -5
nice idea... learned lots over the years
|
|


