kingkobra
Rookie Solder Flinger

Posts: 10
Likes: 0
|
Post by kingkobra on Apr 27, 2008 23:05:33 GMT -5
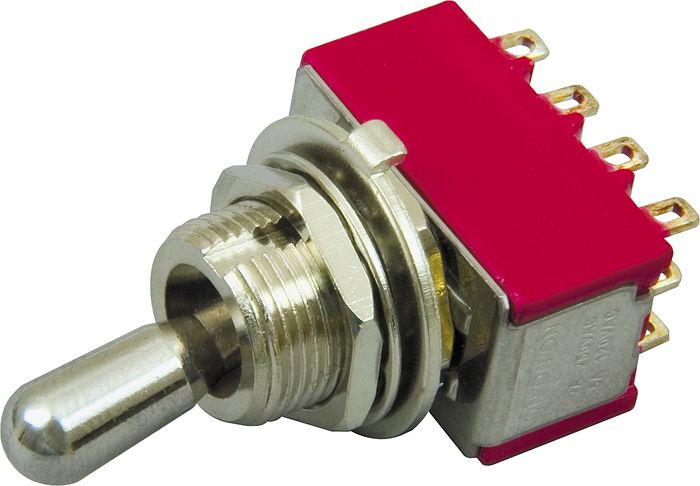
i was wondering how you would wire a mini on/on/on dpdt swith as the pickup selector
thanks.
|
|
|
|
Post by newey on Apr 28, 2008 5:08:35 GMT -5
kk-
Well, that would depend on knowing more information than you've provided. How many pickups are we talking and how do you want them selected?
|
|
kingkobra
Rookie Solder Flinger
Posts: 10
Likes: 0
|
Post by kingkobra on Apr 28, 2008 18:46:01 GMT -5
yeah that would help you guys wouldnt it.
well 2 pickups and i want neck/both/bridge
|
|
|
|
Post by newey on Apr 28, 2008 22:20:57 GMT -5
Well, that's basic enough. You don't even need a DPDT switch to do that, it's basically like std LP wiring, you can just ignore the second pole. Or, it's similar to std Tele wiring, and you can easily translate a Tele diagram to your mini switch. Our member Wolf has a site that describes the basic functioning of a DPDT switch: Wolf's siteCheck that out and, if your still stumped, post back. |
|
|
|
Post by wolf on Apr 29, 2008 2:04:29 GMT -5
Thanks newey
Actually, I think kingkobra had a DPDT on/on/on type switch which makes the wiring a little tricky but I think I solved it. I sent him an E-Mail with an attached graphic.
(I'd post the graphic here but photobucket seems to be doing some serious site maintenance at the moment).
|
|
|
|
Post by JohnH on Apr 29, 2008 15:54:56 GMT -5
You could join each of the lugs to its neighbour making three pairs, and wire that into the guitar like a standard Gibson style toggle
John
|
|
|
|
Post by ChrisK on Apr 29, 2008 18:46:14 GMT -5
O-- O-- one pickup's hot lead .... /\O-- O-- output signal \/O-- O-- the other pickup's hot lead (Ignore the dots.)  (But not the dashes.) Photobucket, nah, text bucket! 
|
|
|
|
Post by wolf on Apr 30, 2008 0:42:59 GMT -5
Finally, here is the graphic:  The red lines indicate which terminals are conducting and the black line is a "jumper" wire from the bottom right to the middle left terminal. My solution works with only 4 of the terminals being soldered. However, Chris K's solution requires 6 solder connections but has the advantage of avoiding the non-working condition illustrated in the fourth drawing. Just for clarity, I think Chris K's wiring deserves a graphic:  where the three silver horizontal lines are the jumper wires from the left terminals to the right terminals. Good solution Chris K.
|
|
|
|
Post by ChrisK on Apr 30, 2008 18:11:45 GMT -5
wolf, Your jumpered solution is interesting.........heh, heh, heh! If you use that "free" jumper (the longer stripped end of the output wire) to connect both middle terminals (the slots be with you - at least they line up), you only have to connect two other terminals for a total of four. I did all six since redundant is (and one can then completely ignore the actual internal switching). What you have not shown is the original wiring for the SP3T toggle switch which, along with a different jumper, selects one of three things. One could use it to select an original Strat-like pickup selection such as neck, middle, or bridge. One can do many one of three things with it. In fact, this is how this switch came about; it was originally developed as an appliance switch to select three things such as motor speeds. Carling, scroll down to switches makes a sequential DP switch that has both SPST terminals off at one end position, one on in the middle position, and both on at the other end position. It's great for a tube amp off, filament on standby, and plate B+ on in the same switch. BTW, how you show the switch in the "silent" position is actually how the switch looks like in the middle position from the terminal view (and the view that I always use to denote such switch). |
|
|
|
Post by wolf on May 1, 2008 1:53:24 GMT -5
Chris KWell that was quite a lengthy reply. I didn't post the 3 pickup option because I think I posted it in another topic and it is not what kingkobra wanted. Anyway here is a graphic from my website www.1728.com/guitar3.htm Interesting that you said the switch was originally designed for appliances. I always thought it was designed specifically for series / coil cut / parallel guitar pickup wiring.
|
|
|
|
Post by ChrisK on May 1, 2008 12:42:24 GMT -5
Otherwise known as the "selecting one of three things" application.
This is why the switch is originally referred to as a SP3T switch.
From its appliance background, this switch is usually only available with silver contacts. Silver oxidizes (that's why folk polish it) and requires a wetting current to keep (as in guarantee) the contacts clean. Generally speaking, these misapplied switches generally work with passive guitar signals, but I always use the 0.4 VA rated gold contacts if I can find them.
No, few of any of the original components (and not nearly as many as one might hope of the newer ones) were actually designed for guitars. The usage as a pickup modification switch has an annual volume significantly under that that might spawn a custom switch.
I never understood the Kent Armstrong special Brian May switch (12 terminals comprised of a ST3T (DPDT Center-ON, ON-ON-ON) and a DPDT Center-OFF (ON-OFF-ON). Not only is this switch not required to do this switching scheme, it has nowhere near the volume that would rightly spawn a custom switch.
I suspect that it was done because it could be done! The innards of these mini toggle switches have similar terminals. The only thing that differs is the moving contact. The mechanical bias point is shifted between the one that hangs unconnected at both ends in the middle toggle position and the other that contacts one end terminal at one extreme and the other at both the middle and the other extreme.
There are only three moving contact types. One "floats" in the middle position, the second "favors" one end in the middle position, and the third has no middle position. Our switch is just two of the second with one rotated 180 degrees (200 gradients to the UK folk).
The original lever switch, in its "vintage" three position form and glory, was used with one end position being spring return to center. These were used in the vacuum tube inter-office intercoms of the 40's. Momentary down was "talk", center was "listen" (all listened unless one was set to talk), and up (stable, not momentary) was "dictate" (the first "hands free" if you will).
Leo used "available technology".
|
|
|
|
Post by pete12345 on May 1, 2008 16:24:42 GMT -5
There are only three moving contact types. One "floats" in the middle position, the second "favors" one end in the middle position, and the third has no middle position. Our switch is just two of the second with one rotated 180 degrees (200 gradients to the UK folk). We use degrees over here too Unless you're doing a higher level maths problem, in which case its those silly radians  |
|
|
|
Post by ChrisK on May 1, 2008 20:13:28 GMT -5
I know, radians rule.
Omega is.
Gradients are a vestigial British method of dividing a circle into 400 increments. This is odd since many of the earliest counting systems were based on 12 (halves, quarters, and thirds actually work out).
|
|
eric
Rookie Solder Flinger
Posts: 5 
Likes: 0
|
Post by eric on Jan 7, 2017 0:55:20 GMT -5
Ok, I'm bumping this thread from the past because it deals with an exact dilemma I'm having. So glad I found this thread.
I have a Fender EVH Wolfgang; 2 Humbuckers, 1 volume, 1 tone, and the "Les Paul style" 3-way toggle switch. This switch is cutting out on me (common problem according to my searching). I'd like to replace it with an on/on/on mini toggle switch exactly as the original poster mentioned.
So, this thread explains everything I need to know.....except, what do I do with the ground wires from the two humbuckers and the volume pot (or possibly output jack---not exactly sure)? On the "Les Paul style" toggle switch currently in the guitar there is a ground "post" that all three ground wires are soldered to. If I switch to a mini toggle switch as explained in this thread, where do I solder the ground wires?
As to not leave any information out and to be ultra-specific: coming into the toggle cavity on the back of the guitar are three wires. Two black, and one gray. The black wires are from the humbuckers (one wire from each), and each have a red and black wire inside it. The gray wire is the output wire, and has a brown wire and black wire inside it. All of the black wires are soldered to the ground post of the 3-way toggle switch. Each of the red wires is soldered to an outside post of the 3-way. The brown is soldered to the inside post of the 3-way.
Any and all help is appreciated. I've been trying to research this for days and can't figure out what to do with the ground wires if I switch to a mini toggle on/on/on switch.
|
|
|
|
Post by newey on Jan 7, 2017 8:58:56 GMT -5
eric-
Hello and Welcome to G-Nutz2!
First off, if the guitar currently has an LP-style "big toggle", why not just replace it with the same? The mini-toggle style switches are smaller and won't likely fit in the hole properly.
But, if you are truly intent on using a mini-toggle, there are many of these which have a chassis grounding point just like the LP switch does- it's a little metal tab on the backside of the switch. However, it can be difficult to solder three separate wires to the tiny tab. The sole purpose of this is to ground the chassis of the switch for (theoretical) noise reduction.
If your particular mini-toggle does not have the grounding tab, the switch chassis doesn't really need to be grounded- there is a slight chance of some extra noise without it, but it's usually not a big deal. You can simply ignore the switch chassis entirely and just connect the three black wires together. If you do so, tape off the connection to avoid the wires touching the hot contacts of the switch as you install it back into the guitar. (Use electrical tape, other types of tape may be electrically conductive).
|
|
eric
Rookie Solder Flinger
Posts: 5
Likes: 0
|
Post by eric on Jan 7, 2017 10:51:23 GMT -5
eric- Hello and Welcome to G-Nutz2!First off, if the guitar currently has an LP-style "big toggle", why not just replace it with the same? The mini-toggle style switches are smaller and won't likely fit in the hole properly. But, if you are truly intent on using a mini-toggle, there are many of these which have a chassis grounding point just like the LP switch does- it's a little metal tab on the backside of the switch. However, it can be difficult to solder three separate wires to the tiny tab. The sole purpose of this is to ground the chassis of the switch for (theoretical) noise reduction. If your particular mini-toggle does not have the grounding tab, the switch chassis doesn't really need to be grounded- there is a slight chance of some extra noise without it, but it's usually not a big deal. You can simply ignore the switch chassis entirely and just connect the three black wires together. If you do so, tape off the connection to avoid the wires touching the hot contacts of the switch as you install it back into the guitar. (Use electrical tape, other types of tape may be electrically conductive). Oh my gosh....I was so concerned with the wiring that I didn't even think about the physical fit! I just assumed it was the same. I guess I will have to look for the LP-style toggle switch. The reason I wanted to switch to the DPDT was, I guess, because I thought it was better. When the current toggle switch started cutting out, I took it out to inspect it and clean it. The whole concept of the thin metal leafs making or breaking contact as the toggle was moved from side to side seemed kind of cheap to me. And the "wiggle" or "play" from the actual toggle itself was annoying. I wanted something stiffer. Something more definite; a positive connection. (Not positive in the electrical sense, but the physical sense). For instance, when the toggle is in the down position for the bridge pickup and I go to flick it all the way upward for the neck pickup sometimes it's "sloppy" and crackles or pops. Sometimes the toggle won't stay in the top position and pops back down one step to the middle position, again, popping and crackling. I thought maybe with a DPDT switch (or SPDT as I've learned in this thread---a mini toggle of some type, regardless) the actual act of selecting pickups would be better. I suppose I could reduce the toggle hole in the guitar from 1/2" to 1/4" somehow, maybe at least with a washer, but I don't know if I really want to do that. Well, I appreciate the response and help. I'm sure I'll have other questions, and if I can't find the answers using the search function I'll be sure to post them. |
|
|
|
Post by newey on Jan 7, 2017 21:31:52 GMT -5
Yes, the classic Gibson-style "leaf spring" 3-way switches don't always have that positive "feel" to them. Exactly, I'm with you. But this doesn't mean a mini-toggle DPDT on-on-on is needed. There are regular-size toggles that don't have the leaf spring design, and which will operate just like the DPDT mini. www.guitarpartsonline.com/Toggle-Switch-3-Way-Chrome-Your-Choice-of-Tip-Color-2052.htmI don't know that this particular switch is actually stiffer to operate, or has a more positive feel to it, I posted it as an illustration that not all toggles are like the Gibby 3-ways. |
|
eric
Rookie Solder Flinger
Posts: 5
Likes: 0
|
Post by eric on Jan 7, 2017 22:04:28 GMT -5
Excellent. Thanks for the help!
|
|
|
|
Post by reTrEaD on Jan 7, 2017 23:05:08 GMT -5
|
|
eric
Rookie Solder Flinger
Posts: 5
Likes: 0
|
Post by eric on Jan 7, 2017 23:16:32 GMT -5
I assume I'd have to solder a lot of jumper wires. (I'm not splitting, tapping, or phasing). |
|
|
|
Post by reTrEaD on Jan 7, 2017 23:27:03 GMT -5
I assume I'd have to solder a lot of jumper wires. Not so much. Just depends on what you want the switch to do for you. (I'm not splitting, tapping, or phasing). Probably not worth the money for your needs. That thing is thirty bucks. |
|
eric
Rookie Solder Flinger
Posts: 5
Likes: 0
|
Post by eric on Jan 7, 2017 23:52:55 GMT -5
Yeah, I think I'll pass on that one, ha!
|
|