|
|
Post by ssstonelover on Aug 4, 2022 2:49:43 GMT -5
Hi Frets, Ah, slather on, as in slather on the superglue Easier to show than to write about. I got it from this video some years ago. Yes, it's about a classical guitar, but Brazilian Rosewood has as many (or more) open pore than open grain woods, so it's applicable on a solid body electric, and use basically the same idea, but with an old credit card for spreading out the glue. Since it usually goes on tope, bottom, and sides, I end up using ~1/4 of the bottle (of the 2 oz. size). The part of the video on spreading it, to answer your question, is after about minute 2. 2P-10 as a grain filler |
|
|
|
Post by cynical1 on Aug 4, 2022 11:32:59 GMT -5
...I suspect cynical1 will have something to say on the subject . . .  My reputation precedes me... Let me just say this...well, maybe a bit more... The reason you put ANYTHING on wood is to protect it from moisture, dirt and contaminants. The quality of that protection is based on the durability and resilience of said protection. Oil is easy. Oil is hard to screw up. Oil needs to go on every so many years based on the conditions said protection encounters. Oil can be a challenge to refinish...unless you use more oil. Typically you need to put a coat or 2 of shellac down before you can confidently apply a coat of lacquer or varnish Lacquer normally takes about 10-20 years to deteriorate or crack. Less if you sweat like a horse and don't own a towel. Lacquer has a very cool property that repairmen love. Because of the acetone base it essentially melts into the previous coats of lacquer. You can also leave clear lacquer in a clear glass jar in the sun and let nature darken it to match repairs on older guitars...or make a new guitar look older. It looks cool on necks, but see below for why I stopped using it on necks. And, the longer you spray it the fewer brain cells you have, so politics are much more engaging... Varnishes are just any solvent with a resin that remains behind to polymerize into a hard coating. Polyurethane uses a plastic. There are many others...and the Internet contains them all, so I'll leave this at that. Epoxy is cool for fretless fingerboards and filling burls and some flashy artsy fartsy stuff, but it's really too damn hard and expensive to make it cost effective. I can accept oil on a body. The worst thing that happens is wherever your body touches it you'll effect the finish, but nothing tragic typically occurs. The neck is a different matter. According to an interview I read, Nuno Bettencourt built his first guitar with no finish anywhere and loved it. Now, he can make a call and get another one from Washburn if the neck goes wonky. The neck is the part you're always touching with oily, sweaty fingers and palms. (OK, so some of you don't sweat, Andrew) This is where you really want the most protection. You spent the most time building it, the player will be all over it, so what would make you assume such a low impact protection would be sufficient here? OK, so I had to get one more shot in... Somewhere in the bowels of this site is the process in detail on how I do necks...and I can elabotate if your Google-Fu is weak...but essentially I take polyurethane and thin it 50/50 with mineral spirits and wipe it on the neck. Suspending it first makes the process easier. I use a gloss for everything but the back of the neck get 2-3 coats of matte. Since you thinned it 50\50, you're going to need to put twice as many coats on. It dries level (provided you didn't slather it on) and it cleans up with less effort because the thinner allowed it to level smoother than it would in its original viscosity. Sand and polish the glossy part and just steel wool the back. Pretty, easy and fast as Hell to play...for 20-30 years easy... Happy Trails Cynical One |
|
|
|
Post by gckelloch on Aug 4, 2022 12:31:07 GMT -5
I am a total amateur at finishing, but Tru-Oil is just mineral spirits, Urethane, and boiled Linseed Oil. It's used on gunstocks. It penetrates, seals and dries hard after about a week. I don't imagine it would have to be reapplied after a few years. Not sure there is any advantage to the oil part other than how it looks and feels, but it might also aid in grain penetration. Nice for the back of the neck. I have an Agile ST-625EB I think just has thinned Urethane on the back of the neck, and that feels great too.
Thinning Urethane with mineral spirits definitely sounds like a better idea for the body. I assume you can spray 1K Acrylic over that if you want?
|
|
|
|
Post by frets on Aug 4, 2022 22:50:25 GMT -5
This has been a really interesting and informative thread concerning finishes.
ssstone lover, I now understand and that indeed is slathering. I like the technique and plan to use it in the future. Cynical, I am just starting to try finishing a body with true oil, a black walnut. But I will heed your advice on the neck. I have always used superglue on my necks but want to try your thinned poly method.
|
|
|
|
Post by gckelloch on Aug 4, 2022 23:51:55 GMT -5
This has been a really interesting and informative thread concerning finishes. ssstone lover, I now understand and that indeed is slathering. I like the technique and plan to use it in the future. Cynical, I am just starting to try finishing a body with true oil, a black walnut. But I will heed your advice on the neck. I have always used superglue on my necks but want to try your thinned poly method. Sorry to but in, but my Tru-Oil'd neck feels a bit slicker than the Agile neck. You might use it on the neck back if you aren't filling the grain with super glue and won't apply anything else over it. It's great on Maple. I haven't tried it on anything open-grained. I assume you aren't finishing the FB...which is? Black Walnut body, huh. I almost chose that for the Bari Jagcaster, but I was worried about weight. The Black Limba is really light. I'll post some pics in the appropriate thread. |
|
|
|
Post by cynical1 on Aug 5, 2022 5:13:48 GMT -5
I should mention that thinned poly is just that when it dries, in that the coats are much thinner than poly out of the can. Forgetting this when you sand it out leads to an "Oh Scheiße" moment... I start with 800 grit and work up slowly...especially on the on sides and edges. I typically don't touch the edges until I get to 1200 grit...too many "Oh Scheiße" moments I guess...
It also takes about 3 weeks until you can buff it out. (GOLDEN RULE: Until you can put your nose on it and not smell solvent, you can't buff it out) Unlike lacquer, poly will never give you a mirror finish. It will be as glossy or dull after buffing as it was when you applied it. All you're doing is leveling and dust, debris or runs out of the finish. This is because poly is designed to be resistant to abrasion. Another reason never to use 400 grit when initially sanding out poly. Getting those 400 grit scratches out sucks...
I love black walnut. Back in the 70's Alembic introduced their "natural wood" basses. This is also when I discovered that working and sanding some of these exotic woods was a practice akin to sawing railroad ties with a chainsaw in August...in shorts. Many of these trees have chemicals which naturally repel parasites and insects. These are the same chemicals which irritate humans, too. This is what I love about black walnut. You can introduce a dark wood without developing a respiratory or skin condition...
I've never oiled black walnut, but I suspect you'll visually lose a portion of the graining the wood had in the process. One of the guys who taught me on the way up used the same technique you would use when you glue an oily wood, like rosewood. Prior to oiling a dark wood (actually, he did this on everything...) he would always wipe it with acetone. His take was he didn't want the natural oils in the wood or oil from his hands to restrict the saturation of his finish oil into the wood. He also hit it with a heat gun first. While this is all empirical, I will say, he was able to get a better luster out of it than I ever did with oil.
HTC1
|
|
|
|
Post by frets on Aug 5, 2022 11:17:59 GMT -5
Cynical,
I’m really not losing any graining. At least that’s what I’m seeing. I’ll shoot some pics when it’s done.
I had a question for you (and others familiar with black walnut, like ssstonelover). It’s an SSS Strat design and I unfortunately routed it for a pickguard. I just wasn’t thinking at the time and before I knew it I had the channel routed going to the middle pickup. Anyway, the only pickguard I can think of would be black. But I think that would just visually “weigh down” the look.
I was thinking of some wood pickguards like a Spalted with hues of black and grey in it. Can you think of a wood or ? that would accentuate the black walnut without giving it a dark, heavy, oppressive feeling to it? I’m welcome to any ideas.
|
|
|
|
Post by newey on Aug 5, 2022 13:05:58 GMT -5
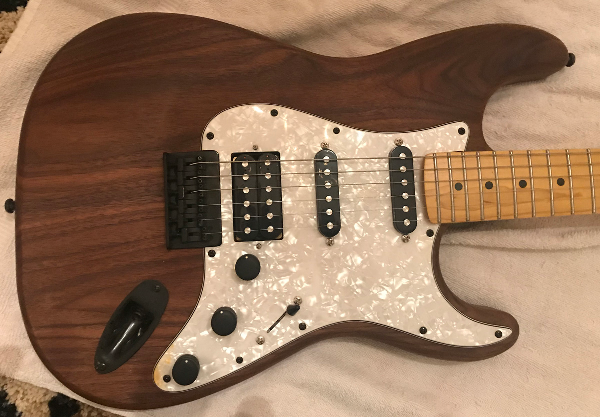 I think the white pearloid looks good with the black walnut. Maybe could get one that's more like an ivory pealoid, could be a bit darker. For wood, why not just go black walnut? It won't match exactly but would probably look cool.  |
|
|
|
Post by b4nj0 on Aug 5, 2022 13:34:44 GMT -5
@cyn1, Zebrawood might work for a pickguard because you have those distinct dark grain lines running through it. Here's my 'bird for a taste:  But as newey suggested: 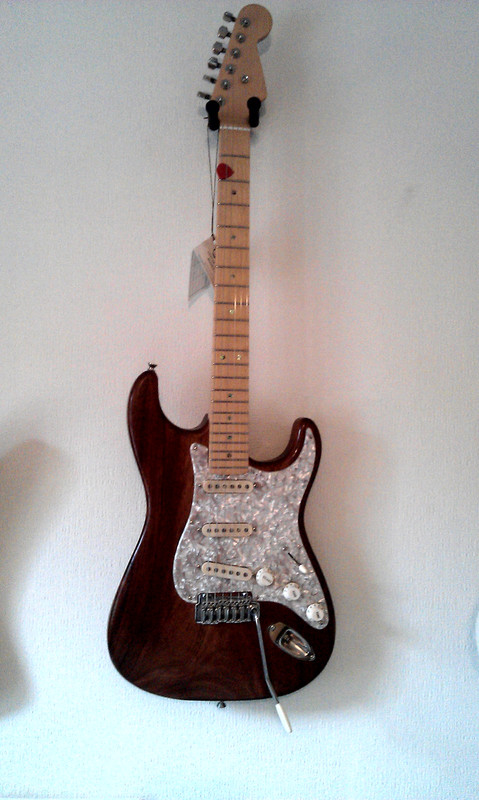 Which is a Warmoth celluloid guard on a Schecter one piece Koa body/Warmoth neck. The Warmoth guard is very slightly "brown" tinted. Maybe something a little less flamable though ... Fess up time; the attentive might spot the error I made in this thread (that frets initiated about opinions on a Schaller bridge) when I wrote that this guitar had a Callaham bridge? It's actually a Wilkinson, and the Callaham is on my '73 Strat. Advancing years and a surfeit of guit fiddles I guess? Choices choices! でつ e&oe ... |
|
|
|
Post by gckelloch on Aug 5, 2022 14:20:55 GMT -5
|
|
|
|
Post by frets on Aug 5, 2022 17:47:45 GMT -5
Those are really awesome recommendations, thank you guys. Cynical, I have that exact pickguard on another guitar and your right, it would match. I like the metallic idea and never thought of a white pearloid.
Deciding on the neck is a challenge on whether to go dark or light. I have two mahogany necks, one with a mahogany fretboard and the other with a Pau Ferro fretboard. I then have a tiger maple with a Pau Ferro Fretboard. Lastly, I have a ambrosia maple with a flame maple fretboard. I’m tending toward light.
|
|
|
|
Post by gckelloch on Aug 5, 2022 20:25:41 GMT -5
The Mahog fretboard might absorb a lot above ~2kHz. I wouldn't. The ones with Pau Ferro FB's sound smart; the Mahog neck likely having less upper-mids. The Ambrosia maple neck could end up warping. I wonder if adding CF rods from the back would be possible without a CNC? That and filling the canals with something very rigid might be a good idea.
|
|
|
|
Post by cynical1 on Aug 6, 2022 4:34:42 GMT -5
The more I think about it, if you already have the ambrosia fingerboard glued to the neck and it requires you to pull it and re-apply a fingerboard...you might just want to leave it... I know we talked a lot of merdo here, but at this point pulling the fingerboard is a lot of work for an arguably marginal change in performance...
I had a few thoughts this morning...so at my age, I figured I better write them down...
1.) If you're using jumbo frets...unless your touch is like a death grip...there should be minimal string contact with the wood. Probably not going to be an issue with a hard finish applied.
2.) Tape off everything but the fingerboard and hit it with a coat of wood hardener prior to applying a hard finish. This will offer a bit of a firmer, more consistent surface to absorb abrasion. Part of me thinks doing this after cutting the fret slots may help them grab and stay better, but that's just speculation on my part with no practice to confirm it...
2.) You could wipe epoxy on the fingerboard. (you can also use wood hardener first. The marine epoxies I used never had a problem with it) Just use extra retarding agent in the epoxy so it levels. Sanding epoxy should be a formal corporal punishment...
3.) Scallop the neck. This makes the fingerboard material inconsequential...
4.) Screw the fingerboard. Set the nut for a slide guitar and the problem is less of a problem.
Long and short of it is you have a neck that is structurally reversed, in that the harder wood is the neck and the softer wood is the fingerboard. I really think that unless this guitar goes out on tour for 5 years you won't experience any significant issues. Just keep your string gauges light and enjoy.
HTC1
|
|
|
|
Post by frets on Aug 6, 2022 12:17:00 GMT -5
That makes me feel so better to know I can still use that neck. And I have another just like it. Thanks Cynical. The jumbo frets are already on it and completely dressed. I will hit it with the wood hardener (with a small paint brush) but the epoxy will not work out. Could I do a couple of layers of thin superglue?
|
|
|
|
Post by gckelloch on Aug 6, 2022 16:12:50 GMT -5
The more I think about it, if you already have the ambrosia fingerboard glued to the neck and it requires you to pull it and re-apply a fingerboard...you might just want to leave it... I know we talked a lot of merdo here, but at this point pulling the fingerboard is a lot of work for an arguably marginal change in performance... I had a few thoughts this morning...so at my age, I figured I better write them down... 1.) If you're using jumbo frets...unless your touch is like a death grip...there should be minimal string contact with the wood. Probably not going to be an issue with a hard finish applied. 2.) Tape off everything but the fingerboard and hit it with a coat of wood hardener prior to applying a hard finish. This will offer a bit of a firmer, more consistent surface to absorb abrasion. Part of me thinks doing this after cutting the fret slots may help them grab and stay better, but that's just speculation on my part with no practice to confirm it... 2.) You could wipe epoxy on the fingerboard. (you can also use wood hardener first. The marine epoxies I used never had a problem with it) Just use extra retarding agent in the epoxy so it levels. Sanding epoxy should be a formal corporal punishment... 3.) Scallop the neck. This makes the fingerboard material inconsequential... 4.) Screw the fingerboard. Set the nut for a slide guitar and the problem is less of a problem. Long and short of it is you have a neck that is structurally reversed, in that the harder wood is the neck and the softer wood is the fingerboard. I really think that unless this guitar goes out on tour for 5 years you won't experience any significant issues. Just keep your string gauges light and enjoy. HTC1 Sounds like a good plan, but for one thing. Scalloping might interesting to try on either neck, but I don't think it's fingers pressing on the FB that cause damping as much as the integrity of the wood under the frets. I'm not sure it would be worth applying anything over the hardener, as it will have already stiffened/strengthened the surface fibers as good as can be, but brushing several coats of Polyurethane or Polycrylic over the frets may give it more of the 4kHz+ "sparkle" of a lacquered Fender Maple neck if desired. I've read that Polycrylic is harder stuff, but technically more prone to cracking. We are getting into splitting hairs tonally, but I'd want the harder finish for the sparkle if will stick to the wood hardener. Fender necks used to come lacquered over the frets back in the day, and it had to be scraped off. I did that myself to an Ibanez neck in the mid-'80s. I just had to scrape the strings back and forth on the frets to clear off the frets, but I think I used water-based Poly. If you can spare some waste, it might be worth pressing the hardener nozzle against the frets and squirting it right into the edges, or you could just squeeze it into the edges with a putty knife. Might not make a difference, but who knows? |
|
|
|
Post by frets on Aug 6, 2022 17:30:07 GMT -5
Gc😸😸😸,
That’s a good idea. I had thought about using superglue over the fretboard after the hardener had set for a while. At any rate, this hardener and top coat method will save 3 neck builds. I’ve never sold a guitar with a Spalted or ambrosia fret board. But it was one of those things where I had it and thought “why not.” I was planning on using one to sell but thank heavens, you guys caught me before I did it. Although I do a fair amount of woodworking, the finer details about wood I do not know. I was great you guys caught me and educated me. Thanks again to you all.
- Cindi
|
|
|
|
Post by gckelloch on Aug 6, 2022 18:44:50 GMT -5
Gc😸😸😸, That’s a good idea. I had thought about using superglue over the fretboard after the hardener had set for a while. At any rate, this hardener and top coat method will save 3 neck builds. I’ve never sold a guitar with a Spalted or ambrosia fret board. But it was one of those things where I had it and thought “why not.” I was planning on using one to sell but thank heavens, you guys caught me before I did it. Although I do a fair amount of woodworking, the finer details about wood I do not know. I was great you guys caught me and educated me. Thanks again to you all. - Cindi I am certainly an amateur at guitar building, but I've been involved with woodworking on various levels since the mid '7o's when I first built some projects in my dad's basement shop, and then worked in home renovation for a while. I did a good amount of research b4 finishing my Jagcatser body. Polycrylic was just the easiest choice, and I had to do some finagling during the process because I thought the water-based wood dye I used would not dilute when I brushed on the Poly. It came out OK in the end, but not as deep & rich as I had hoped, and I discovered during the staining that the body was actually a three-piece, rather than the two-piece I had specified in my order! It's a very lightweight guitar, and it sounds good. It has a particularly dark and straight-grained Pau Ferro FB, and the baked Maple neck has a nice flame. I'll go post some pics now. Two things about applying a finish over the hardener to consider: 1) You'll likely have to sand the hardener with (~400g?) so the Poly will stick. Again, I don't know if a water-based poly will stick to the hardener. I assume you'll need to tape over just the frets by cutting them out with an Exacto after laying strips of masking tape along the FB. Even if you tape under the sides of the FB to prevent the hardener from seeping onto the neck, some hardener will still get on it, and you may need to rebuff the fret ends after sanding it off. I'm not sure if you should do all that b4 finishing the back of the neck, but I imagine so. 2) After you sand the hardener, I assume you would want to take the tape off the frets b4 brushing on the poly. Then you can just do the recommended very light sanding between coats without ruining the fret job, but be very careful sanding on the frets. It may not be worth applying the poly at all -- so much extra work and potential problems. Maybe ask if a potential customer actually wants it? Most guitars do not have a finish over the frets, and most guitar players wouldn't know or care either way. |
|
|
|
Post by cynical1 on Aug 7, 2022 4:45:04 GMT -5
I must admit, I never bought into cyanoacrylate glue as anything more than a decent filler for wood...if it comes in a gel state...and if it plays nice with my final hard finish. Granted, you can't permanently adhere a hard hat to a goal post with wood hardener...but I never really saw the utility in that practice anyway... Now, gluing dimes to payphones was fun...but try and find a payphone today... I've seen videos of people using it on a fretless fingerboards in place of epoxy. I see that as very little time invested for an acceptable result. Jaco played roundwound strings on a fretless coated with marine epoxy. I would submit that the same fingerboard coated with cyanoacrylate glue would suffer a premature failure under the same conditions... Rather than rail on, let me take it this way. If I bought this neck from you, as is, this is what I'd probably do with it. 1.) Tape off the neck, brush wood hardener on the fingerboard. This would be to add some dimensional stability just in case the beetles compromised anything. Wood hardener is very thin and likes to run everywhere...it's like painting with water on glass. Brush it until it stop wicking in. Because the frets are in place I would wipe the surface once it stopped wicking. It's done its job wicking in, no need to leave anything to clean up later. 2.) With luck, after wiping the residue off, I shouldn't have to sand it. I might just take a 400 grit abrasive pad to just clean it up...yeah, I'd probably do that anyway...old habits... 3.) I think I waited a month last time I did a project similar to this...but that may be because I was just busy on other stuff...before I finished it. I would just finish it with the wiped poly method described above. 4.) Once all the sanding and polishing is done I'd tape the fingerboard, grab my Dremel tool with the fiber wheel and polishing compound and do a quick pass on the frets. This takes care of the poly and makes them super slippery and they'll shine like chrome. 5.) Bolt neck to body and play. Side Note: Don't pour the wood hardener into a plastic cup to brush it on...it'll melt the plastic...and it never washes out of jeans...don't ask me how, but I know this... HTC1
|
|
|
|
Post by cynical1 on Aug 8, 2022 5:50:33 GMT -5
I just noticed something I first missed in GC's post mentioning water based finishes. I'm not out to save or destroy the world, it can that on its own without my VOCs in the air, but there is something you need to be aware of with any water based finish or colorant. (Dye or stain) Water based products on wood will raise the grain. Not so much an issue with close grain woods like maple, but a pain in the azeno on course grain woods like ash. You can use this to your advantage. A trick I fell into with wood dye goes as follows. Make your first pass with a black wood dye mixed with water. Let it sit until COMPLETELY dry. Sand until smooth. Make your following passes with wood dye mixed with denatured alcohol with your color(s). Denatured alcohol in the dye will not raise the grain. Do this on a quilted maple you get this:  Pretty cool 3D effect, huh. There are other ways to get this effect, but this is the easiest I've found. I use TransTint dyes, which makes this process as simple as it sounds. Your mileage may vary with other products. Buy a good mask and work in a well ventilated space. Your sandpaper will thank you. HTC1 |
|
|
|
Post by frets on Aug 8, 2022 12:52:36 GMT -5
Cynical,
That is absolutely stunning. Are you using any other prep materials prior to using the black dye (like a grain filler). I use a lot of Swamp Ash. It’s kinda my go to wood; but I typically like to go the naked route with the grain raised; but, I’d like to do a completely smooth finish.
I’ve got another Swamp Ash body that I finished a out a week ago. Oversized Strat type. I planned on using Crimson’s Stunning Stains in green. What should my prep look like to make it look more professional?
And, what top coat did you use on that gorgeous quilted?
|
|
|
|
Post by newey on Aug 8, 2022 12:55:32 GMT -5
frets- While cynical1 has been following this thread, probably a good idea to "tag" him, as I just did, so he sees your questions sooner.
|
|
|
|
Post by frets on Aug 8, 2022 12:57:37 GMT -5
I have no idea how to tag.
|
|
|
|
Post by newey on Aug 8, 2022 14:46:37 GMT -5
frets- Two ways to do so; You can simply type the "@" symbol directly in front of any member's username. When you do so and then post your thread/reply, the user so tagged will appear in blue, just as your username does above. The user then gets a notification when they next log in (or refresh the page) that they have been so tagged, and can click a link to go directly to the thread in question. Option #2 is to use the tagging button which appears in the reply box when you hit "reply" to a post. It is an icon showing a person's head/torso with the "@" symbol. It is the 6th button after the globe symbol (for inserting weblinks), to the right of the musical notation button. Click the button and a dialog box appears directing you to enter the username you want to tag. Frankly, I find it quicker and easier just to type the "@" symbol rather than using the button. Clicking on the blue-highlighted username also takes you directly to that user's profile page. You can then send a PM to the user from there.
|
|
|
|
Post by cynical1 on Aug 8, 2022 15:28:05 GMT -5
I have no idea how to tag. ...which explains why you were always "it" as a child... That's not my guitar in the picture...but I know what it is... Ever since Imageshack and Photobucket sent all of my images into the ether I just steal other people's images... There really is no magic in it. If the dye you use works with denatured alcohol then just leave the water out. One caution I will give you is that it dries extremely fast when mixed with denatured alcohol. For me, I just mix the color a little light and just add more coats depending on how dark you want to go. If you score a small air brush you can get some interesting effects with wood dye. I haven't used a stain in 30 years. As a basic primer I should throw some Cliff Notes in here. 1.) Sanding. Yes, this is the part that no one ever talks about when building and finishing a guitar. I spend more time sanding than building a neck...but I'm currently in therapy for it... Typically I hit a body with a 220 grit then 360 or 400 depending on what I remembered to buy at the store. Pay particular attention to the end grain. This is even more important on course grained wood. After sanding the bare wood I'll hit it with a few 3M abrasive pads just to make it smooth. I gauge when I'm done by the slight sheen the wood will have when held at an angle to the light. 2.) Mount the body to a neck holder or whatever you do to to hold the body while you finish it. Hit it a few times with a tack rag, then wipe it a few time with denatured alcohol. You want as much dirt, oils and contaminants off the wood as you can prior to the wood dye. This is why you mount it to the holder first...so your nasty fingers stay off of it... 3.) Depending on the effect you're looking for and what type of top you have to work with, the process varies. With ash, alder, poplar or mahogany I just add color. I might screw with a burst on the ash, but the rest just gets color. If I have a figured or quilted top I'm going to do the black under color routine. 3a.) Plain color. Mix the dye with denatured alcohol. I like the stain wiping pads for this, but any lint free cloths works fine. Mix your dye light and work fast making sure you keep wiping and adding color. Keep your wiping medium wet, but not saturated. I won't lie. Many of my early guitars were very dark versions of my desired color. Working too slow will leave uneven swaths in your dye job. To fix this you make another pass. You see where I'm going, right? To say there is a learning curve would be an understatement. 3b.) 3D "Pop" finish": Mix your black wood dye with water. Make this sucker dark, because you only need one pass for this step. "Slather", I believe is the current term we're using... Let this dry for a few days. You want to feel the roughness of the wood before you sand it out. Start with a 600 grit and move to an abrasive pad once you have black left in the "lower" graining and a feathering of black on the raised grain. The more black you leave the darker your color coat will be and the 3D effect looks a little more ominous...for lack of a better word... Mix your colors light and follow the process in step 3a.) until you like your color. They darken a bit once the finish goes on, but they snap more, so that makes up for it. Either way, give it a few days to dry before sanding it again. Typically I just use a 3M pad and a tack rag to smooth it out before the final finish goes on. To get that mirror shine, you can use a lacquer of your choice, build up a fekŝarĝo of coats, then sand it down from 400 or 600 grit to around 2000 grit. Two passes with rubbing compound, two passes with polishing compound and a couple passes with some swirl remover and your guitar will look like the one in the picture, too. Feel free to use some car wax. Lacquer was an auto finish before they put it on guitars...where do you think Leo bought his? Ever notice that his new guitars tended to be the previous automobile model year's colors? One thought I had for your other body, if it looks like the previous one, is to hit it with black dye mixed with water. You can also mix the black light and make a few passes. This will raise the grain even more. After sanding the black down you can take an amber dye mixed in denatured alcohol and work the center of the body. Let that dry and start rubbing your green color mixed in denatured alcohol from the edges to the center to create a simple burst. The color transition will be there, but the lower darker grain will give it an interesting pattern offset. Just thinking out loud... Normally they give me drugs to stop that...
Anything specific I glossed over just chime out. Happy Trails Cynical One
|
|
|
|
Post by frets on Aug 8, 2022 16:36:53 GMT -5
Thanks Newey, I will use it in the future (but not in this email). Cynical, I forgot that this body is an ambrosia. Would the same technique work or would I lose the subtle variations in the wood?   I want to do a Pthalo Blue. |
|
|
|
Post by cynical1 on Aug 8, 2022 17:36:07 GMT -5
I'd do the black under your blue. With the blue, the darker you make it the more pop you lose. There is some nice fiddleback on that body, it would be a shame to lose it. When you get to the blue, start with your wiping medium good and wet and start with the sides. Work to the middle as the rag loses to dye. Repeat when you flip it. Done right this give you a subtle burst of your color on top that goes opaque on the sides.
If you can score a few small pieces of the wood like your body to practice on it would help you get a feel for working with dye mixed with alcohol. If you've only used this stuff mixed with water the alcohol mix will seem like a different medium entirely.
I can't tell from the picture, but is there an indented glue seam in the center of the body on the top? If so that needs to be cleaned up (read as sanded flat) before you get to the dye. If it's dark and visible now, it'll stick out like a Shriner at an antifa rally once the dye goes on...
HTC1
|
|
|
|
Post by gckelloch on Aug 9, 2022 1:09:47 GMT -5
Man cynical1, that’s some serious pro level finishing. Sounds like a lot of work and time that might not pay off if the guitar doesn’t sell for that much. Let me describe what I ended up doing on my Jagcaster body using all water-based supplies as a somewhat easier solution. First, don a new pair of butyl gloves for every step to keep oils off the body.
1. Sand the body to 400G. Brush off the dust with a dry brush and/or compressed air.
Use water-based wood dye for the grain accents – black or whatever color you want. Wipe off as much dye as comes off on a damp sponge, and let dry a day on a clean rag or whatever. The dye will remain in the grain.
2. Sand again lightly with 400G. You could sand to 2000g, but I don’t know how much difference it will make to the eye after it’s finished, and it’s a lotta work. Brush off the dust with a dry brush/vacuum. Hang up the body by the neck screw holes. Add ~30 drops of food coloring to 2oz of Polycrylic – that was dark enough when I mixed my colors, and it’s not near enough to keep it from curing. Brush on a coat and let dry for a day. There might be a type of sealer you can apply that Polycrylic can be applied over, but I didn’t use anything on the Limba Jagcaster body and the finish is just fine after being out of a case for several months in a very humid environment on the seashore.
3. Very lightly sand with 400g just to rough the surface. Brush it off and add another coat if it needs it. My color wasn’t as rich as I had hoped because I over-sanded, especially on the edges. I suppose you could just touch it up with more colored poly rather than a whole new coat. You can also add more wood dye to and sponge off any spots you may have sanded down to the wood b4 brushing on more colored poly. Not sure if you’d really need to wait a day to poly over them, but it couldn’t hurt. Let dry another day.
4. Very lightly sand, and brush off. Don a proper ventilator, gloves, and a paper painter’s suit and spray on 3 light coats of 1K with 20m between them. I used semi-gloss. Let dry a day, and do 3 more coats after a light sanding if you want. You might even get 2 or 3 more coats from the can if you want. I didn’t bother. I got a few minor drips in places. Sanding them out b4 the final coats didn’t fully work, but they aren’t obvious. Let dry in a well-ventilated space. Fumes are strong and dangerous until it sets.
I think you need to wait a week to buff it, and keep any plastic or solvents off it for a month.
|
|
|
|
Post by cynical1 on Aug 9, 2022 7:27:37 GMT -5
Sounds like a lot of work and time that might not pay off if the guitar doesn’t sell for that much. "The value of any experience is measured, of course, not by the amount of money, but the amount of development we get out of it." - Thoreau
"If you got into this industry to make money, you might want to invest in a fast car and a gun...liquor stores abound" - Me
It is quite a bit of work. Even more fun when you have multiple irons in the fire. Starting out you make a lot of firewood, too... I am not preaching that I hold the sacred route through any of this. After 40+ years I have learned what gives a consistent result. Let me illustrate it this way: Which cake will draw the most traffic...even though both contain essentially the same ingredients and may taste identical? Frets is in a bit of a different position that most of us here. She still works in the industry. Granted, her primary products are harnesses, but there is a little gotcha. If you work in the industry, anything with your name on it better look like it can walk on water and glow in the dark, because they will see any flaws or "good enough" trails and they will transfer this to everything you make. Building a reputation is a lot easier than repairing one. Sermon over. HTC1
|
|
|
|
Post by frets on Aug 9, 2022 12:56:49 GMT -5
This body is by far from done. I have to do a bunch of sanding and if the joint doesn’t look better, then I’ll make it for one of my buddies.
Cynical is right. Stuff has to be first class or your name is sullied. I need better equipment and more experience. I am getting some new equipment here soon and am working with a master luthier to get better with building. It will take time.
But thanks to you guys for helping me with improving my finishing skills. Before working with this master luthier, I had been on my own with regard to body and neck building. Myself and YouTube. I really want to learn all these techniques and expand to making first class guitars. And you have been very supportive.
Thank you Cynical and GC and everyone else that has provided me with more knowledge to move forward on this journey. I probably will make some clunkers before I hit my stride.
|
|
|
|
Post by cynical1 on Aug 10, 2022 4:49:07 GMT -5
This body is by far from done. I have to do a bunch of sanding and if the joint doesn’t look better, then I’ll make it for one of my buddies. There is a way around this glue seam issue. It's not any less work, just salvages all your work to this point. Marquetry or mother of pearl inlay strips.  Looks like this on the guitar: 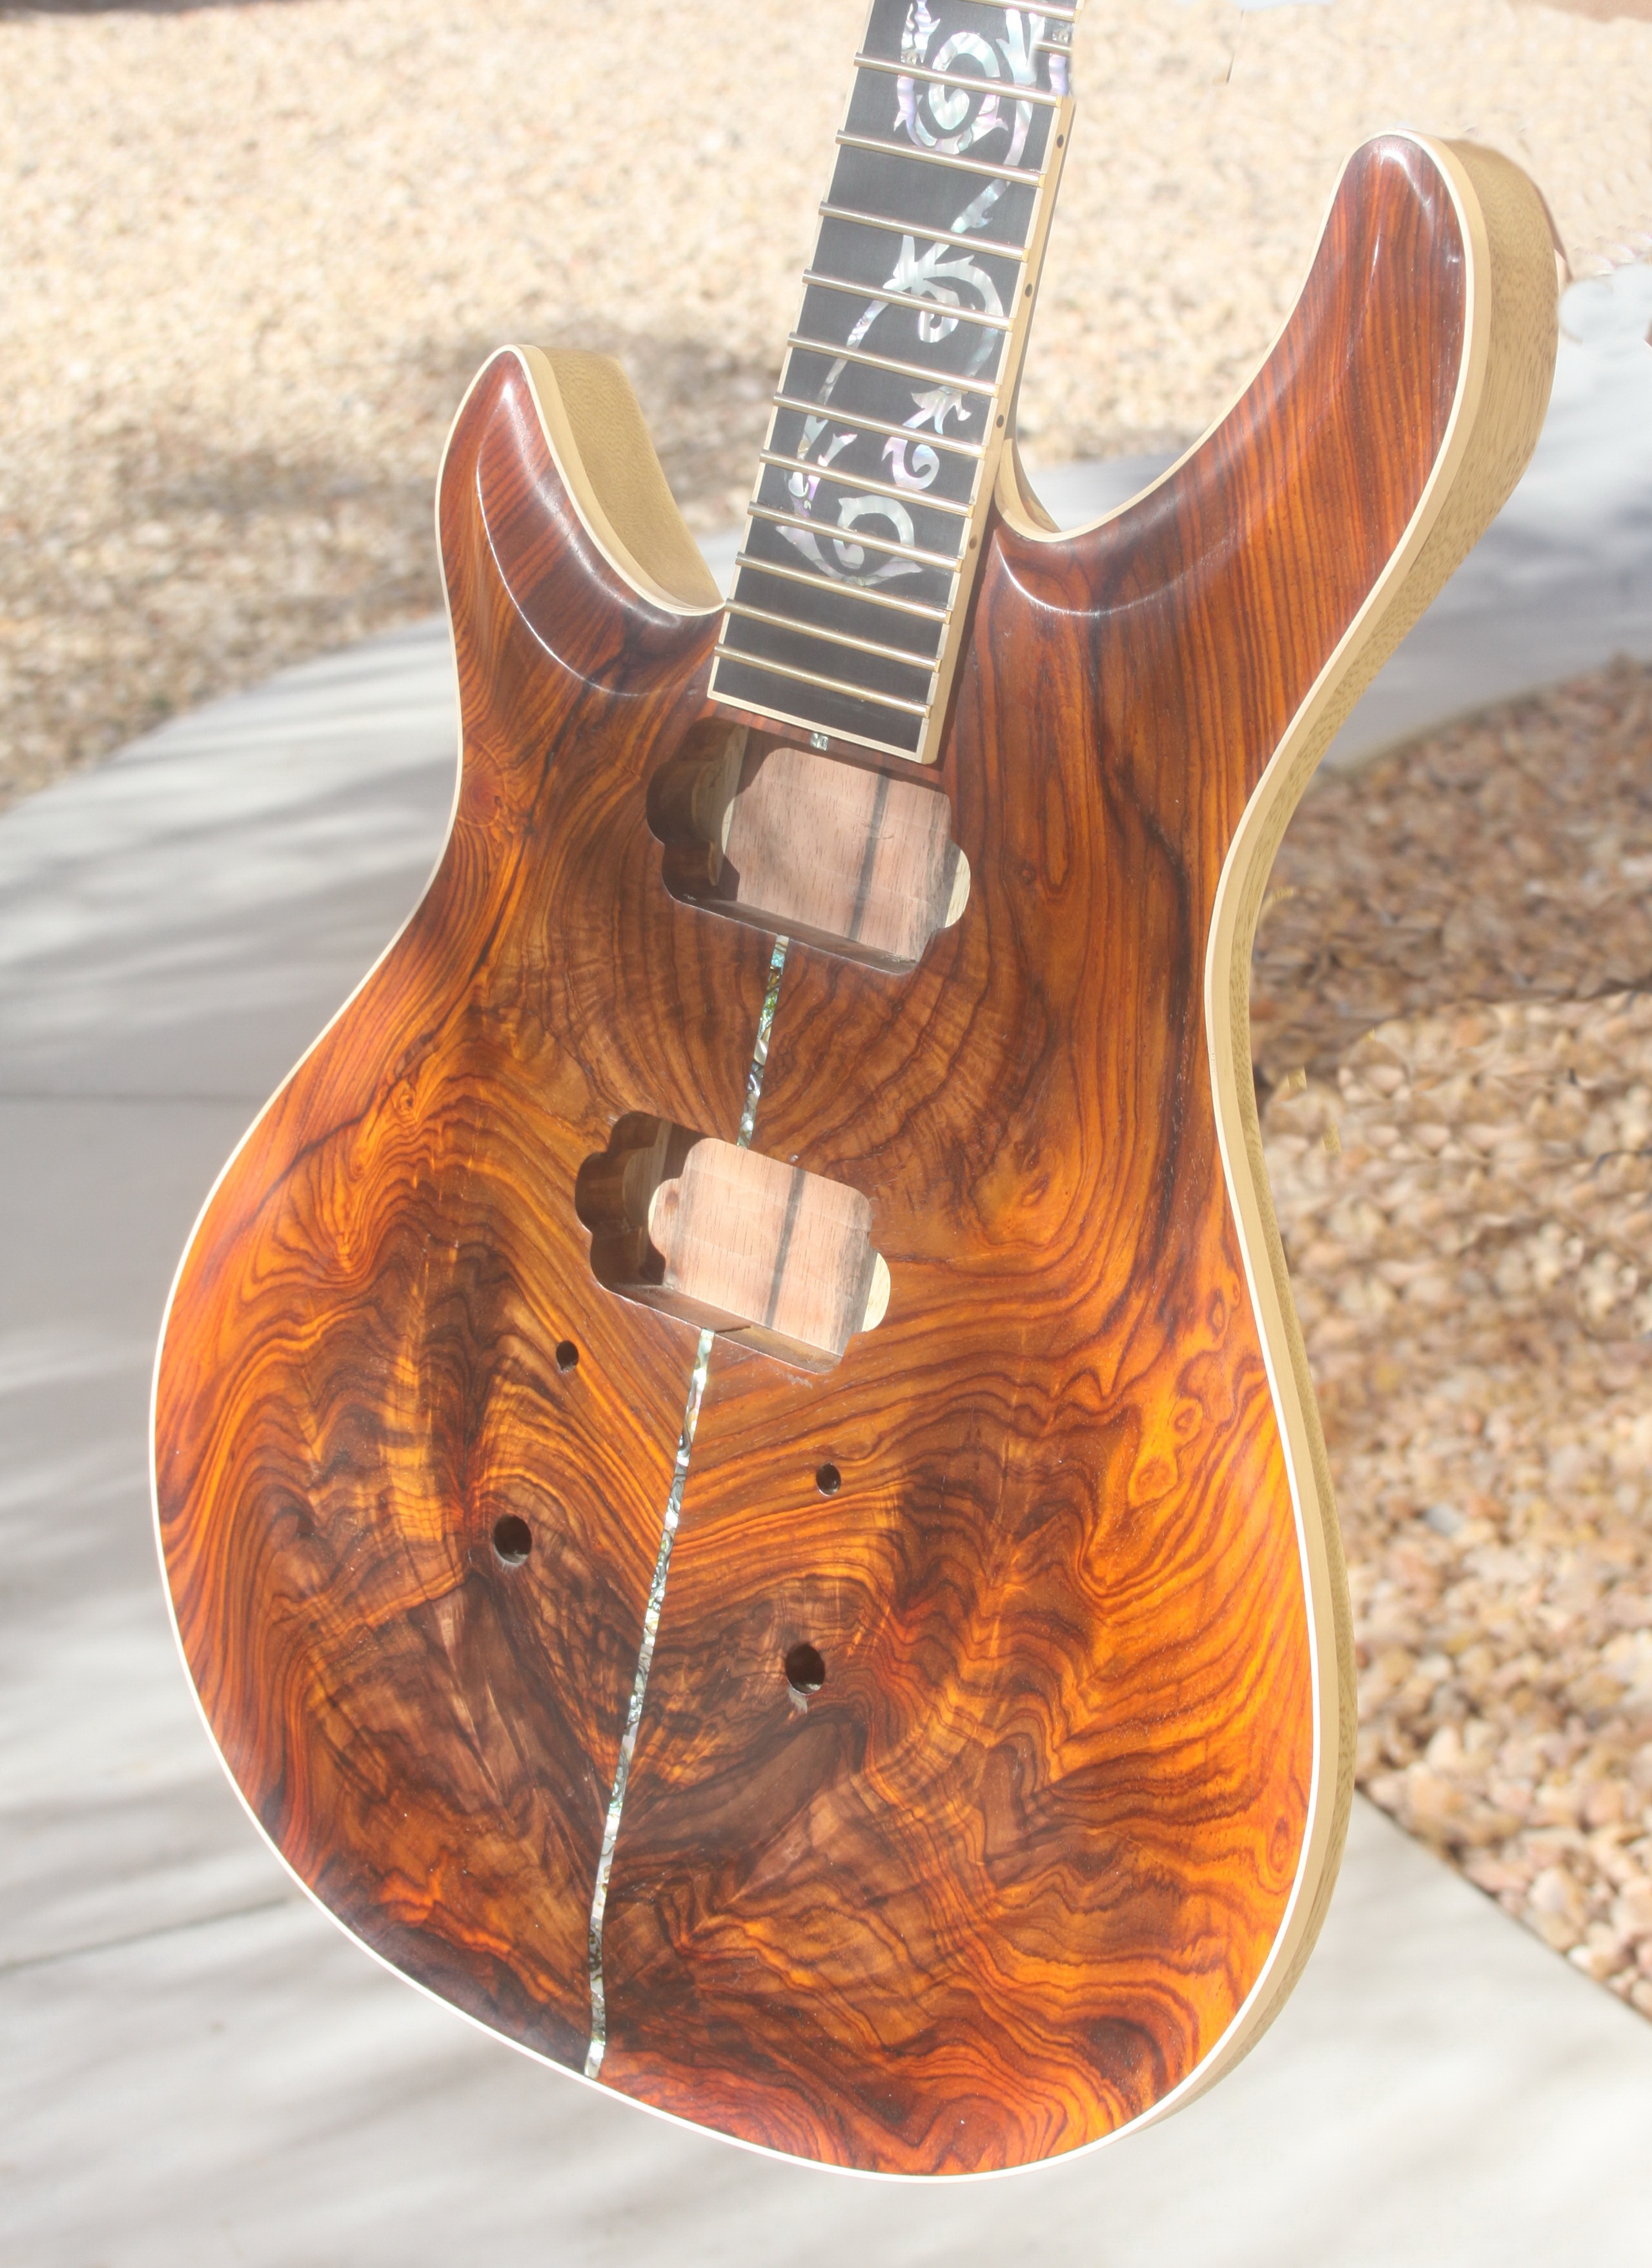 Every time I see this I can't help but think this was an "ho merdo" moment at one time. Typically, you're only gonna do this for an expensive piece of wood. It's also handy when you find you glued a figured top just a little off...or tried to use a router table as a planer/joiner and happened to tear out a piece you missed when you glued it up... That's why you smoke that merdo after you glue the wood, but I digress...
The strip breaks up that visual anomaly and leaves people with the impression you are a craftsman. Let them think that...There are several ways to do this from chisel to router depending on body shape and your given skill level. This would be a good one to run past your luthier accomplice. You'll use this again, I can sort of promise you that if you do this long enough. Presentation is everything.
Count on it. I would suggest you save a few for later. These are the ones you experiment with later as you learn new things...you can't make it worse, right? HTC1
|
|