|
|
Post by flateric on Jan 21, 2009 6:14:13 GMT -5
Quick question:
What's the best way to get permanent lettering onto a die-cast enclosure for a home-made stomp box?
I want something that looks reasonablyu professional and won't wear off after a couple of months in a gig bag.
|
|
|
|
Post by flateric on Jan 21, 2009 11:32:21 GMT -5
Never mind - problem resolved now (hopefully)
|
|
|
|
Post by ijustwannastrat on Mar 20, 2010 16:44:31 GMT -5
sorry for the bump, but may I ask how you solved your problem?
|
|
|
|
Post by cynical1 on Mar 20, 2010 17:23:09 GMT -5
...just glad we could help...
HTC1
|
|
|
|
Post by newey on Mar 20, 2010 17:54:28 GMT -5
|
|
|
|
Post by flateric on Mar 22, 2010 17:37:10 GMT -5
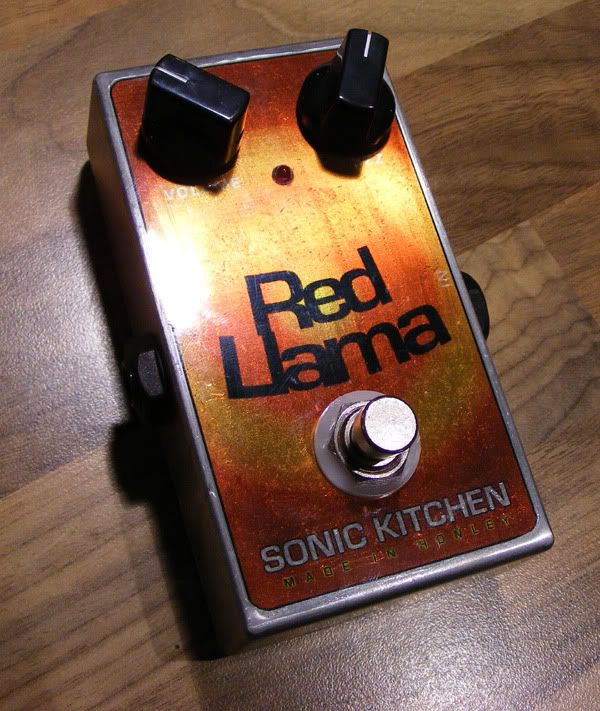
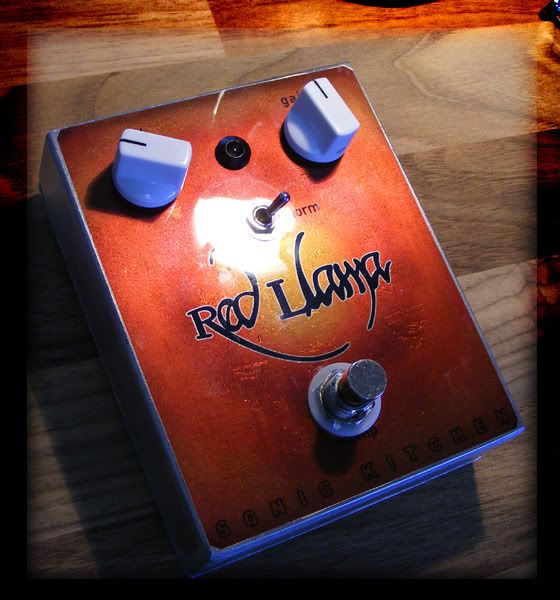
I've moved on a bit since then. I'm using the old acetate overhead transparency sheets, ink-jet printable ones, printing the whole graphic for the box top in reverse, then when completely dry I glue it to the top of the box, ink side down, using a really thin smear of araldite epoxy. This way you can indulge in colours, designs, fonts, a lot more and the top side of the transparency gives a gloss finish and protects all the artwork at the same time. A couple of recent examples:   |
|
|
|
Post by flateric on Mar 22, 2010 17:47:24 GMT -5
|
|
|
|
Post by flateric on Apr 3, 2010 9:29:57 GMT -5
New facelift - Red llama distortion pedal with 'Phat' switch for bass.  |
|
|
|
Post by cynical1 on Apr 3, 2010 11:22:04 GMT -5
Very nice work, flateric...both inside and outside.
Years ago in another life I spent I worked for a printing company. It was fairly common to print everything reversed on the substrate, then apply an adhesive backing to it.
With reds and certain 4 color process jobs we'd also print white as the last color to cut the transparency of the printed work against whatever it was being applied to.
Another trick on lacquer applied or waterslide decals is to have a clear piece of vinyl, or similar material, die cut to completely cover the decal.
You can then spray an enamel, epoxy or lacquer over this to level it out on the finished surface.
HTC1
|
|
|
|
Post by newey on Apr 3, 2010 11:51:17 GMT -5
Waterslide decal paper is also available with a white background, although I haven't tried it yet. But the bigger the waterslide decal, the tougher it is to get mounted flat, so I don't know that it's practical to do the whole face of the box that way.
|
|
|
|
Post by cynical1 on Apr 3, 2010 12:30:48 GMT -5
Back in the day we would do piano decals, bicycle decals and some work on vehicles with lacquer applied decals.
They were big, and a real PITA to apply. The process is to paint lacquer on each letter, or the applied surface of the decal...wait for the lacquer to set up, (about 5-20 minutes) then apply to the super clean and super smooth surface.
Then you water soak the tissue cover and remove...this usually bubbled the decal. When it does you gently smooth it out with a wet chamois...trust me, this sounds a lot easier then it was...
Once the decal sets you go over it with a chamois soaked in naptha to remove to excess lacquer. After a few days you apply your finish over the decal.
I learned from a guy who had been doing it for decades. He could do a truck door in about 20-30 minutes...my times were significantly higher.
The trick is the initial placement and being able to work fast and efficiently. Generally, any attempt to reposition ends in less then desirable results.
Water slide was easier as they tended to take a bit more abuse then lacquer applied. Just dampen you surface, make sure your decal is soft and don't apply pressure to the decal until you know your position is good. Work from top to bottom or side to side in a squeegee like motion to ensure no air bubbles sneak in and it should work. If you get air an bubble, take a needle, poke a hole in it and re-moisten to flatten.
Happy Trails
Cynical One
|
|
|
|
Post by wolf on Apr 3, 2010 13:21:37 GMT -5
Gee, things sure have changed a lot over the decades.
In my day, the cutting edge, top of the line, high tech equipment for labeling stomp boxes was the Dymo™ label maker. (and I remember they would emphasize the fact that the lettering was embossed.)
|
|
|
|
Post by flateric on Apr 4, 2010 4:53:41 GMT -5
Waterslide decal paper never works for me unless its a small lettering area. I've tried a few times to do a complete enclosure piece and I can't get it to apply without wrinkling, blistering or folding. this inkjet transparency method is a great way of doing an entire top in one go, once you get the epoxy glue coating sorted. I guess you could apply over a white painted background but you need to be careful the adhesive didn't interfere with the paint.
|
|
|
|
Post by cynical1 on Apr 4, 2010 9:52:36 GMT -5
flateric -
What you're doing now looks good and works for you.
I was just recalling past experience with decals and graphics. Your way seems much easier and quicker. I wouldn't change your process based on anything I've mentioned.
Waterslide substrate material was always a @##$%^ to print. Unlike modern laser or inkjet printing, where all colors are printed simultaneously, in a print shop your graphics would print through a 4 color process with a base. In order, white base, cyan, yellow, magenta, black and probably a clear. Next they'd get an oversheet applied and sent back for printing centerlines and cut lines. Finally they'd go off for die cutting or shearing.
With waterslide and lacquer applied substrate you would scrap about 40% of the job because the material just couldn't take it. Reverse printed with an adhesive backing applied was usually around 95% good...not hard to see why no one uses them anymore...
Ever wonder why professional printed graphics is so expensive? Unless you're buying thousands of the pieces it better to stick with what you're doing now.
Well, that wandered off the mark far enough...
Happy Trails
Cynical One
|
|