lynxpilot
Rookie Solder Flinger

Posts: 19
Likes: 0
|
Post by lynxpilot on Dec 7, 2010 19:22:37 GMT -5
First a little background. I'm new to guitar but familiar with the shop (wood or metal). I have a couple LP's and thought for my first semi-build from Warmoth parts, I'd try a Strat. I came up with a scheme I'd like to use to finish it and upon searching the web and sellers of Strats, I noticed that most are in retro pastel 50's type colors and it's very rare to see a neck or peghead painted with solid color.
If my scheme is a solid color with an airbrush/hand painted design that includes painting the neck, am I ruining the intrinsic value of a Strat clone or violating some Strat-type design tradition?
Nextly, I noticed the whammy bar thread that seem to exude a sort of tuning misery associated with virtually any brand or type of vibrato mechanism. Is it really that bad? I'm putting a Graftech TUSQ XL on and wonder if that will help. I have two vibrato's coming. One is 'Full Contact Gear' and the other is Gotoh. I realize there are some top-notch brands out there and those mentioned probably aren't on that list, so are the brands I'm looking at junk?
Sorry for the newbie questions, but I gotta start somewhere.
|
|
|
|
Post by Double Yoi on Dec 7, 2010 20:45:02 GMT -5
If you are building a guitar to sell, and painting it in a way that is "outside" a standard strat, Then the uniqueness will be the selling point ala John Bolin  I believe there was a series of strats in the late 70's early 80's with headstocks with matching paint. Kind of like this newer USA standard.  |
|
|
|
Post by Double Yoi on Dec 7, 2010 20:47:12 GMT -5
If you plan to keep it for yourself, Most all rules of decorum were smashed long ago  Either way is going to be fun and pls post pic of the build! |
|
lynxpilot
Rookie Solder Flinger
Posts: 19
Likes: 0
|
Post by lynxpilot on Dec 7, 2010 21:11:44 GMT -5
Thanks for the boost. I'll pin up a couple of pics when I start making some progress. Probably be starting in about a week or so.
|
|
|
|
Post by ijustwannastrat on Dec 7, 2010 21:54:07 GMT -5
I would like to +1 you for calling it a vammy, a wibrato, but never a tremo'leo. As for aesthetics, beauty is in the eye of the beholder, and if anybody proves this, I believe Mr. EVH could. For the painted headstock, my personal preference says NTY. I've never seen a painted headstock I've liked, simply because of the edge. For tuning issues, that graphtech nut should help some, another thing you could do is get locking tuners, and if you set up the trem properly, alot of times strat vibrato's can be aight! For the Full Contact Gear, are you talking about THIS? (It's a link) I believe other members have had this discussion before, and the verdict was that on the 6-post vibrato's, no matter how well you set it up, hypothetically only two posts will actually touch the trem. I forgot if this was a good, bad, or unimportant fact. On this bridge, I don't understand what the "eCam" saddle actually does check out the video on their website, it's pretty cool, it looks really cool. I'd love to see a review on this by you once you play around with it for a while. I will say, however, I don't dig the huge name on it. |
|
lynxpilot
Rookie Solder Flinger
Posts: 19
Likes: 0
|
Post by lynxpilot on Dec 7, 2010 22:33:02 GMT -5
Thats the one. The Gotoh is a 1264-B, which I'm assuming is relatively close to a stock Fender. I didn't even notice string spacing on the oddball (FCH) until just now. It's about 2.06" and I'm not sure if that will be an issue. My fretboard is supposed to have a compound radius that widens out near the body, and I also ordered a wide nut, so it might turn out that the string spacing is wide at the head and tight at the neck joint. Looks like I'll have enough parts to get busy on the next one right away. I waffled on tuners too and ended up with some gotoh regular ones and some schaller locking. With the whammy, I'll probably opt for the locking on this one and save the others for a hardtail.
|
|
|
|
Post by Yew on Dec 8, 2010 7:07:39 GMT -5
If its not vintage, its customisable.
|
|
|
|
Post by flateric on Dec 8, 2010 11:37:04 GMT -5
I say go for it - its a strat clone. Create something imaginitive, unique, a bit wacky, it will be unique and it will be yours.
|
|
|
|
Post by 4real on Dec 8, 2010 16:59:43 GMT -5
I love the look of a matching headstock face colour with the body. My strat is mahogany without a pick-guard and the headstock face is stained to match courtesy of squier.
Painting the actual fretboard is to be avoided as wear is inevitable...possible, afterall a maple board is varnished but really, if you play it, they do wear considerably and always seem to look a bit "odd" to me. Likewise that back of the neck...no rule as many guitars are finished necks, but a satined maple strat neck is kind of nice to hold...IMHO
As for trems. The strats fairly standard fulcrum format synchronized trem/vib was and still is a classic piece of design. If set up right and with particular care at the head end of things, they can be stunningly reliable and have a great feel of their own.
Tusq XL nut I used on my LP with Kahler, good but not as good as say an LSR roller nut (this would require nut slot modification and permanent though it has an advantage in that it screws in and is height adjustable...no nut filing that can literally take hours if not days to get right!
Proper Locking tuners are also well worth it, on my "fenders" I use their shallers I think they are as on the real fenders and are really smooth. I used sperzels on the LP which are light and cheaper but do the job reliably. Staggered posts and no string trees help.
On my strat I have a conventional nut and roller string trees and locking tuners. The bridge is a more contemporary two post knife edge design (much like fender uses) with solid saddles. I've used graphtec saddles in the past and they are really good too.
I like my bridge to be unusually "high" and floating, a down only approach with extra string tension will give more tuning stability (like EVH)...mine is more like Jeff Beck's setup.
For you general tem/vib use it works a treat...if you are going to go all 80's hair metal or Vai on it...well then, specialized equipment like a floyd or kahler is required at considerable cost. But even a cheapy original style bridge can work well and be very stable if all the aspects and a proper set up are covered. Most 'complaints' really do seem to be without these things being attended to properly or using a standard trem to do 'non-standard' things with it.
Tuning problems are almost always at the head end...take all the tension off a cheap tuner with multiple wraps and it's not going to want to return to pitch...any sticking in the nut or string trees, same deal.
But there is also the players side to things as well...they can be a bit tricky to get all balanced up and in tune from scratch as every change in tension on one string is going to throw out the others. Tuning practice and attending to each string that's going out and any quirks to a particular guitar generally makes everything manageable...set it up for down only with extra tension than it needs and you really should have no problems at all.
Sounds like a great project...
|
|
|
|
Post by cynical1 on Dec 8, 2010 22:48:50 GMT -5
Well, it appears most of the sentient points have already been made.
I do have to ask why you want to paint the fretboard? Not to say it can't be done, but as has already been pointed out, normal playing is going to take most lacquers off in time.
If you're no stranger to woodworking, you might want to consider doing some inlay work. If you have steady hands and an artistic flare, you can buy sheets of mother of pearl and come up with some very cool designs on a rosewood fretboard. If it's maple just about any kind of solid color laminate material will work, as you're going to finish the fretboard anyway.
If you really want to paint the fretboard about the only thing that's going to protect it over time is marine epoxy resin. And you'd probably want to vacation in Kabul before you got into that much effort.
Personally, I've been a bass player so long that I would be that last person to advise you on a whammy setup. I will say that I agree 100% with 4real that the roller nut is the way to go. It takes a bit more work going in, but in my mind it's worth it. I would also agree with his take on Kahler. They aren't cheap, but it's a solid design and takes minimal routing to install.
I have been toying with the idea of building a guitar...Project #3...(#1 is close, #2 has until spring when I can re-spray...) with either a Kahler or a Bigsby B5 with a Schaller roller bridge and an LSR roller nut. This may not be the ideal setup, but since the body is going to be chambered I don't want to weaken it at the bridge or through the center with back routing.
And when it comes to the aesthetics of a guitar, what ever floats your boat is what you should be concerned with. If you have a concern how this may effect the structural or mechanical aspects, then by all means shout out.
Remember to keep us in the loop when you finally roll it off the assembly line.
Happy Trails
Cynical One
|
|
|
|
Post by JFrankParnell on Dec 8, 2010 23:24:58 GMT -5
I've got the 'full contact hardware' or 'Babicz' trem on my strat. I love it. There wont be any difference in the tuning stability compared to a stock 6 hole trem (the nut and string trees are the culprits). That graphtech nut should do well for you, and staggered tuners can take the string trees out of the equation. Or, if youre going warmoth, they have an angled peg head version that also can leave the string trees out. Let me just mention that there are some roller string trees that would prolly work ok, but they're ugly as butt.
So, with the Babicz trem, cheap plastic nut, nut sauce lube, and cheap string trees, I dont have that much grief with tuning. Yeah, if I go EVH on the thing, it'll go out 'a little'. But, general surfy, rockabillyish whammying is no problem. Upgrade the nut with graphtech, and staggered tuners, i bet it'd be perfect.
|
|
|
|
Post by 4real on Dec 9, 2010 5:28:43 GMT -5
The strat style trem is a different beast to a kahler and if the body is routed for a fender back routing i'd go that way. There are lots of fabulous techniques and a certain sound and feel to fender style trems...
My strat has roller trees and a standard nut...they work well. The staggered tuners are also good and i use them too...although the trees may not seem necessary with the staggered tuners, I found i needed them to cut back on sympathetic string vibrations behind the nut. An LSR incorporates tiny foam pads behind the rollers to stop that if going that way.
Bigsby's...I know there's the retro thing...my first guitar a white SG with three HB's and a bigsby was a shocker for tuning and a different beast yet again. But really, you not only have to take care at the nut end as always, you also need a roller bridge and on a lot of flat top guitars like fenders other things are required to keep pressure on the bridge...all adding more pressure...and generally never had much luck keeping the things in tune though i can see the retro appeal.
|
|
lynxpilot
Rookie Solder Flinger
Posts: 19
Likes: 0
|
Post by lynxpilot on Dec 9, 2010 5:47:27 GMT -5
The Warmoth neck is the 'angled strat'. I ordered maple with jet black ebony fretboard, stainless steel frets, and compound radius. Graphtech nut will be on it. Body is rear-routed swamp ash. For now, I'll use the 'everything axe' mini-HB's from SD. I'll probably wire for all HB / all SC with one push/pull. If I don't end up liking those pups, I'll probably go with HSS on the next guitar using SD SH-11 Custom Custom. I wouldn't have any idea on what to use for singles for neck and mid pups, but that's way down the road. Just a good excuse to start strat #2.
Reason I wanted to paint the peghead was purely for the scheme. Both of my LP's have solid color painted necks. One of them is satin finish on the body and leaves the grain showing and it looks kind of nice actually. On this one, I'm kind of wanting a solid color head to toe with one hand-painted design on the peghead and another in the same scheme on the body opposite the pickguard. I'll probably start with a grain filler, paint the design, then airbrush a transition into the solid color, finally finishing with clear topcoats. For now, I'm using nitrocellulose lacquer, but on subsequent guitars I might investigate a more modern finish.
|
|
lynxpilot
Rookie Solder Flinger
Posts: 19
Likes: 0
|
Post by lynxpilot on Dec 9, 2010 5:52:44 GMT -5
oh, and cynical1, not painting the fretboard. It was the peghead and neck I was wondering about.
|
|
|
|
Post by cynical1 on Dec 9, 2010 9:31:02 GMT -5
Well, then...nevermind... And let me just vent for a moment here on nitro cellulose lacquer... Some of the more erudite members here have made this point before, but let me make it again. The reason builders used nitro in the 50's and 60's was because it was cheap. They could buy last years automobile colors from their suppliers for an additional discount. It dries fast and has an indefinite shelf life. It was a cost decision, not a tone decision. It is the lowest grade of lacquer available and no one but instrument builders use it anymore. And before you Tone Nazi's lock and load, look up the word "Fullerplast" on Google...then get back with me...or just click here... I have nothing against lacquers. I still use them because they're quick, cheap and dirty to use. I prefer a catalyst lacquer, but I have a compressor and a Binks gun. Traditional varnish is generally overlooked, but it's tougher then lacquer. It doesn't polish up as well as lacquer, but if you go with a satin then all is good...some steel wool and you're off. Poly, which is technically a varnish, is generally frowned upon as well. I prefer the old fashioned VOC laden variety, as the water based version raise the grain and are not as tough in my experience. It's a film coating and will not "melt" into the previous coats, so repairs tend to be a bit more obvious and involved. Otherwise, it's tough as nails and if you reduce it 50% with mineral spirits you can wipe it on a neck with a lint free cloth and it'll level out very nicely. Wipe about 4-5 coats of a satin poly on a maple neck, let it cure for a couple weeks and sand and buff it out and you'll have one of the fastest necks around, There are poly colors you can use if you look around. Never used them, so I can't comment either way. And one more word about poly. Spraying poly is doable, but it is a first class mess. Due to the slow drying time unless you're in a dust free environment there is little advantage to spraying versus wiping. You're still doing final sanding, and the odds of a run or drip from wiping are less then from spraying. Finally, and this is a financial as well as a personal decision, but as the industry started out using automotive finishes of the day, don't overlook today's automotive finishes. They are systems where color and clearcoat work together. Many do not require baking and they buff out to a mirror glaze if you take your time. And they are tough as nails. Granted, you better figure on dropping some coin to do it, but when your see the $300.00 sticker on a pro paint job for a guitar, you can assume an easy $100.00 of that is the paint, clear and supplies. And sanding and polishing is time consuming...generally taking 3 to 4 times as long as it took you to prep and paint. And as far as the headstock goes, the one thing I always liked about Les Pauls was the binding around the black headstock. It just looked classy. Binding a headstock can be time consuming, but if you're going to paint the face of the peghead it really is the cherry on top... And rather then paint or stain, take a look at wood dyes. With a little practice you can have some stunning results in just about any color you can mix. Happy Trails Cynical One |
|
|
|
Post by JFrankParnell on Dec 9, 2010 10:39:21 GMT -5
wow, nice info, Cyn1. Lynx, did you consider a neck that didnt need any finish? I'd like to try that on my next one.
|
|
|
|
Post by cynical1 on Dec 9, 2010 11:16:56 GMT -5
Not a problem. Glad to impart something... And I see another rant coming on...must be the weather... There is no such thing as a neck that doesn't need a finish. OK, if you're making your neck out of an oily wood that will not easily accept a hard finish...like rosewood...then mineral oil is a given...but there's a reason why you don't see one piece rosewood necks all that much... Here's the deal. The neck is subject to tensional and torsional forces, humidity, moisture, dirt, sweat and oils from your fingers. All of these things can cause your neck to warp all to Hell. Does this happen 100% of the time? No. But do you want to be the first kid on your block with a fretted corkscrew? OK, before the Neck Nazi's come around touting Tung Oil, or Linseed Oil, or Mahatma's Divine Neck Oil...remember one thing. Unless you religiously apply this oil and keep your neck free from temperature/humidity extreme is will be subject to a much higher probability of warping then a neck with a hard finish. This is why wood receives a finish..to protect it from you and the elements. Read that one again, because it's important. Finishing a guitar can be harder then building the guitar. It is only natural for people to gravitate to a solution that is quick, requires little or no skill and returns an acceptable result without much pain. There is a trade off for this convenience. You will need to continue to monitor and potentially re-apply your finish more often. Also, the majority of reputable builders (and some of the more notable non-reputable builders) will not warranty an oiled neck. Their take is this: 1.) You oil it. 2.) It warped. 3.) It sucks to be you. I hope this doesn't sound too confrontational. It's not meant that way. I just get a rash from reading about how "oiling a neck improves the tone" or "it's better for the wood" or "it's green"...(...that last one really chaps my _ss...) OK, I'll sit down now... I think I may need a seasonal change in my meds... Happy Trails Cynical One |
|
|
|
Post by JFrankParnell on Dec 9, 2010 12:02:24 GMT -5
heh, you tell 'em, big shooter ;D But, those neck woods they have at warmoth that say no finish needed, really they do need an oil 'finish' applied? oh, lynx, check this peg head |
|
|
|
Post by cynical1 on Dec 9, 2010 13:03:23 GMT -5
...But, those neck woods they have at warmoth that say no finish needed... Can you send up a link to those necks? Warmouth has always had a straightforward policy on oiling a neck, or leaving it bare wood. In fact, here it is: Other Neck Finish Info
To Finish or Not to Finish?
All our necks are dipped in an oil based penetrating sealer which is compatible with virtually all secondary finishes. This provides enhanced stability; however, it is not adequate protection for playing. We strongly recommend you apply a hard finish to all Maple, Mahogany, and Koa necks. Oils do not validate our warranty requirements. We understand the attraction of raw or lightly oiled necks. They feel fast and are not sticky. Unfortunately, they are much more susceptible to moisture related warping and twisting. Our experience is that hard finished necks seldom warp. Less than 1 out of 200 (0.5%) are returned for warpage. Raw or oiled necks don't fare as well. About 10% are rendered useless from the torture. The more acidic your perspiration, the higher the odds are against you.
If you must play a raw neck, that's cool; it's ok. A neck is just a tool. Just be aware of the risk. If yours does the pretzel act, we don't want to hear about it.
For a valid warranty, a hard finish must be sufficiently thick to completely cover the wood. That means no wood is exposed and you are actually playing on the finish, not the wood. Now, it does not matter to us who applies the finish. Of course we would like to do the finish for you, but if you choose to do it yourself or have it done elsewhere the warranty is still valid. HTC1 |
|
|
|
Post by JFrankParnell on Dec 9, 2010 13:24:24 GMT -5
if you do the custom neck builder thing, click on more info by the shaft wood selector in step 2. Several have the 'finish not required' checked, and several say the same thing in the description.
|
|
|
|
Post by cynical1 on Dec 9, 2010 13:45:30 GMT -5
Interesting...they actually advise "No Finish Required" for a neck shaft... I can see oiling the fingerboard, but oiling the neck shaft...especially when your warranty is voided if you do...seems a bit counter-intuitive...
Very strange, indeed...
Thanks for finding that. Good catch.
HTC1
|
|
lynxpilot
Rookie Solder Flinger
Posts: 19
Likes: 0
|
Post by lynxpilot on Dec 9, 2010 20:37:38 GMT -5
cynical1,
I had already purchased the nitrocellulose lacquer before I did proper homework. I have no particular affinity for the stuff, but since I've bought it I'm now in the same category you spoke of, namely it's the cheapest thing around (because I already bought it). I'm certainly open to other avenues and that will be explored later. As for the neck, I'll take Warmoth's word for it and finish mine. What they say makes a lot of sense.
One other thing I may do is mod the whammy. I have an idea (and a shop) that could easily take all the sticky out of the bridge end. I'll show details when I do it.
|
|
|
|
Post by cynical1 on Dec 9, 2010 22:32:11 GMT -5
LP -
If you've got the nitro then by all means go ahead with it. I've used nitro many times...it's cheap, it levels well, it dries to a very thin coat and if you ding it the repairs are easy.
I would suggest dropping some coin on a good mask. Lacquer, especially nitro, can burn brain cells faster than a Yoko Ono concert. It also doesn't do well below 50 degree or about 75 degree F.
The number of coats is always a hot button issue with some people. I spray one quick light coat on the entire body. Wait about 15 minutes and go back and hit another one. If you have a spray can just keep going with light coats 15 minutes apart until you burn the whole can. This stuff will be dry enough to move in less then an hour.
If you plan on polishing it out to a mirror finish wait about 30 days for all of the solvent to evaporate. Lacquer shrinks as it dries. Sanding before it completely dries can give you some surprises later.
For a final polish I start with a 400 wet or dry. Sand it until there are no imperfections, orange peel, overspray and all the sanding marks gone. Be especially careful around the horn and edges. Then move to an 800 grit wet or dry. You can go to 1200 grit, but I stop at 800 on lacquer. Then take some polishing compound and work the body over with it. A buffer is nice, but if you've never used one you can burn the finish if you're not careful...so I would stick with the good old elbow buffer... Then find some swirl remover and work the last of the imperfections out.
Also, if you're doing anything besides stain or wood dye make sure you paint with lacquer as well. Laying down an enamel, then firing on some nitro will give you a one of a kind finish...Fugly, but one of a kind...
What kind of wood do you have on the neck?
And I'd like to see you idea on the bridge. Experimentation is always cool...until someone loses an eye...
Happy Trails
Cynical One
|
|
lynxpilot
Rookie Solder Flinger
Posts: 19
Likes: 0
|
Post by lynxpilot on Dec 10, 2010 6:05:29 GMT -5
Neck is maple. Thanks for the nitro advice.
|
|
|
|
Post by cynical1 on Dec 10, 2010 7:07:39 GMT -5
For my personal basses and guitars I don't use nitro, or any lacquers on the neck. Just a personal preference, but if I'm going to go through all the work of fretting it and cleaning the clearcoat off the frets, I don't want the finish crapping out before the next fret job...
I tend to get poor wear out of lacquer on a neck...probably body chemistry and sweat, but it just never held up for me.
Years ago I would mix urethane 50/50 with mineral spirits and wipe it on, but nowadays you can buy wiping poly all set to go. It goes on pretty thin, so usually 3-4 coats depending on preference. On the bottom of the neck heel I only put one coat. (...and I never finish the body neck pocket...) This is a personal preference and not indicated to be a "Holy Grail" standard.
You can purchase the wiping pads at any home improvement store, or use a lint free cloth. I even knew a guy who used steel wool to apply the neck finish... I always got a straggler strand whenever I tried it...so take that one for what it's worth...
I prefer a satin or semi gloss, as periodically I take a 3M abrasive pad to the back of the neck to keep it slick and the satin accommodates this better then the clear IMHO. The semi gloss is also easier to hide a nick repair down the road. (...cause it ain't a question of if, it's a question of when...)
If the nut is already installed you can pull it and re-install it after the finish, or just tape it off. The tape is easier... If it's not installed tape off the slot or mounting shelf. You don't want any finish there.
Are the frets and nut already installed on your neck?
Happy Trails
Cynical One
|
|
lynxpilot
Rookie Solder Flinger
Posts: 19
Likes: 0
|
Post by lynxpilot on Dec 10, 2010 18:49:25 GMT -5
Yes and yes. I went through the whole builder with options at Warmoth and it's more or less a finished neck less the hardware and finish. I'll look into a better paint for the neck as you suggested. What I'm wondering right now is if I can hand paint the fine details of my scheme without leaving brush marks that stand up after a few layers of clearcoat. Most will be airbrush, but some of it will have to be with a brush.
They just shipped the body yesterday. I'll get it mid-week next week. That'll give me something to start on. I'm psyched. Oddly enough, I'd actually like to hear what it sounds like too, since my only experience thus far has been my LP's.
|
|
|
|
Post by cynical1 on Dec 10, 2010 23:06:26 GMT -5
Hmmm...painting with a brush....airbrush....then clearcoat...hmmmm...
Do you have any auto paint dealers or friends that own a body shop near you? I mention this as with what I think you're looking to do an auto paint might be your best bet.
Not to say you can't do an enamel and poly over it. The only thing you have to consider is that they will expand and contract at a different rate depending on temperature and humidity.
Poly is just a film coating. Auto paint systems (I use the word system, as if you stay within a particular product line the colors and clears are designed to work and play well together) stand up a lot better when airbrushed and cleared. Some do not like to be brushed, but this is where you quiz the shop owner accordingly.
I would lean more towards the body shops, as they will be more willing to sell you small quantities where an auto paint store will want to dump quarts on you. You may have to be less fussy about the color and be willing to take a metallic, but most shops just shelve or toss left overs. Get friendly and offer the guy $20.00 and he'll probably cut you a deal.
If you don't have a compressor and spray gun a Preval can works pretty good for small jobs.
And there's a few ways around the brush marks. You can play with the thinning rate, paint in slightly cooler then recommended temperatures to retard drying, possible light sanding, or just build up and sand a boatload of clearcoats until you have a level surface. The last one is how you make a decal appear flat and not raised.
Remember, if you clear the headstock you're probably going to want to clear the whole neck, or at least everything but the fretboard and nut. Not everything will need multiple coats, if you're trying to bury brushmarks, but spraying the whole neck on the last coat will blend the finish better.
I really am intrigued by this project.
Happy Trails
Cynical One
|
|
|
|
Post by JFrankParnell on Dec 19, 2010 20:56:34 GMT -5
|
|
|
|
Post by cynical1 on Dec 19, 2010 21:05:01 GMT -5
Read as "Play raw and if it twists you can really feel every C-note resonating out of your hand! "
HTC1
|
|
lynxpilot
Rookie Solder Flinger
Posts: 19
Likes: 0
|
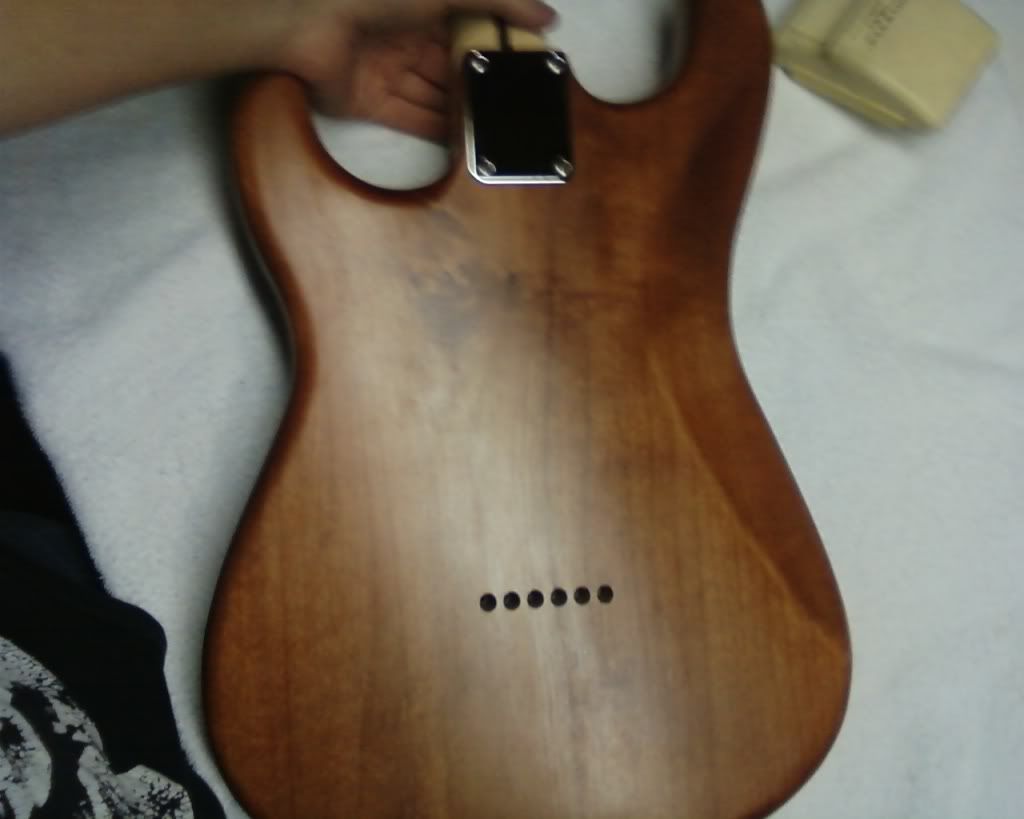
Post by lynxpilot on Dec 28, 2010 21:08:37 GMT -5
Received the body from Warmoth last week. I grain-filled with TimberMate and sanded down, so it's ready for the sealer coat. Neck arrives next Monday (3rd). Airbrush should arrive next week too. I'll probably set up my 'paint booth' in our well house. If you hear any news story about some redneck blowing himself up in his pump house in southern missouri, no, it wasn't a meth lab. Seriously though, I'll probably use our space heaters to warm it up, shut them off and paint, let the cloud clear, and keep incandescent lights on the pieces parts while they cure. It's been cold here, but at least the humidity has been next to nothing. The well house is insulated, so it should stay nice and warm.
|
|