|
|
Post by dannyhill on May 8, 2014 11:50:26 GMT -5
Hi everyone, Last year the neck of my Dano had a close encounter with a soldering iron. After I sanded out the charred bits I left it but it then went grey with sweat/dirt etc and so I cleaned it with WD-40 which is mostly naptha. Thereafter I brushed on a layer of beeswax which left it sticky and I think then its when a larger area of a reddish/dark colour had formed around what was the grey area. After which I sanded down the beeswax and put a thin layer of superglue on and wet/dry sanded it the area. After which I rubbed down again and tried to clean with lemon oil and then acetone before adding nail laquer by brush followed by wet/dry sanding. But it still does not match the surrounding area: 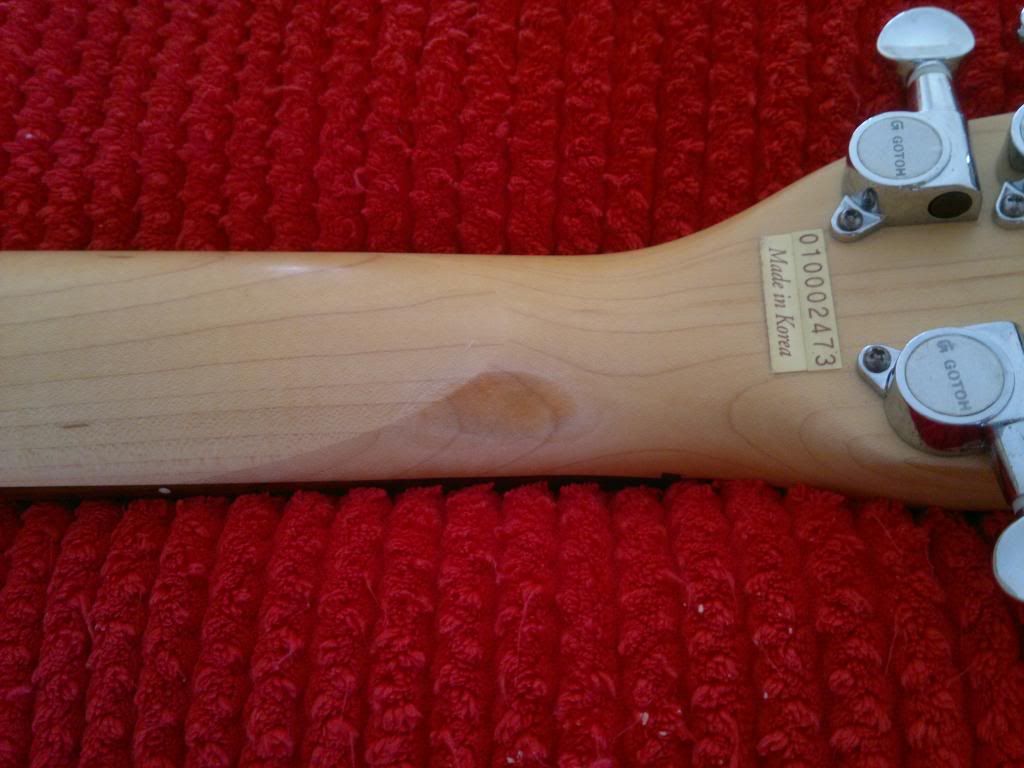 Similary I had a couple of scratches on the headstock which I tried the same approach with although I sanded the area down more as the depth of damage was a lot less and on a flat surface. But as above I have a whitish ring (almost down to the wood, a little laquer left?) centred around a darker area. In the photos below you can see an area to the left of the first A peg and a smaller area to the lower high E peg: 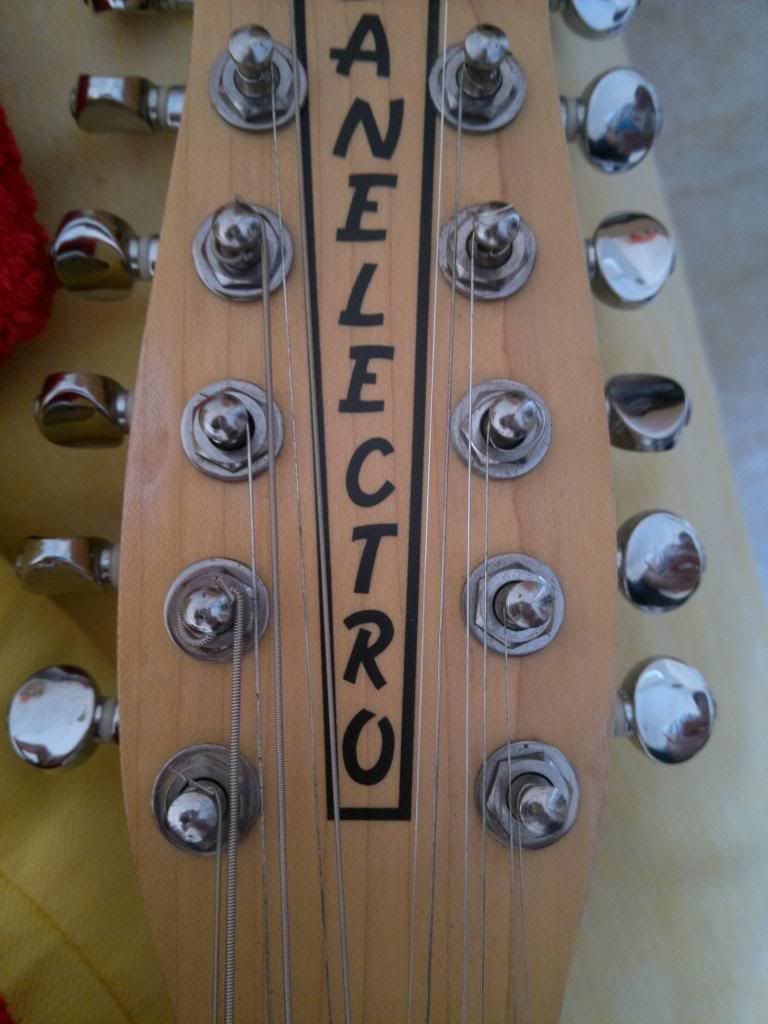 So what has caused the miscolouration? Chemical damage? Staining? Dried out maple? Damp maple? Or is this the natural colour of maple and the laquer layer had a slight tint to it? All help much appreciated. I've had no experience to date with dealing with natural finishes/necks etc. Cheers, Danny |
|
Deleted
Deleted Member
Posts: 0
Likes:
|
Post by Deleted on May 8, 2014 13:14:15 GMT -5
The wood got burnt. Hence i think is this dark colour.
|
|
|
|
Post by dannyhill on May 9, 2014 7:01:55 GMT -5
Nope, it was not this colour before I removed the grey bit and widened the area without laquer.
|
|
Deleted
Deleted Member
Posts: 0
Likes:
|
Post by Deleted on May 9, 2014 7:20:17 GMT -5
^^ then apply the same "techniques" to the rest of the neck to make it look uniform  |
|
|
|
Post by dannyhill on May 9, 2014 9:03:19 GMT -5
Hold on while I get a needle and some cotton to stitch my sides up with.
|
|
|
|
Post by newey on May 9, 2014 19:27:33 GMT -5
beeswax . . .superglue . . .WD-40 (yes, naptha for quick evaporation, but as a carrier for a lubricant) . . .acetone . . .nail lacquer . . .
Have I left out any? But what's significant about the above list is not what's on it, but what's not on it.
You've tried everything, except the stuff that the neck was finished with in the first place. This is possibly Nitro but much more likely to be a polyurethane. Get some.
A Dano website query might get you some more specifics about the finish. And you should always test in a small, unobtrusive area for compatibility before going all in.
The finish on the back of the neck appears to be more of a satin or matte finish, while the headstock is more glossy looking. But it's hard to tell from the photos. In any event, poly comes in both types, so buy accordingly. You won't need a lot, and you can brush it on and still get convincing results, so that's the route I'd go, to avoid overspraying a larger area than needed.
Possibly, but more likely that you're through the finish layer and into a layer of sanding sealer. Either way, applying the correct finish should take care of that.
|
|
Deleted
Deleted Member
Posts: 0
Likes:
|
Post by Deleted on May 9, 2014 23:28:07 GMT -5
Just a thought here, if some chemical has penetrated the wood and given that dark color, then maybe some sanding to make up for some tiny room for putty, and then application of some identical color wood putty, maybe that would do the trick? Then proceed with local application of finish as Newey explained.
|
|
|
|
Post by cynical1 on May 11, 2014 10:44:00 GMT -5
Newey gets the prize. You have discolored the wood with oil and their ilk. The discoloration is probably permanent. That's not you biggest issue. Getting a more permanent hard finish to adhere is going to be tricky as the oil is now a barrier to adhesion. The easy road is to just keep applying something like linseed or tung oil to protect it and just live with the ugly spot.
For future reference, sanding is the most common method to remove a burn. Granted, this leaves a low spot, but unless it's a deep burn you can even much of it out.
More than likely it's a catalyst finish, so poly or any other varnish would be fine to protect the now exposed wood. Apply with a small artist brush, sand and repeat until the repair is seamless to the original finish.
Over time the oil will allow a hard finish to be applied. Shellac can be applied prior to the final hard finish to improve adhesion, but if there's too much contaminate in the wood its performance will suffer.
For the discoloration and skin oils a Q-Tip with some bleach is a good way to get as much of the original wood color back.
HTC1
|
|
|
|
Post by dannyhill on May 12, 2014 7:34:39 GMT -5
Hi HTC1,
Initially I sanded the burn area off months ago which later became a grey spot from the dirt and sweat, I removed that with WDE-40 and then sanded it recently.
Thereafter at some point of the treatments mentioned above the area turned a darker colour than its surroundings, light brown compared to straw colour. This area is much larger than the original area given that the sanded area went beyond the original grey spot.
Not sure how a light poly would cover up a darker spot?
I know I did try with some neat bleach product at one point. Maybe I should have diluted it a little so it would penetrate more? It was quite gloopy. I could try this again.
Thanks!
|
|
Deleted
Deleted Member
Posts: 0
Likes:
|
Post by Deleted on May 12, 2014 8:17:37 GMT -5
I guess Cyn1's idea was about protecting the wood rather than prettifying it. So, at this point you should restrain from using extra chemicals.
In the meantime i didn't read any solid argument against my wood putty idea (given adhesion is not a problem)
|
|
|
|
Post by JohnH on May 12, 2014 17:02:35 GMT -5
I reckon it was the oil lubricant in the WD40 that soaked in and spread, making a colour change that is deeper than just the surface. I dont think that will come out easily.
It might be interesting to get s scrap of hardwood and make some samples with the same problem to test techniques. Eg, if you applied a genuinely volatile solvent, like pure naptha (or how about non lubricating electrical contact cleaner?), apply and soak up. It might either work, do nothing, or soak the problem in deeper making it worse.
Also, oil is a nice finish on fences and decks, but it fades away with time in the sun. So getting the area as clean as possible, then let some sun and UV get to it to gradually draw off the oils.The same three possible outcomes apply!
|
|
|
|
Post by dannyhill on May 13, 2014 4:45:11 GMT -5
Hi John,
It could well be!
I shouldn't have been so lazy and gone and bought me some naptha.
I do actually have a can of contact cleaner!
And of course their is plenty of sun here!
Cheers,
Daniel
|
|
|
|
Post by cynical1 on May 13, 2014 18:26:16 GMT -5
In the meantime i didn't read any solid argument against my wood putty idea (given adhesion is not a problem) Well, you are now. While at times it's unavoidable after a serious injury, it's not the option of first choice for a burn. It does have a tendency of making a permanent ugly spot. The easiest way of fixing a low spot is extra thick cyanoacrylate glue. It's a great way to even out a low spot. It won't flow, dries nearly clear and is seamless under the final cover coats of clear. Be careful, as some manufacturers use agents that hate lacquer. The stuff from Satellite City with the green label is the best. HTC1 |
|
|
|
Post by dannyhill on May 14, 2014 4:32:40 GMT -5
I agree, the amount removed is just 1-2mm.
|
|
|
|
Post by dannyhill on Jun 9, 2014 8:08:18 GMT -5
newey - I believe its a satin or slightly gloss finish on both front back. Its neither gloss/sticky like my V6 stat (gloss) nor LPs, nor is it Satin/Matt like my Squier VM Telecaster II (in fact most of my necks of my Fender type guitars are rubbed down to a satin level with some wet/dry or wire wool or green scouring pad). I mean what is the difference between satin and matt? Anyway, I found some polyurethane spray down in the storeroom which is labelled as a colourless wood protector for outdoor furniture, it actually has a slightly golden colour which is bang on with the finsh on the neck/headstock. However, before I found it, last weekend I bought some oil paints and mixed a little golden (light) ochre from the selection into some clear nail laquer and that went on beautifully on the neck except for one 2mm diameter spot one inch down from where it meets the headstock on the 'centre line' of the neck. I also used it on the headstock which didn't go on such a good match. The lower right bit didn't seem right and on wiping some excess yellow off it ended up too light. For the upper left (larger) bit, it went on too yellow. It might well be that I did that headstock later and forgot to shake the bottle for an even suspension and so ended up painting on a layer with more ochre oil to laquer. Anyway, I may wipe off with acetone and retry with the spray I found (spray on a cloth and wipe cloth over the wood). That 2mm diameter spot and around the edge of the headstock parts both have that reddish almost herringbone pattern so perhaps a Q tip with bleach or contact cleaner and then poly spray would be good there? Or perhaps a rub down first? Photos on the way. BTW I parallel I thought now I had base coloured (water paint blend) and drop filled with crazy glue a deep screw driver scratch (must learn to fix things with a towel on the body) on the upper flat surface of the body of a tele I would try the same with my Squier Jag which came with finish imperfections, after close inspections seemed they left dots and a couple of narrow streaks of the base colour before spraying on the poly so you see the black undercoat as dots here and there and two small fine streaks on the top of the body. Hmmm, what can I say? Well, I forget to learn a valuable lesson from fixing two surface imperfections on my Black Beauty copy and a finish crack from dropping a screwdriver from a sleepy hand (still hadn't learnt to put a towel down). You see my water colour black was too light, more a dark grey, so I resolved to use a permanent marker, only the surface imperfections were so shallow that by the time I finally managed to add the crazy glue without either (a) the ink dissolving up into the glue leaving a lighter/browner under colour or (b) scratching the marker colour through the glue exposing the wood or (c)remove too much glue when scraping excess with the a razor or wet/dry sanding, and having to scrape/polish out/acetone wipe the each time to start again I had rubbed down to the wood in places surrounding the original minor imperfections. Ye gads, from mild irritations to minor disasters! Something similar occurred at my cracked finish (2mm diamater) where after first widening it slightly to remove 'crazed finish' instead of the marker pen I tried a crazy glue and cartridge pen black ink suspension drop fill solution which was more trouble than the marker pen followed by drop fill crazy glue solution and given the curvature of the body just under the bridge humbucker it also ended up with larger areas surrounding the original area rubbed down to the wood. The one thing saving my sanity at this time was that however good/bad the fix ended up, it would be hidden by a pickguard which I had purchased (the model came without one). Anyway, what saved all this was clear nail laquer over the black marker pen. The laquer always went on thinner than the crazy glue and was easier than to flatten/profile into the surrounding body, partially because if go slowly you can use an acetone soaked cloth, wipe, Q tip to wipe 'layers' of the laquer away without affecting the surrounding areas, wet/dry sanding can just be too risky on thin finishes or curved parts of the body! So back to the Jag, did I learn from the Black Beauty experience? Did I fcuk!?! I didn't have a permanent white marker (do they exist), the water colours white was too creamy (the jag is Olympic White) and the tippex pen white was 'too white' so I decided to go with the oil paint white which seems a very close match. One week later of frustration of dab, cover with crazy glue and wet/dry too close that the oil paint is exposed and wiped away, followed by use a pin to gouge the spot (<1mm diameter black spots in finish) or streaks deeper and then retry only for the same to occur as the oil paint was too thick or too translucent once thinned with contact cleaner with all these imperfections on curvy parts of the body, I now had small patches of wood showing. Ye gads, from virtually invisible irritations to complete disasters! So now, I start to use my brain (where had it been all this time? Too much in a hurry and over confidence?) and decided to add a thin layer of tippex over the very work areas, sand smooth followed by brushing on/cocktail stick on a top layer of white oil paint, thinned with contact cleaner. Hmm, this stuff never seems to dry! So THEN I finally read up on oil paints and find that they take anywhere between 5-14 days to dry! Agghhh! So now I try this again and this time the top layer consists of the thinned oil paint in nail laquer, and now we are in business! I can remove excess laquer with an acetone rub, but after I rubbed too much last night I found that nail varnish really needs a couple of days to go rock hard, so I will wipe carefully the excess tonight before I get the wet/dry clothes out. At the moment it looks like someone threw paint on it, but it must work out eventually right? I think the white top coat is still slightly too white, but then a thin layer of clear laquer with a small amout of yellow ochre could give it the warmth it needs to match perfectly, at least in artificial light. :-) Time, patience and experimentation right? Maybe make this a sticky? or should that be a tacky thread? :-)
|
|
|
|
Post by gitpiddler on Jun 9, 2014 21:04:45 GMT -5
My 1st thought was the neck appears a little fat behind the 2nd fret, you could shave across and up the neck from the Spot and achieve a smooth taper surface to finish.
|
|
|
|
Post by dannyhill on Jun 10, 2014 8:48:05 GMT -5
I'm letting the Jag laquer paint dry more until tonight. Back to the Danelectro. I rubbed off the parts that appeared quite yellow and then re-applied with a less yellow mix. I then applied the poly spray liberally from a cloth or Q tip to the head stock and entire neck, that has provided a more even colouring - although it may have left the appearance blotchy looking to the camera but not to someone 50cm away. Before doing so I used both bleach and contact cleaner to try to remove the dark areas (edges of headstock and little spot on back of neck). I also used some acetone to remove thick layers of laquer in spots on the headstock, that unfortunately left those areas a bit too light again, which I wouldn't mind still working on to make more yellow. It may well be they are lighter because I sanded away more layers of wood in those spots so they are lower/scooped? Incidentally I used a mix of micro-mesh and 150 sandpaper before I realised that 150 micro-mesah was not the equivalent of the sandpaper 150 but actually about 400 it also probably contains silicone. Anyway, here are the photos, all of the areas needs a fine rubdown to give a satin feel and even out the thickness/yellowing or colouring - tonight. Looks better than before, so if I go steady I should get it even better, the headstock needs the most touching up. 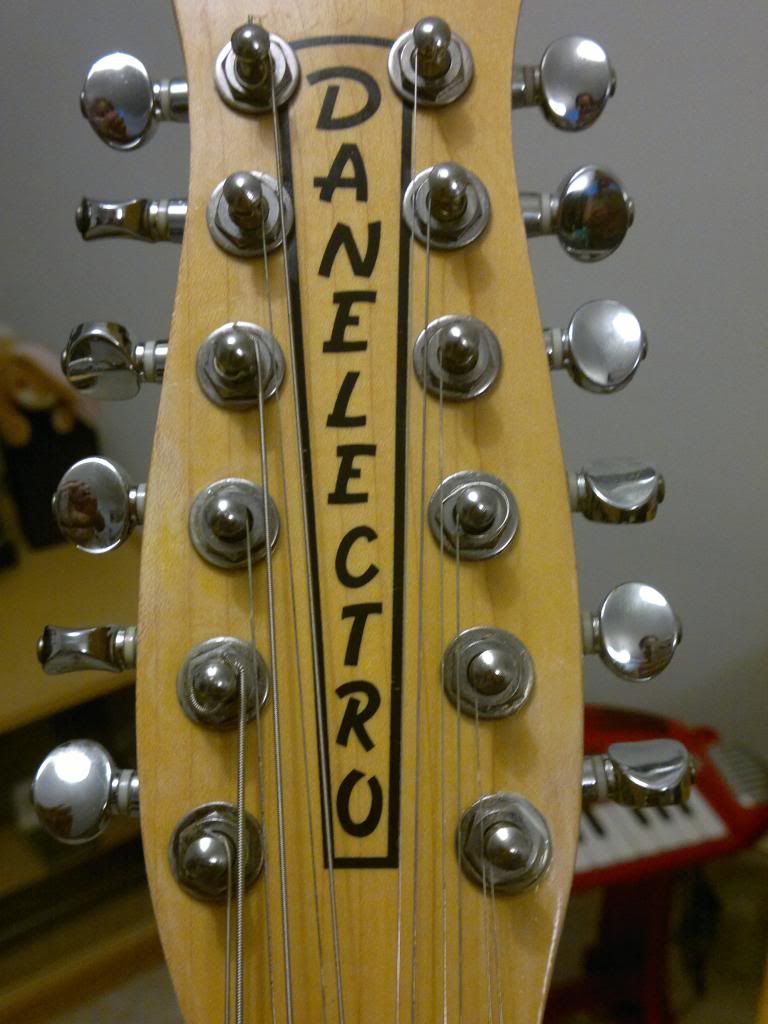 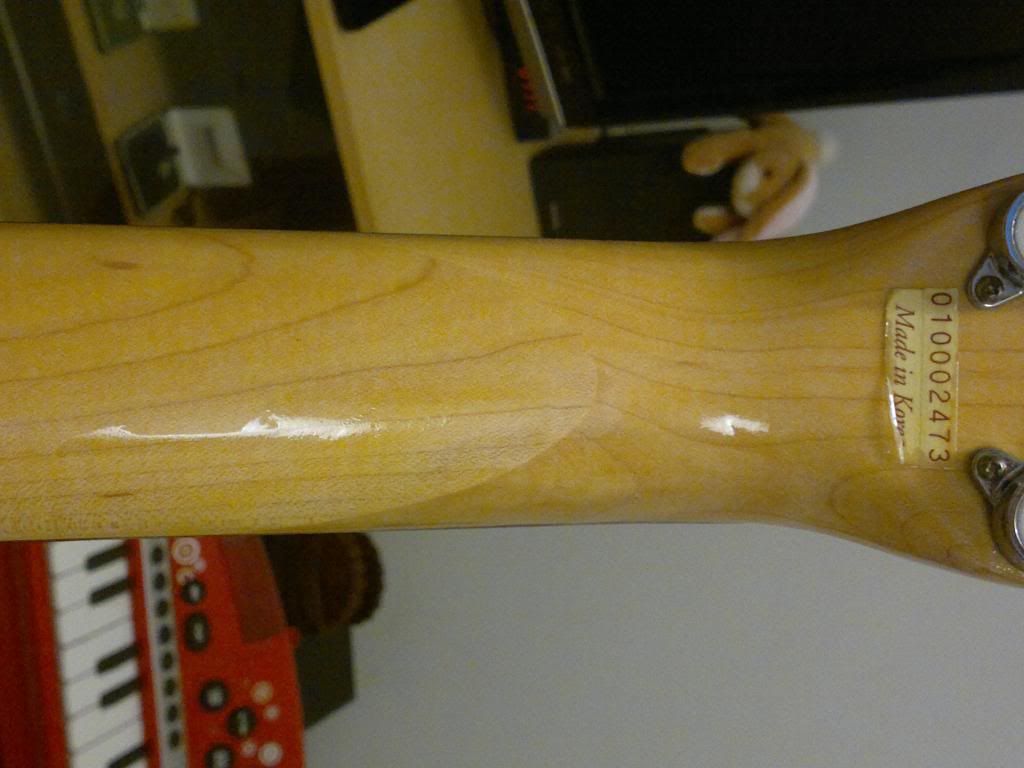 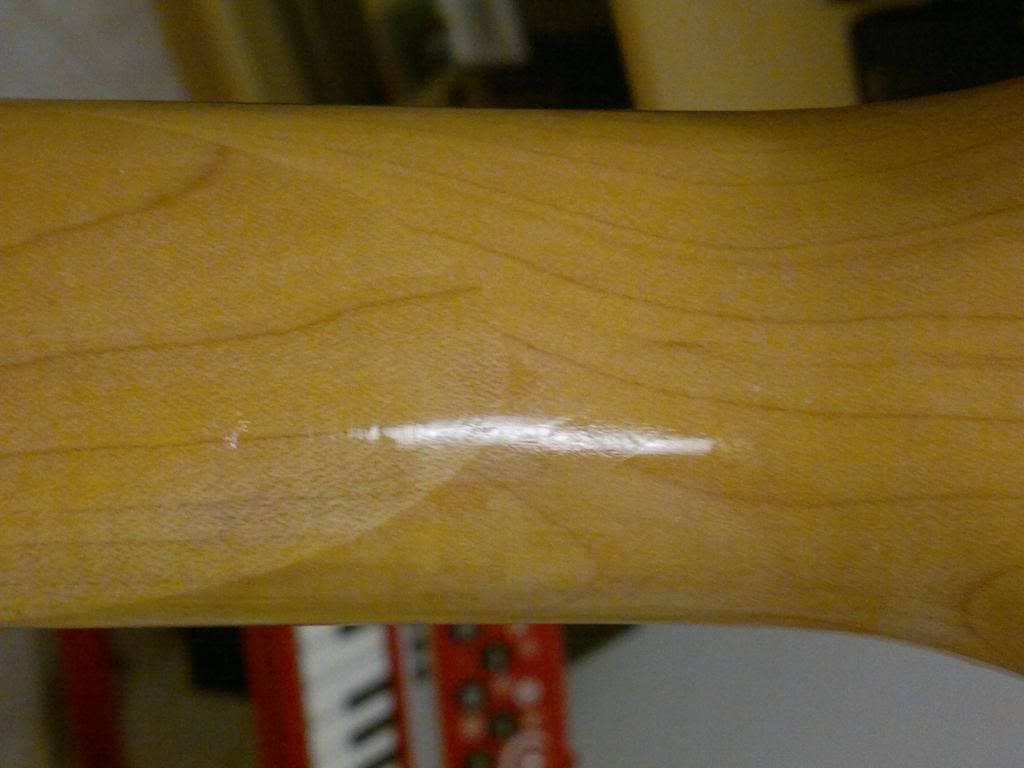 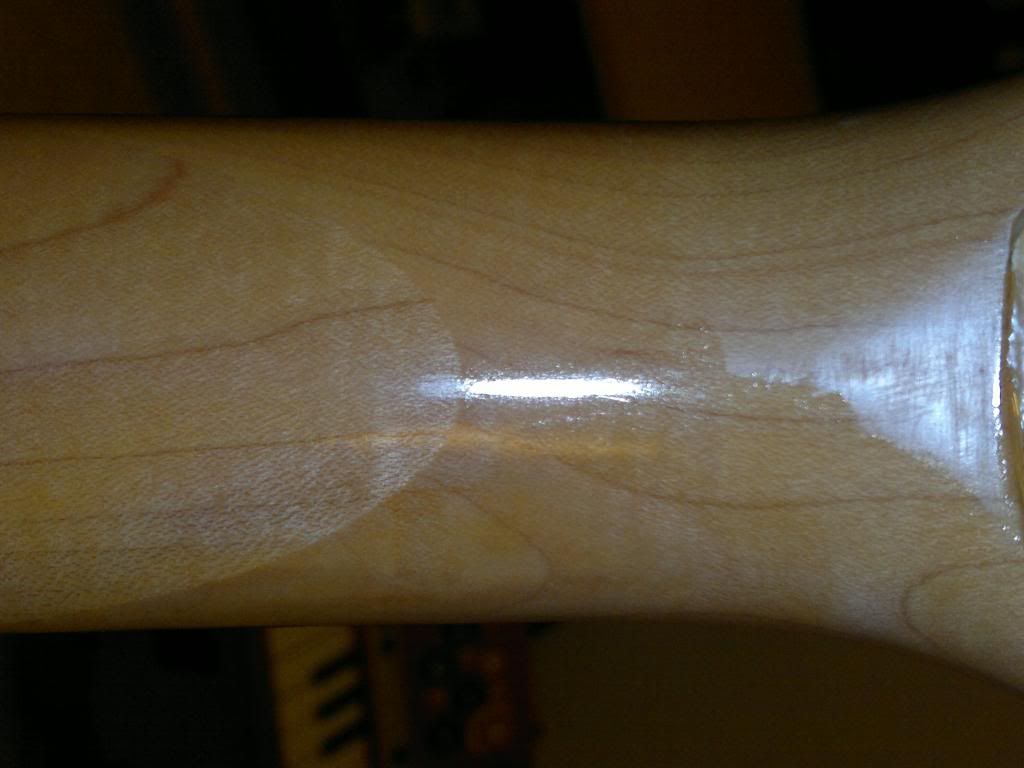 In the last photo you get the best view of the grain pattern which is what is coming through in certain places, especially on the headstock. All suggestions welcome, Danny |
|
Deleted
Deleted Member
Posts: 0
Likes:
|
Post by Deleted on Jun 10, 2014 10:32:23 GMT -5
if it feels good, leave it that way. Nice job BTW!
|
|
|
|
Post by dannyhill on Jun 11, 2014 9:42:23 GMT -5
Ahhh!
I used some micro-mesh in soapy water to smooth the neck and a lot of the poly or whatever it is just rubbed off, maybe I didn't leave it on long enough or maybe 'that spot' is not taking up the spray. Maybe it needs a deep clean with naptha and leaving in the sun? Anyway for now I went back and brushed on some yellow tinted laquer and also on the dodgy parts of the headstock. I will see how it is when I come back from my trip in a couple of days......
|
|


