|
|
Post by strat80hm on Sept 12, 2016 20:56:25 GMT -5
Have you equipped one of your floyd with one?
|
|
|
|
Post by strat80hm on Sept 12, 2016 20:50:37 GMT -5
Hey Cyn - thanks for popping in! That BBE seems like a good optical compression too - probably quite similar to what the Mooer does. Bulkier though - bigger boards not very NYC friendly.. 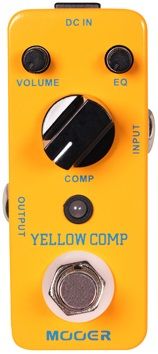 |
|
|
|
Post by strat80hm on Sept 12, 2016 20:18:22 GMT -5
Here s the battery-draining wiring - does it speak to you?  ![]() |
|
|
|
Post by strat80hm on Sept 12, 2016 1:58:33 GMT -5
Thanks for this diagram - that looks kinda similar, yet different. I ll look into it to determine which cable is the battery.. |
|
|
|
Post by strat80hm on Sept 11, 2016 13:25:59 GMT -5
Hey John,
It does indeed - system works perfectly till battery drains down to 7-8Volt, below that the battery led blinks.
As of now i remove the battery between gigs (daily)
That is a good question: how do i figure this out? should i reverse my wiring?
This is the FIshman Presys - piezo is directly wired inside preamp (no plug)
Preamp output is a plug (Molex connector) type with the 3 wires (red, white, black)
black is grounded
white goes to rind
red goes to tip - this is the one i choose to insert the volume pot
Thanks for your lights
|
|
|
|
Post by strat80hm on Sept 10, 2016 15:32:52 GMT -5
How to properly wire a added volume pot my acoustic guitar equipped with Fishman-presys-preamp (active piezo) without draining the 9V battery?  - Since i installed a volume pot, the 9v battery runs out in a couple of days - big hint for a wrong wiring letting the circuit on all the time - Acoustic guitar active preamp turns on when a jack is plugged - and off when unplugged, i d like to keep that! 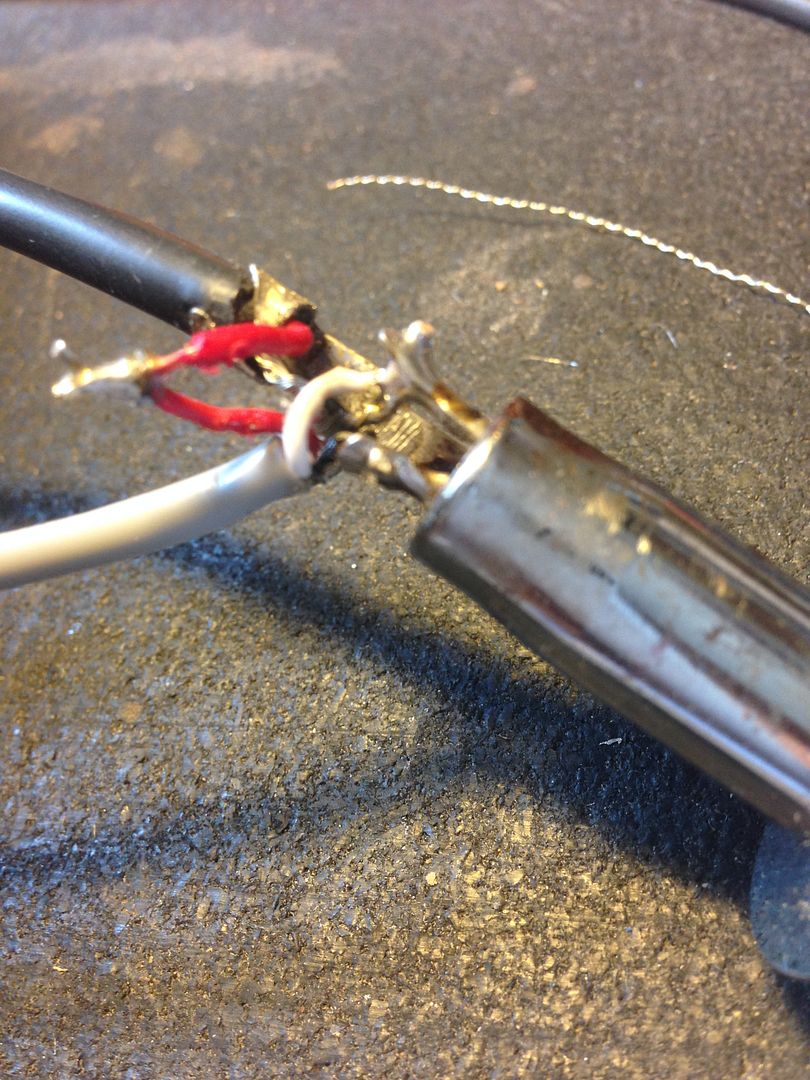 I connected that volume pot on the red wire and made sure the ground would connect only when a jack is plugged in - but apparently this is not working and the battery is dying out even when not plugged. Anyone know what d be the proper way to do this? |
|
|
|
Post by strat80hm on Sept 10, 2016 14:27:08 GMT -5
Update: that Mooer Optical is doing the job quite nicely!
|
|
|
|
Post by strat80hm on Apr 4, 2016 21:23:39 GMT -5
Hey JohnH! Thanks for helping out.
Vocal compression pedal huh? never thought about that, should most definitely give it a try.
I ve found a couple of pedals for vocalist like the VoiceTone T1 from TC Helicon.
I m wondering if that recent (and affordable) SpectaComp from TC Electronic - via it s toneprint application - could be a solution too..
|
|
|
|
Post by strat80hm on Apr 3, 2016 21:09:18 GMT -5
Always looking to improve the acoustic guitar live experience within a full band on a loud stage, i m realizing that my main issue is precisely the most desirable feature of the nylon-string guitar: its super-wide dynamic range.
Imagine a very loud situation (with banging drums, electric bass, keys, horns and vocal monitors) and you in the middle with a nylon string guitar (piezo) and your fingers: you might wanna freely switch from arpeggios to hard strumming (rasgueados) to percussions (golpe) to tremolo (spanish guitar style) to fierce solo (thumb/ staccato) and more: Although the main issue is going to be the volume: even while constantly adjusting my own volume to suit my playing technique, it always feel like i m "fighting", which is not the best idea. I m not having too much feedback issues (i covered the soundhole)
So i m thinking a compression could help "minimize" a tad that wide dynamic range.
I tried a couple of classic pedals (Boss, Mxr, Guyatone) but even at the lowest setting, they seem to be working too hard on the sound - and when i try to compress the less, then the output signal becomes weak (weaker than bypassed signal).
I ve read about these following models though havent tried them yet:
- Mooer Optical Compression
- Fishman ToneDEQ Preamp EQ
- Fishman platinum pro
- TC BodyRez or PlayAcoustic (bodyrez inside, plus vocal harm)
Has anyone any suggestion that could help my situation?
|
|
|
|
Post by strat80hm on Feb 7, 2016 15:56:07 GMT -5
So, the next time someone trots out the nitrocellulose Holy Grail nonsense, just smile and thank some hopefully long dead a  hole in Marketing somewhere for starting that urban legend. HTC1 What!?! How about brass nut, mojo banjo, grigri guitar, voodoo drums, Mississippi crossroad, black cats, blue LEDs, brown m&ms, pink elephants, point-to-point soldering and clothe-sleeved wire??? Legends too since you re at it??? |
|
|
|
Post by strat80hm on Feb 7, 2016 15:34:58 GMT -5
I also agree with greekdude, of course. No instrumentation can show the differences that human hearing can distinguish. If I look at the waveform or spectral response of a piano compared to a guitar I could never point out the differences or even recognize which is which, and yet I can hear the difference any time. Furthermore, from my own experience, when listening to waveforms (attack, decay, sustain, release) right after the "attack" phase, it is not easy to tell a piano from a guitar or a cello: To me, the attack (and peak) is the main differentiating factor between instruments. |
|
|
|
Post by strat80hm on Jan 31, 2016 14:39:39 GMT -5
Thanks for sharing - the concept is not new but this one is very well made!
The war in the comments below the videos is predictable yet hilarious - guitarists can be SO conservative...
Again a blatant proof (as we needed one) that one hears with their eyes a lot - always good to be reminded reality: many roads lead to Roma haha
|
|
|
|
Post by strat80hm on Jan 30, 2016 16:51:41 GMT -5
Thanks for improving the DIY method - indeed, double coil out of phase seems to be the way to success
yes 80 s metal brought a lot of fun to the party - although i do mostly play with clean sounds: what i was saying was that i love using a magnetic sustainer IN ADDITION to natural feedback on a very loud stage - gives you a lot of possibilities for fun discoveries.
Acoustic guitar gives you some easy infinite sustain on stage too - though it quickly turns into feedback, takes practice.
What kind of sound are you playing with?
|
|
|
|
Post by strat80hm on Jan 30, 2016 16:42:24 GMT -5
Congrats for a successful live performance on the acoustic - not always easy to have those setup to our exact liking (not many screws to play with). Indeed, another world - glad you didnt go the electric+simulator way: people ear with their eyes too, that would definitely have killed the vibe - especially if filmed and broadcasted  Like others said, a video would be cool! |
|
|
|
Post by strat80hm on Jan 9, 2016 18:34:01 GMT -5
Nice perks indeed Speaking of what s inside a commercial drivers, i found this pic from 4Real (http://music-electronics-forum.com/t1025) 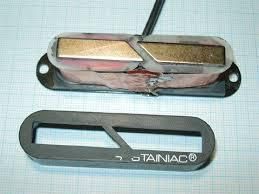 I m no expert unfortunately, hense no result connecting home made driver to commercial circuit  Overall, while i still love sustainers - can really be a lot of fun, especially on stage at loud volume (in addition to natural feedback and sustain) - electromagnetic solution is not the best for my purpose yet! How does yours go? |
|
|
|
Post by strat80hm on Jan 3, 2016 21:03:39 GMT -5
Thanks for the pics and explanation - way clearer indeed.
Did you find specific benefits to the dual-coil and dual-magnet design?
From my experience/understanding, both sustainiac/sustainer drivers, regardless of their outside shape, are just one magnet+coil, and that little added metal part that is supposed to block some E.M interferences.
|
|
|
|
Post by strat80hm on Dec 21, 2015 17:07:47 GMT -5
Hi Strat80hm, And the ones you built were all single coil drivers? And the 2 sustainiac drivers were split coils? (You can test with a magnet, bass and treble side of the drivers have a different polarity.) Just thinking of an explanation. I hadn't mentioned anything about building, but you guessed it right! I don't want to give away too many details at the moment but, yes, there is a sustainer part involved. I will need some time to assemble and test and then hopefully I will be able to show some results over here. bye Paul Not sure what your question is: - the DIY drivers i tried were all single coil yes - the Sustainiac driver i used is the single-coil-shaped one. - the Sustainer drivers i have are all humbucker-shaped ones - although they seem to contain only one coil (the second one is hollow) Good to hear some invention is underways ;-) |
|
|
|
Post by strat80hm on Dec 21, 2015 12:38:25 GMT -5
Hi Strat80hm And did you succeed in dismantling your 2 coil sustainer driver? If so, how did you proceed and what did the "dummy" coil look like? Was it wired in series or in parallel with the driver coil? As a hobby sustainer builder myself I'm interested how the pros build their stuff. (Don't know whether you're still gathering courage or I'm necrobumping but I ask anyway.  ) Paul Hey Paul - thanks for interest - i ended up finding a all-made single-coil-shaped Sustainiac driver and used that. It works well with the Sustainer circuit - i tried several home-made ones without great result unfortunately. Regarding the humbucker-sized-driver, it seems simpler than that: apparently the empty coil is just that, empty: there s one coil only, the rest is just hollow. What are you building? |
|
|
|
Post by strat80hm on Nov 19, 2015 17:00:51 GMT -5
The scalloping looks just beautiful. However I think you've overdone it with the depth. Thanks - though the full-scalloped neck on the picture is not mine - it actually is a vietnamese guitar, very deep scallop. On my acoustic, i only did a partial shallow scallop - the minimum necessary to accommodate my tapping-fingers nails. |
|
|
|
Post by strat80hm on Nov 18, 2015 1:09:50 GMT -5
Hey strat it seems now Cyn1 is your remote go-to Tech! Scalloping feels great. I miss my old cheapo YJM partscaster copy. Some day (when I retire) I will do it again, right this time. Right? haha, and i m like the bad apprentice who doesnt listen and messes all up! YJM and cheap! Cool Yup, i love the feeling - and you can tap without breaking your nails - would have done the entire fretboard (vietnamese guitar style) but the capo s not so friend with it. 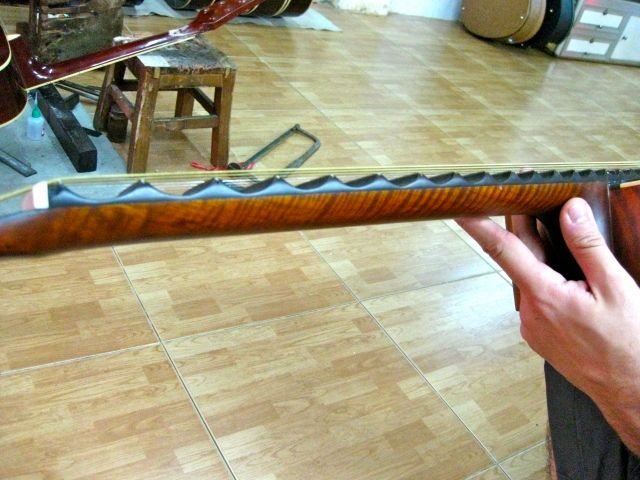 I used a curved chisel mostly- with only very little sandpaper-over-round-file at the end - the trick is to go slowly really, removing small pieces at a time, then you cant really mess up - and even if, it would be a small ding. |
|
|
|
Post by strat80hm on Nov 18, 2015 1:05:11 GMT -5
Thanks for the time- i might wanna try the stripper, i used some recently on a desk, quite efficient (it was no polyurathane though)
But carefully with masking tape and away from edges (that i could finish manually or treat as-is for potential creative look haha
I d first have to locate the time now...
You re right about handling guitar too early: still stains.. haha you gotta to love the learning curve!
|
|
|
|
Post by strat80hm on Nov 16, 2015 20:51:43 GMT -5
Very useful for high notes and all kinds of weird noises; also useful as visual markers, "natural compressor" and thumbrest. What makes you say for sure that this is plywood? On this pics, i do not see the other ply-s per se 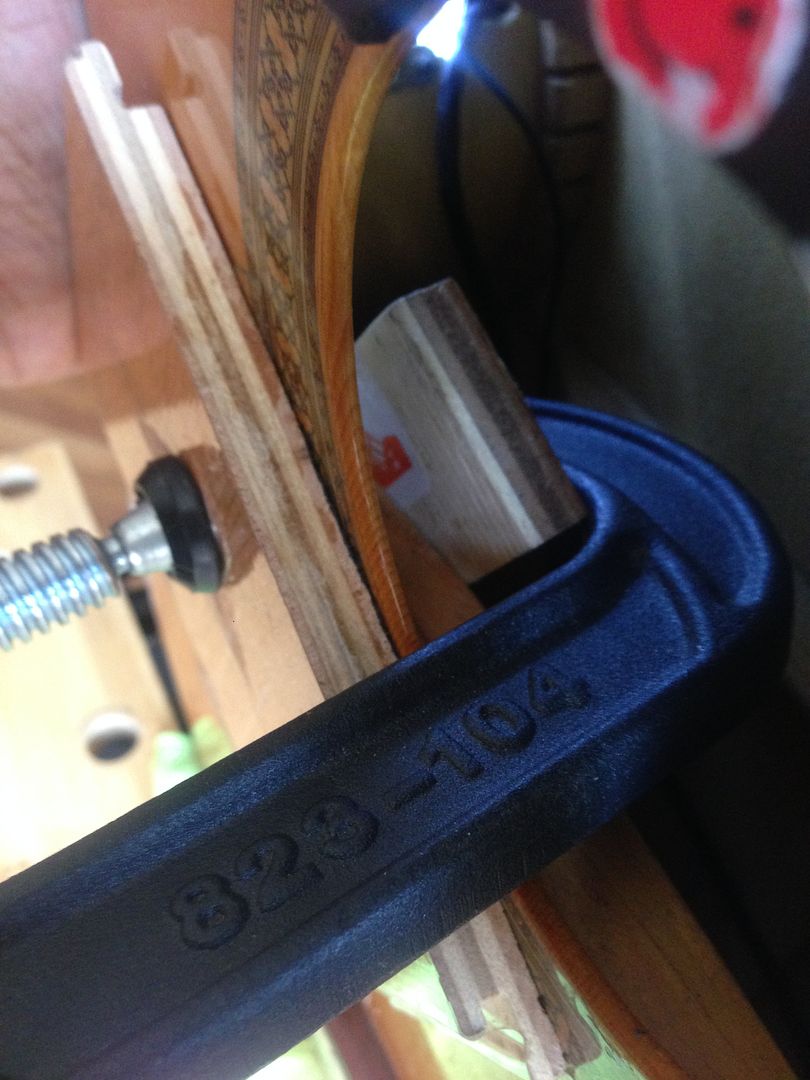 That s a good question: i might find 7 days in a row from time to time, it could be just enough no? Hey, this sounds interesting (besides the side-effects) |
|
|
|
Post by strat80hm on Oct 29, 2015 18:08:29 GMT -5
As i finally come to realize day after day how important the top (soundboard) is to the tone, i find myself dreaming of:
- leaving the back&sides as is.
- totally remove all the "finishes" from the top
- tint the naked wood in red
- apply a couple of thin coats of lacquer
Given that
- i m lazy, prefer to keep my energy for playing
- Cyn said that "sanding polyurathane is more work than you think"
The question:
- if i apply a chemical stripper (Klean) on the soundboard (coated with polyurethane+tinted shellac+lacquer), what can i expect removing?
(ideally, all, but i doubt it s gonna be that simple..)
|
|
|
|
Post by strat80hm on Oct 29, 2015 17:10:28 GMT -5
Haha, indeed, put the horses before the carriage and who knows you could end up at a cool place.. or not. Bone nut/bridge, thinner neck profile, carved fretboard, fretboard extension etc do change the playing experience.   Indeed this guitar is now pretty mute too - did i mentioned i fill up the soundhole? - so quite friendly for strumming at night at home too. On your acoustic bass, where do you think the "no acoustic tone" quality comes from mainly? There s no change of color at all per se, just a slight " dark blue" shade (similar to oil or petrol in water) when it s being rubbed - it then disappear when "drying". It took me a moment to really understand why i ended up the shows with stained hands (as well as forearm and torso when playing shirtless - yup we do that haha): i thought i was a specific area on the guitar, but it turned out it was anytime sweaty skin got in touch with the brown parts (back, sides, headstock). It s been 4 weeks since i sprayed the lacquer, the thing is, this is not really getting better - some color still comes off when rubbed with wet finger - brown on the back, red on the the top. So regarding the color leak, you are basically saying that this might be a matter of drying time - more than solid pigments issue? 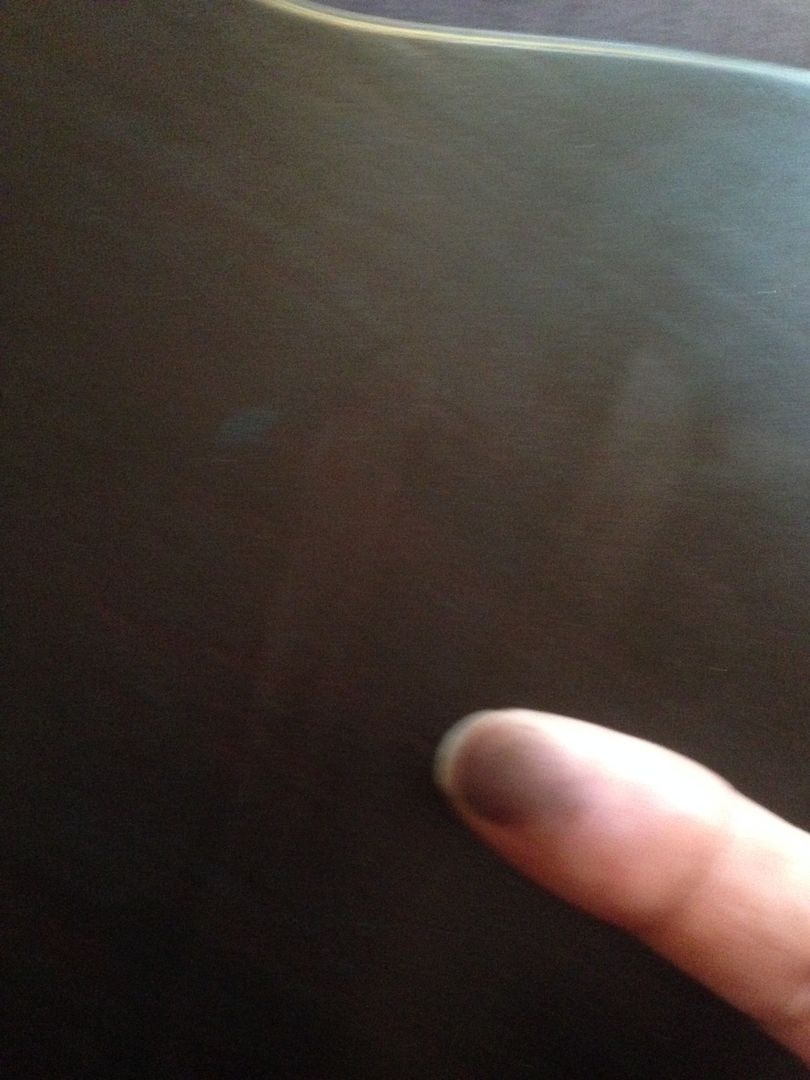 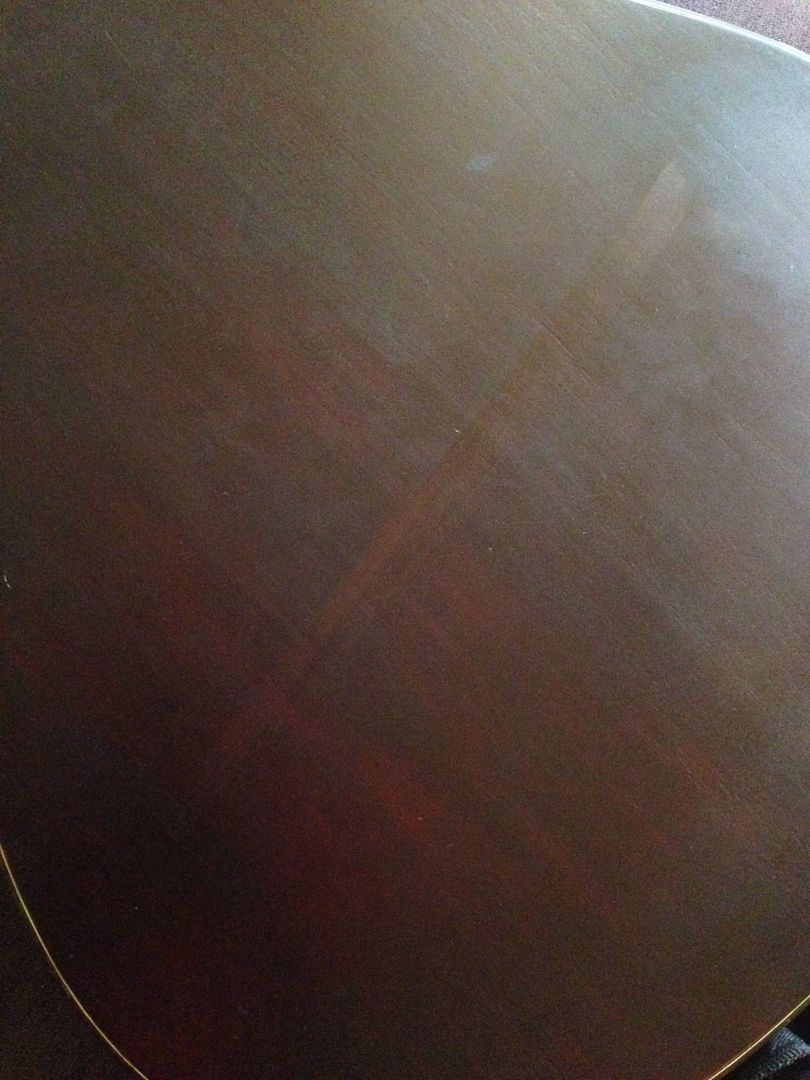 Indeed i was cheap with the shellac haha. Now My understanding is that - the soundboard should be as thin and free as possible - that the back&sides are not as important in the sonic result - so even if i put too many layers of shellac on there, there are likely not the main cause of the muffled sound. The plan - i m lazy so not having to redo the brown back&sides is fine, as long as the brown stays in place.j - so I would then only have to take care of the top? that ll be nice. - sanding down the red soundboard is definitely on the list, it ll bring back some resonance. And I will love to see interesting patterns in the process, why not - then i need to adress that bridge too (i d like it brown..damned, am i gonna have stained hands for ever?) - finish up the rosette area - find some more serious fretmarks (mauve smileys are not serious arent they? and mostly you cant see them on dark stages. As always, this is helping a lot, sending genuine thanks from the East Coast Cyn. |
|
|
|
Post by strat80hm on Oct 26, 2015 15:41:12 GMT -5
Hey there, back after a bunch of shows and experiments with this guitar.
PROS
- all and all, i love the instrument better after I fixed a bunch of details (neck curve, fretboard, piezo, nut, bridge, electronic)
- the amplified sound didnt change and is very usable loud
- people and bandmembers love the new color.
CONS
- the natural acoustic sound is indeed damped.
- the back&sides color (brown) seem to "leak" or "stain" with the slightest sweat or humidity.
SOLUTIONS:
- i have a couple of days off so i might redo the work on the top soon
- i m doing tests with some liquids pigments and shellac
QUESTIONS:
- how come the back is giving away color after 5 coats or so of satin lacquer?
- is it a chemical reaction between shellac/pigments/lacquer/sweat?
- or is it only a matter of number of layers?
Thanks in advance for any element of answer.
|
|
|
|
Post by strat80hm on Sept 28, 2015 0:46:46 GMT -5
Cool fix - and all-wood, nice!
|
|
|
|
Post by strat80hm on Sept 27, 2015 21:59:08 GMT -5
Update: here what it looks like without the masking tape and with the stuff. Guitar did the shows fine, it felt good to have no crack threatening to get worse at any time while banging the thing. Visually in the end, i dont mind about the sloppy job, it looks fine enough on stage, that ll do it. I m not finished with the neck - i d like matte or maybe naked wood and make it a little rounder) - the bridge (dark like headstock), - and other stuff in progress.. 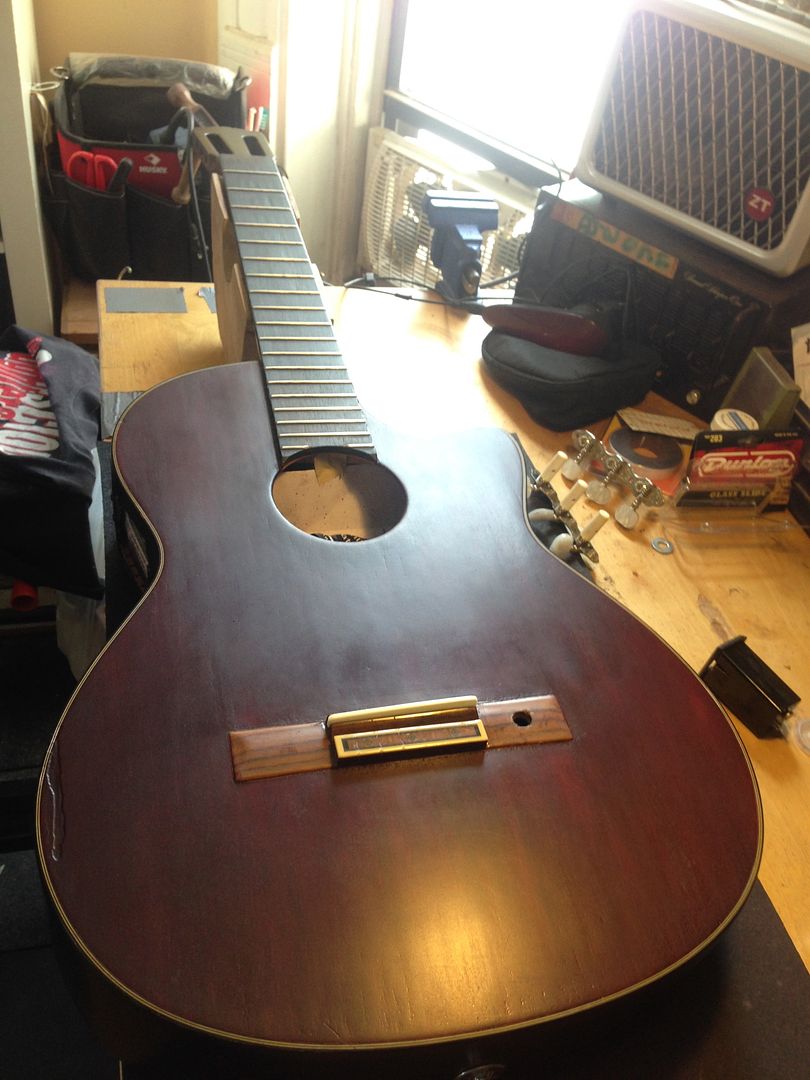 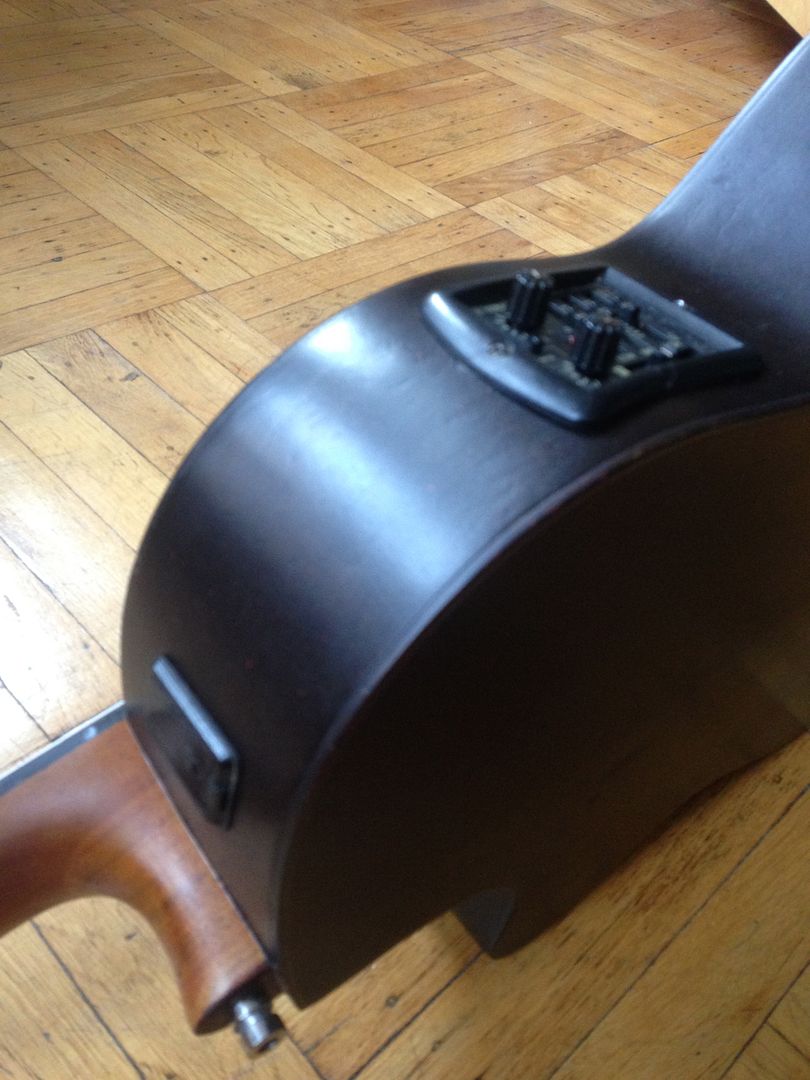 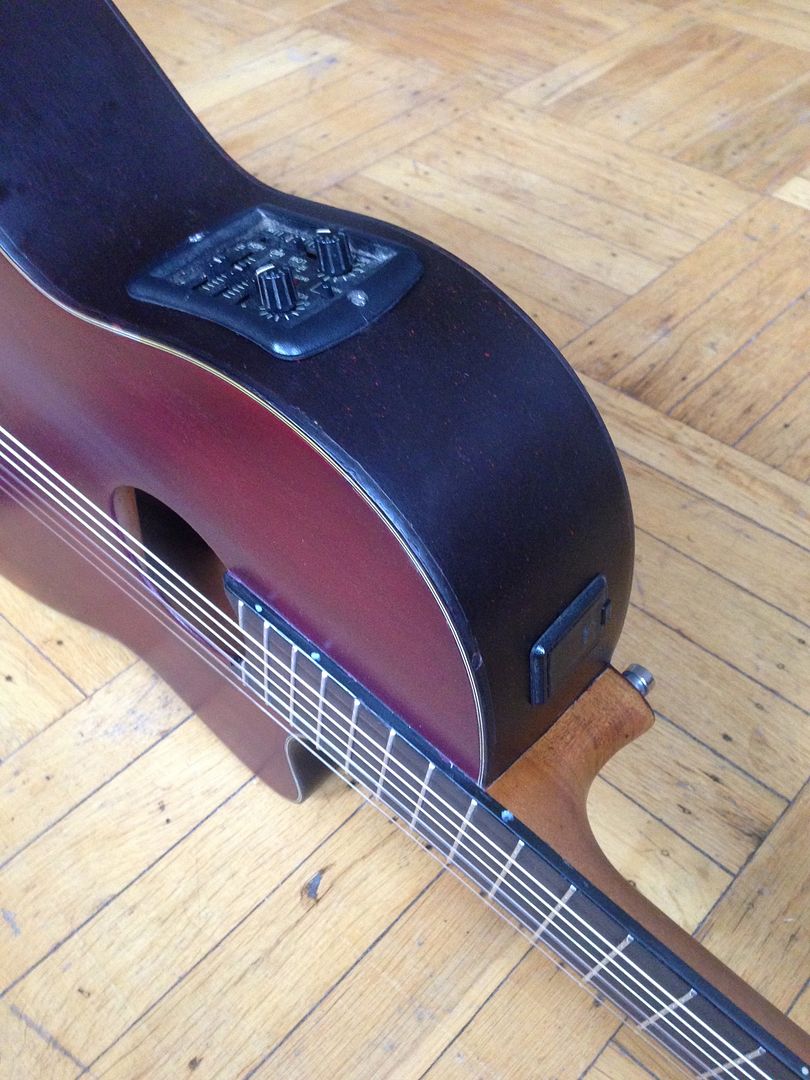 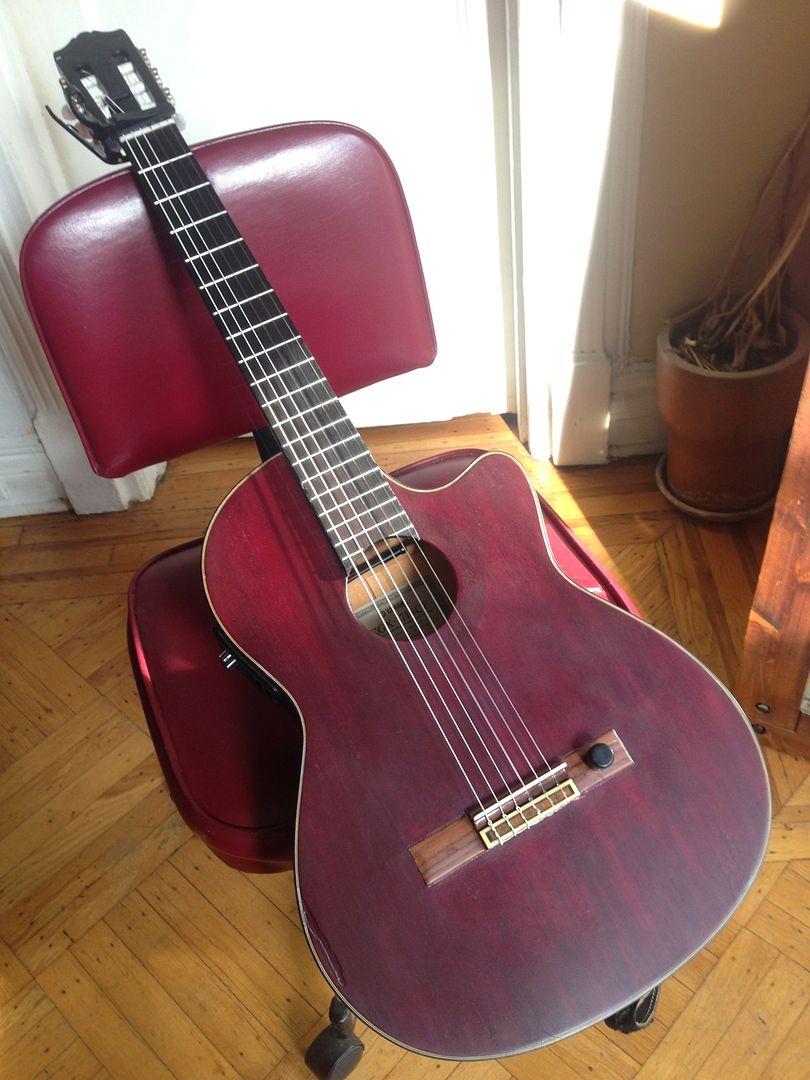 Yet i might choose to redo it all anyway: as you mentioned Cyn, the sound changed. I always plug it so it s not that obvious, yet you can better tell in acoustic, it s less bright, a tad muffled. Harder to get those higher harmonics around frets 4-3-2. I m guessing too many layers of shellac to get the right dark tint. It would be better to thin the shellac and color it much more, so that 2 or 3 thinner layers would be enough to get the dark red hopefully. Then add the golpeador - there was one initially so it was not a problem though. I doing a couple of more shows this week and will compare with other guitars at the store, will see from there. Definitely a learning curve Cyn haha |
|
|
|
Post by strat80hm on Sept 25, 2015 11:57:10 GMT -5
Good to hear there s a way back in case - granted, sanding aint the funniest part.
How long to go back 2 layers worth of lacquer?
Easy to know when i m through (color of the dust?)
I think my job is a bit sloppy and i could get a more consistent color overall - then again, better vs good enough..
I m gonna keep on going with the headstock and do the shows first, will make a decision from then.
|
|
|
|
Post by strat80hm on Sept 25, 2015 0:37:57 GMT -5
Hey! that's great! Now the scar is barely seen. What you did with the help of Cyn could be reference for future readers  Thanks Greek! If this tentative can help anyone to learn from my mistakes, this wont have been for nothing then cool |
|
|
|
Post by strat80hm on Sept 25, 2015 0:36:25 GMT -5
Oh that means that i should have waited a bit - especially since the guitar could do the shows without the lacquer.
Thanks for the guidance, support, monitoring, experience sharing and.. cheering haha
Well, i ve learned a lot:
- solid pigments was not the best idea (not sure why they actually showed up with the last coats, i tried to filter but it was too long with a coffee filter so i went on. Should have tried with some stockings.
- could have fake-painted wood lines before the shellac maybe
- should have sanded more professionally (200 320 400 steelwool 00 0000) before making decision about when to stop
- also should have stopped sanding just BEFORE it was too flat
- should have cleaned up with the lacquer thinner
- should have, should have...
I ll definitely follow your words more carefully on how to properly finish the finish.
Athough i must admit that this is not exactly the result i wanted - yet again, better... well, same old song.
Question: how easy to go backward - sand down or wipe out the lacquer maybe?
It seems that now i know a bit better and could obtain what i was after..
|
|


 )
)


