|
|
Post by strat80hm on Sept 24, 2015 21:51:08 GMT -5
|
|
|
|
Post by strat80hm on Sept 24, 2015 1:08:40 GMT -5
|
|
|
|
Post by strat80hm on Sept 23, 2015 22:09:51 GMT -5
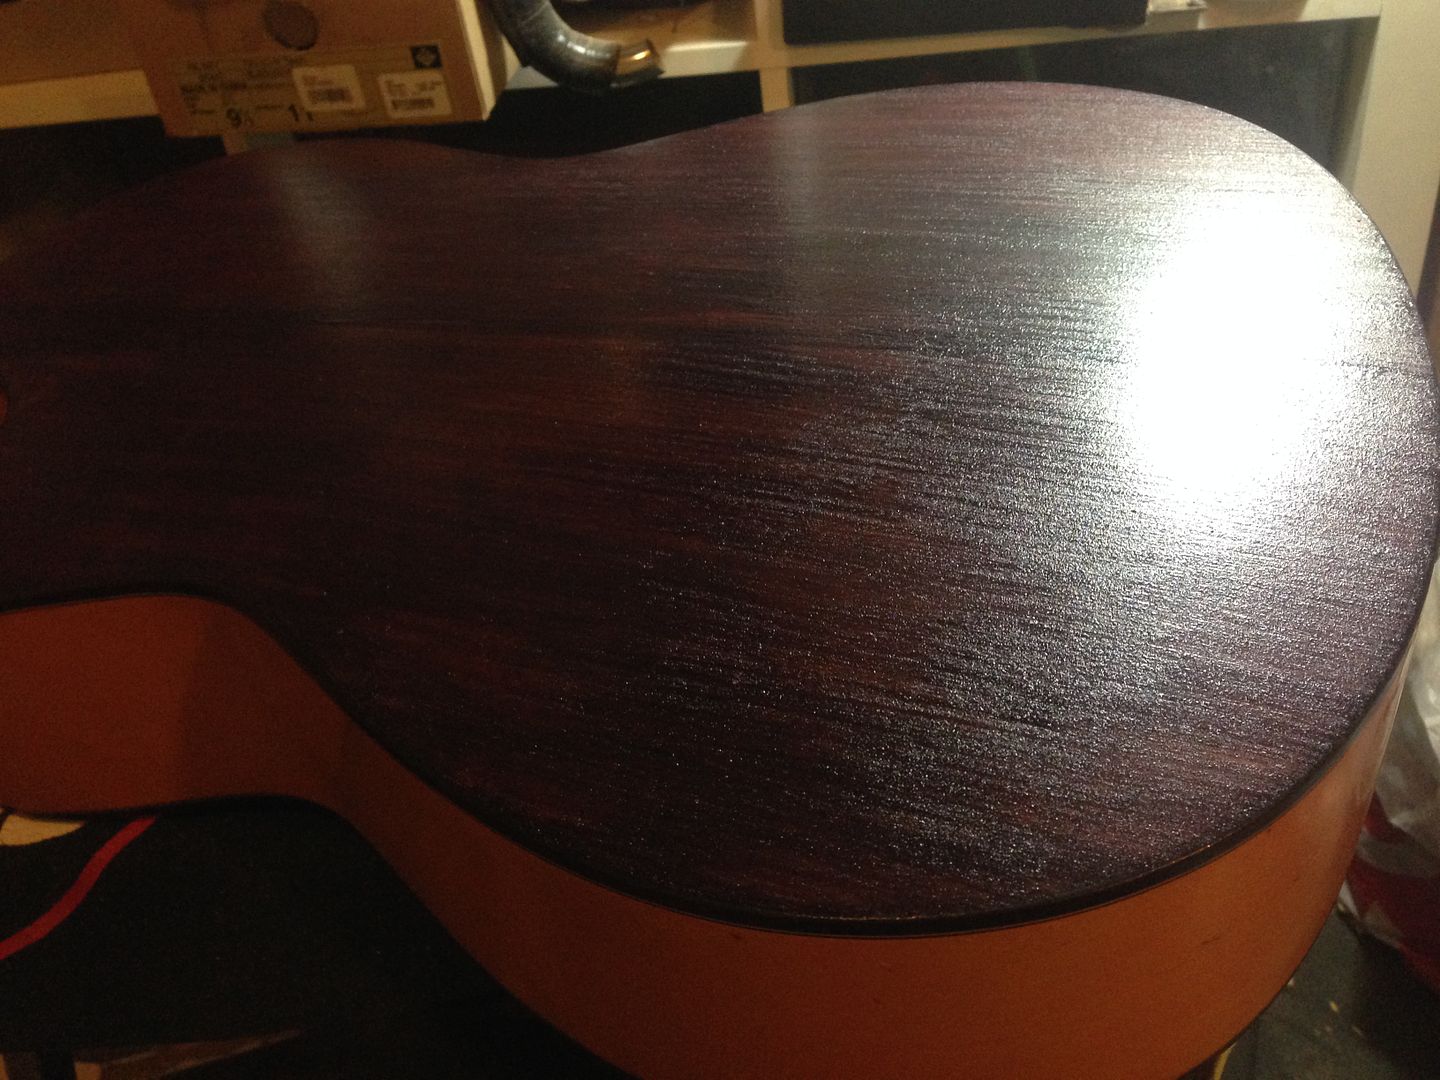
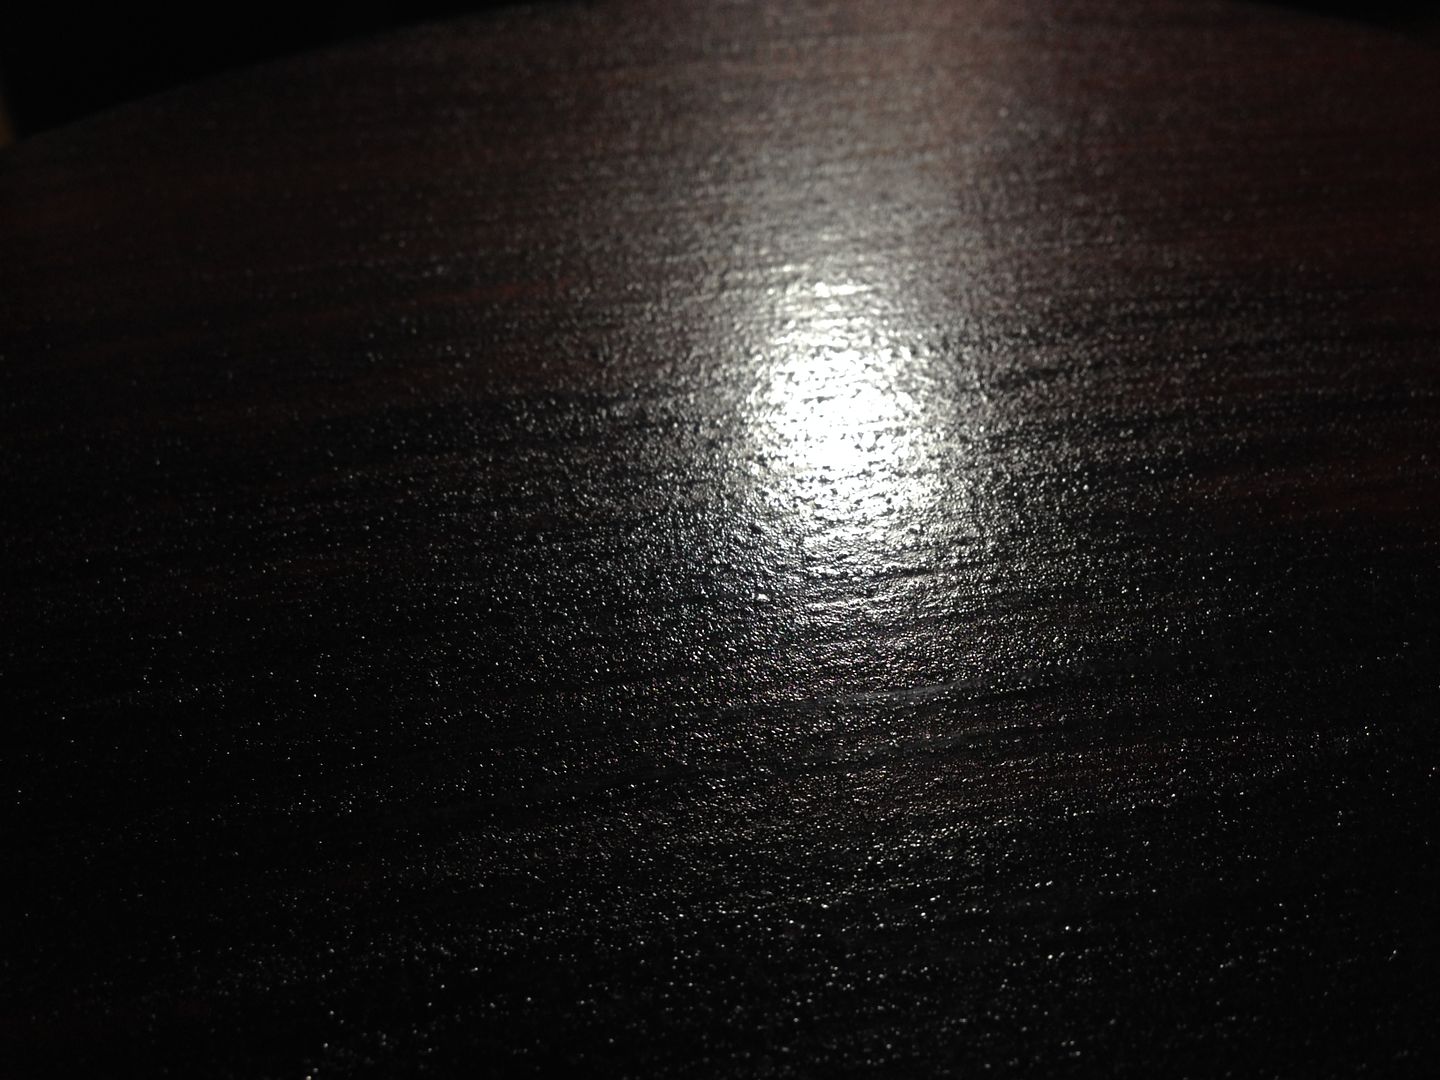
After a couple of hours drying up, here s where it s at: 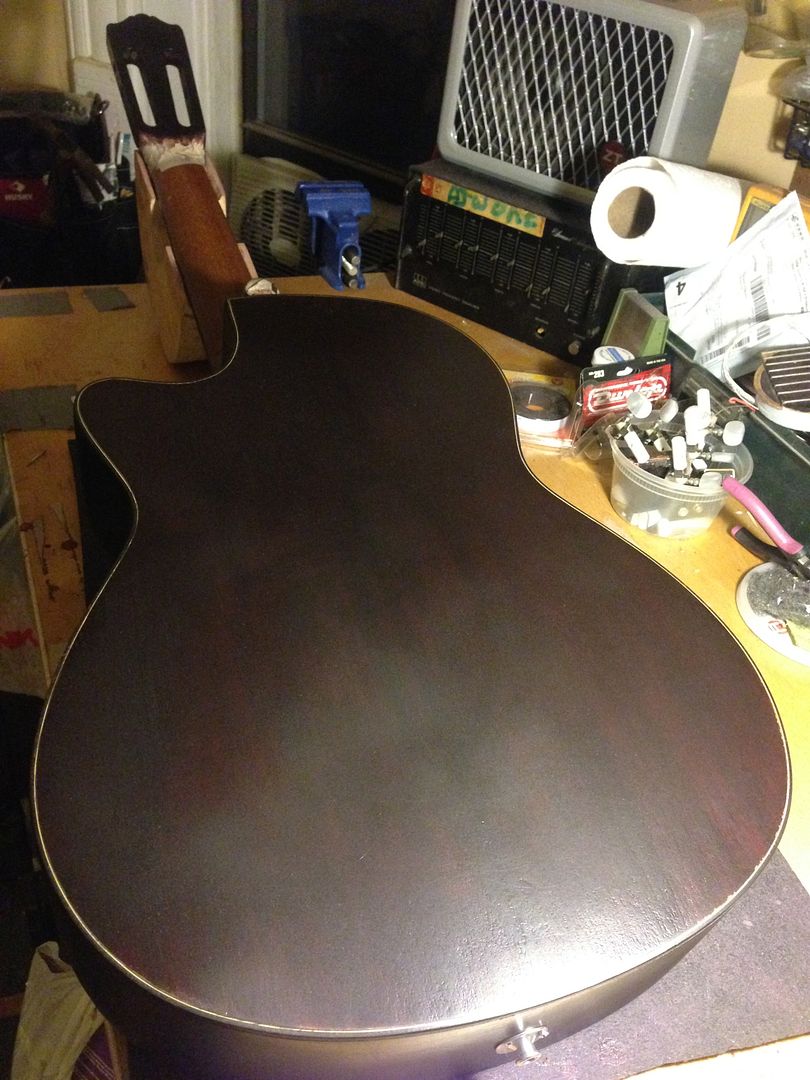 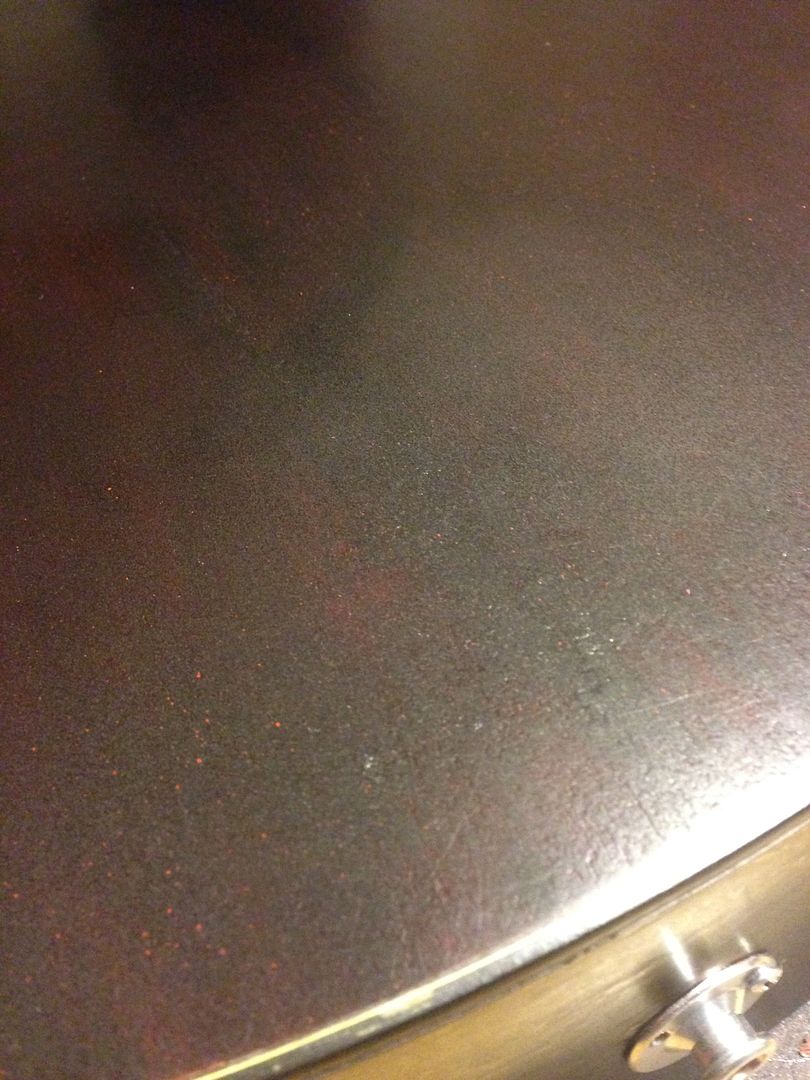 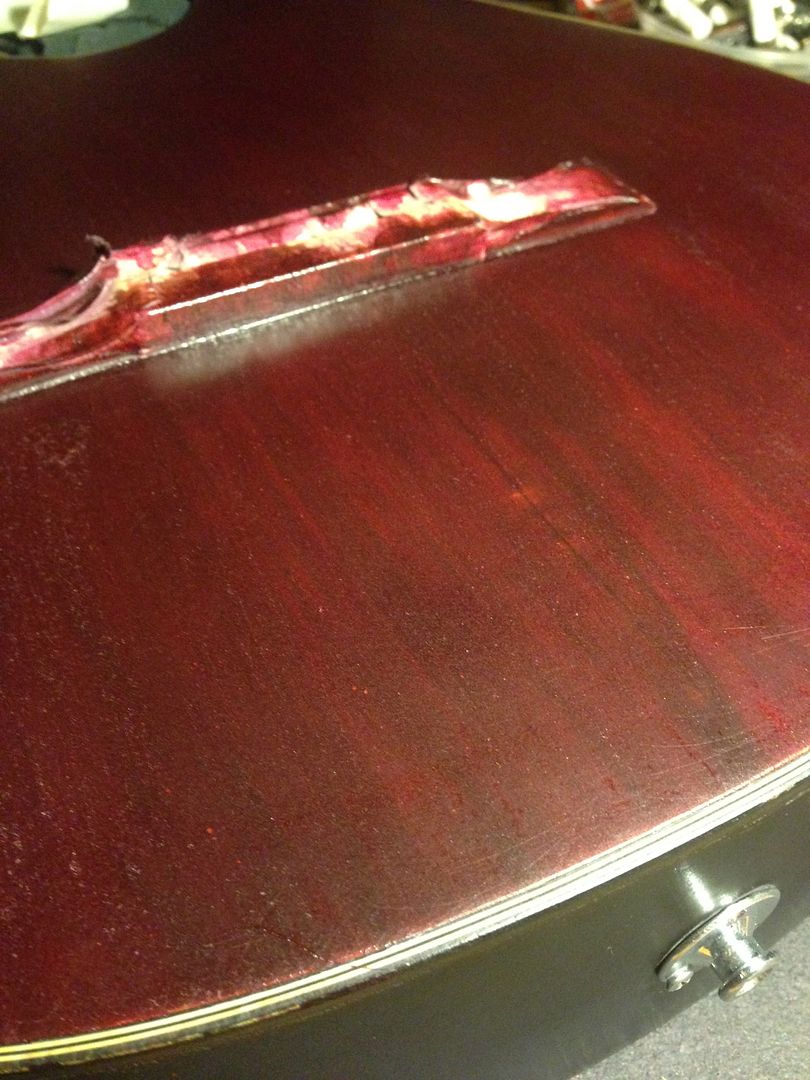 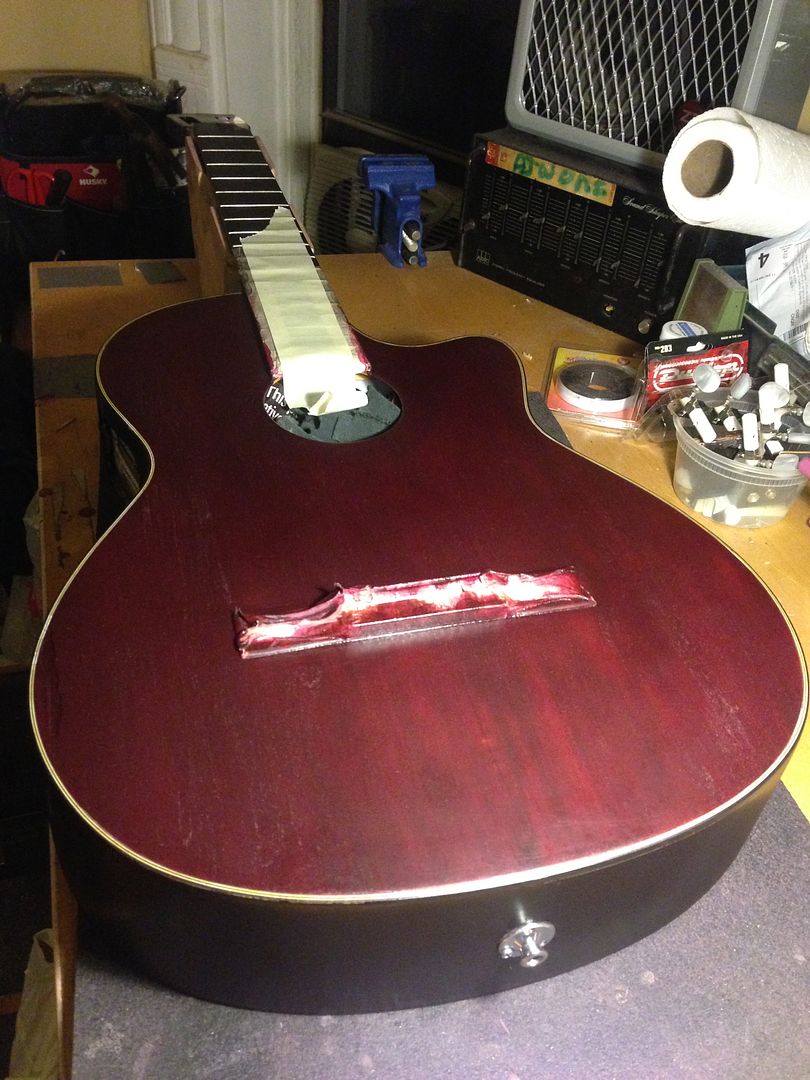 Looks pretty smooth overall, I suppose i should do a quick/light sanding (steelwool 0000) before going for another coat, though i can see a bunch of micro-scratches here and there - were not that obvious beforehand - did i mess up the 0000 sanding? Should i do it again or keep on clear-coating and hope for the best? I realize i forgot to clean up the whole thing with lacquer thinner (although i bought a bottle today..) before applying the lacquer. |
|
|
|
Post by strat80hm on Sept 23, 2015 20:35:07 GMT -5
It seems i just pressed to much with that tack rag - i hadnt heard about those before you mentioned them Cyn.
- so i just cleaned it up with a dry rag
- masked the 3-4 white spot with some pen
- a bit of 0000 steelwool
- a light pass of tack rag
And there i went for a first layer of satin lacquer (in spray)
It is drying now, i supposed i could go for a second layer in a few - unless i ve done something stupid above, in which case it hopefully is possible to go back and fix.
Otherwise, i m hoping that this works, as i need this guitar in 2 days..
|
|
|
|
Post by strat80hm on Sept 23, 2015 19:08:34 GMT -5
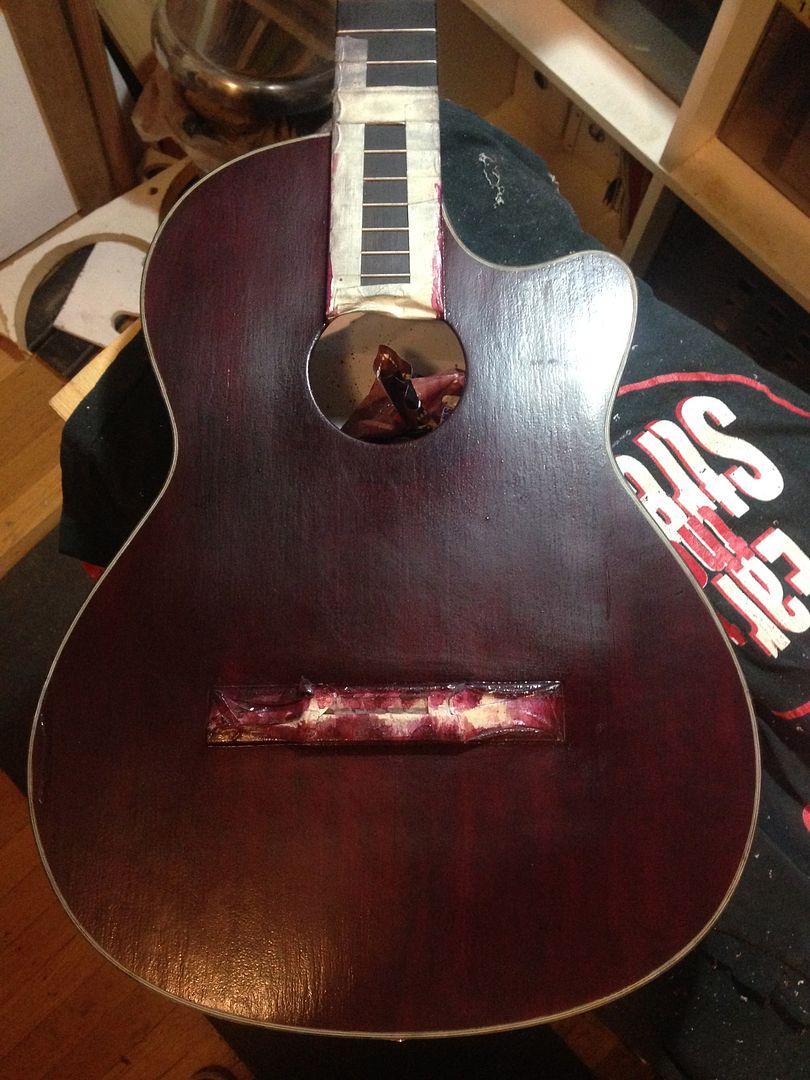
You re absolutely right on this, it doesnt make cosmetic sense! Although i gigged with this guitar for a couple years and i kinda like that scar, i got used to it i suppose. My only intent was to fix the structural issue around the loose bracing and the open crack - all the rest, all the mess, i like! Then i wanted the guitar darker, thus the shellac, pigments, etc.. Also i do not feel like i have much skills at all - this whole thing is a first time for me, so the less work the better  Yeah, that d be me: brand new objects make me feel nervous, not sure why. I like broken in things better. Thanks, went slowly, scrapped too much here and there - hence the extra layer of red to cover up the mess - it s better now. Here s the tool by the way: 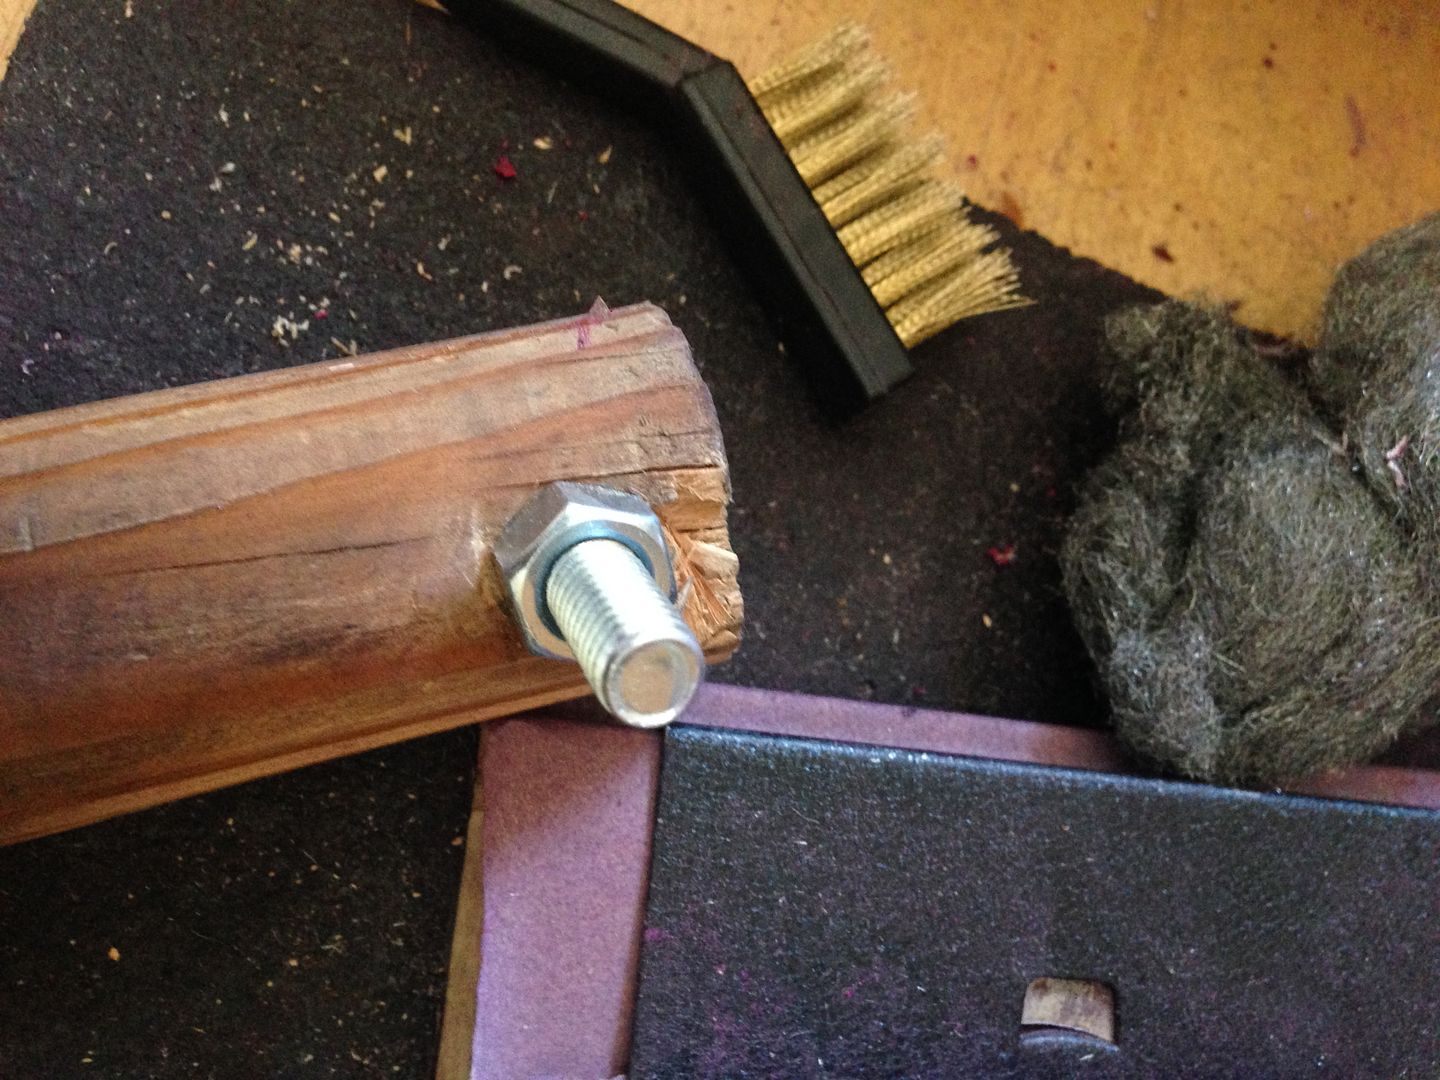
Here s the guitar after that dreaded "extra layer of red" 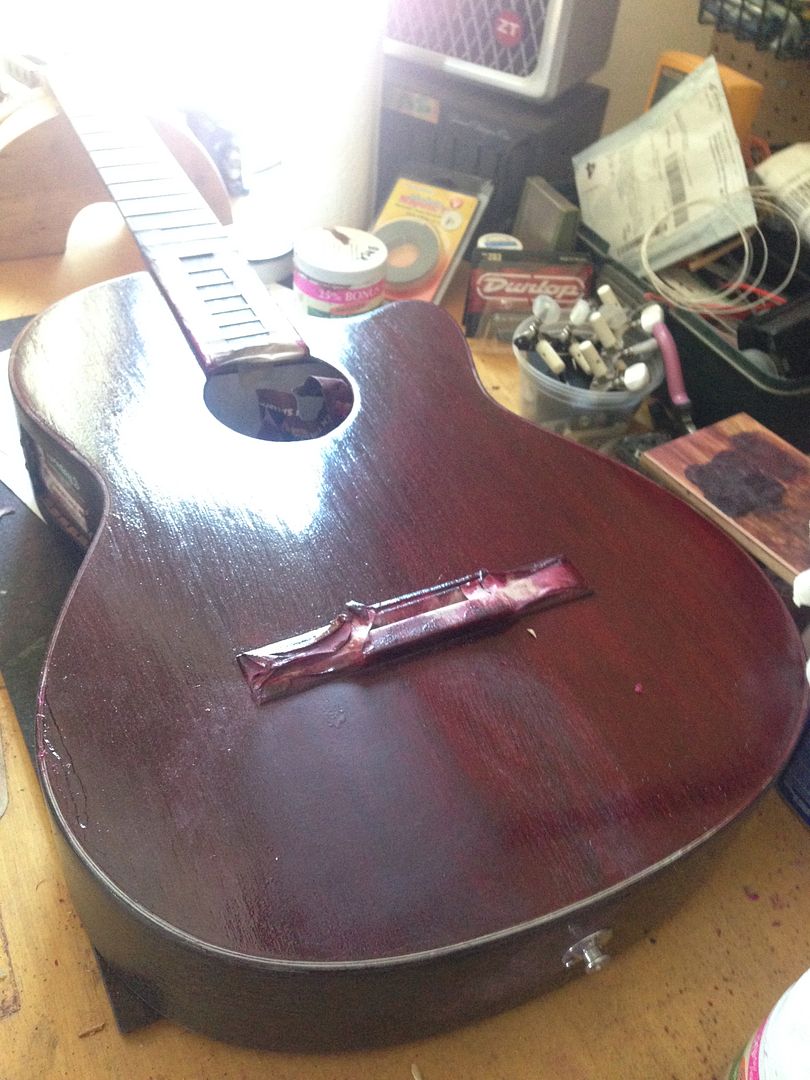
Then after some sanding  
More fine-sanding 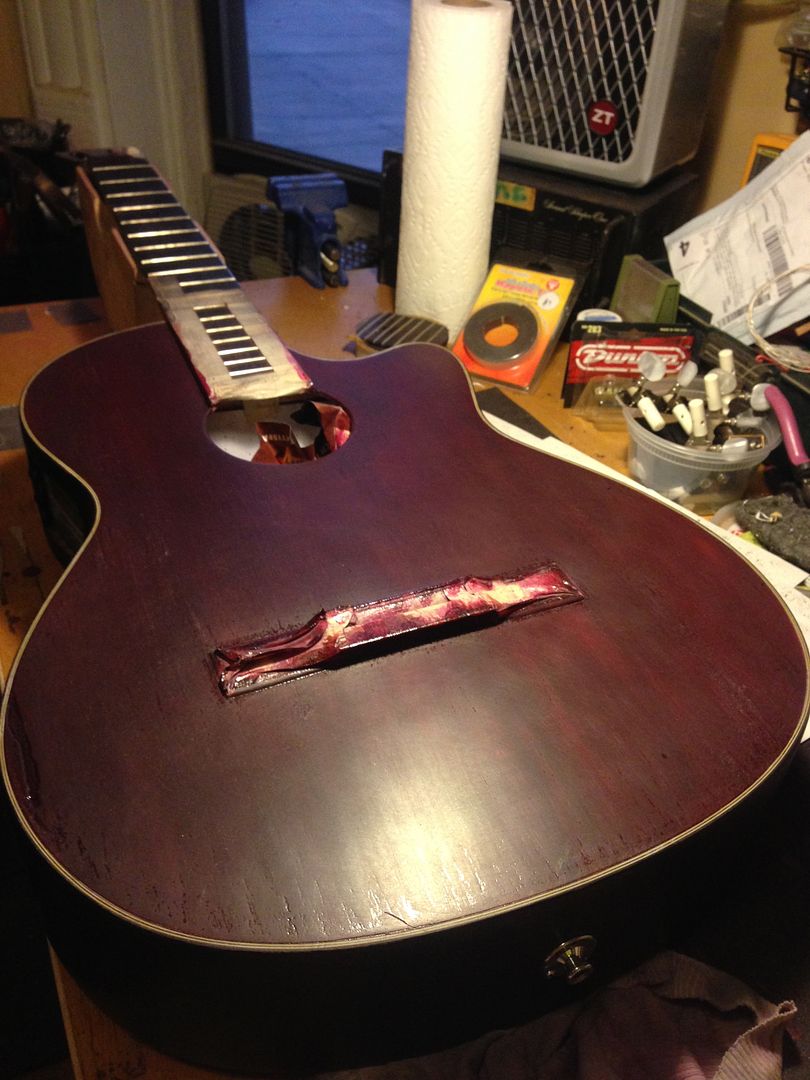
That extra-layer allowed to hide spots where i scrapped the binding too wide  Matter of factly, i just finished sanding that extra coat of red (sandpaper 200, 320, steelwool 000 and 0000), then passed a tack rack: i suppose it s ready for the first layer of lacquer, although i have a doubt: the tack rag left some stickiness all over, is this desirable or should i rub it off - if so with what? This should be written on my workshop walls - messed up a lot of good for the sake of better yup.. Here i might have sanded to much and reached an early coat (with solid pigments), resulting in little pink or white dots here and there. Wondering if i leave it as is OR start over another cycle (coat, sanding).   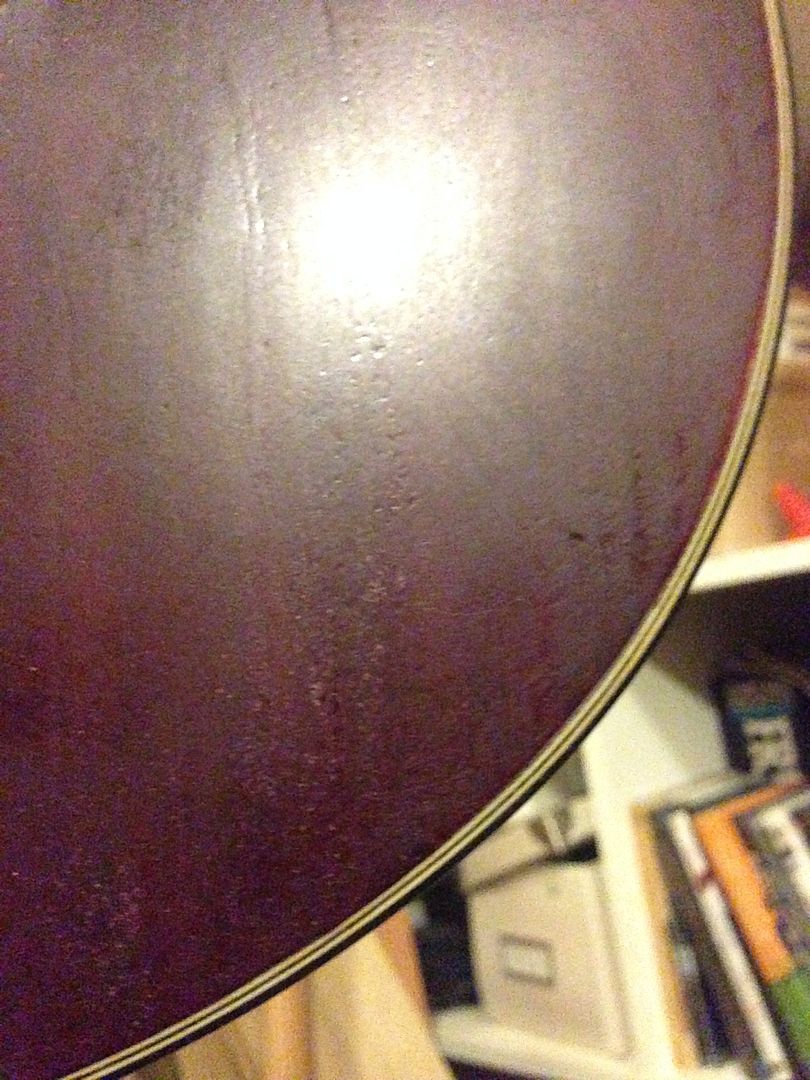 |
|
|
|
Post by strat80hm on Sept 22, 2015 1:05:58 GMT -5
hey WOW!!! nice job! how about that scar on the right bout edge on the front? Any putty going in there? Thanks Greek! Nope, no plastic surgery haha - the guitar came with a scar and life still goes on. Plus i never liked new guitars and never bought any so far, so i dont want this one to look new either. |
|
|
|
Post by strat80hm on Sept 21, 2015 23:32:54 GMT -5
NOTE: I screwed up here and hit EDIT instead of QUOTE and wiped out your post. Sorry, CRS is a terrible thing. Anyways, here's my reply:
In your case, if you can see obvious high brush marks, then you really want to flush it back. Remember, the final lacquer is only going to be several mils thick, so anything you don't get flush you'll prior to applying the lacquer, you could wind up sanding through the lacquer back into the shellac. Not what you want to do. As I said before, the effect of the different color red or amber from the shellac, sanded smooth, will create a cooler effect than a bunch of brush marks...not that I'm casting aspersions on your whole brush mark thing... The clear shellac over your colored shellac is not a bad idea. If you SWAGGED the dye in the shellac, you're probably already getting some unique results as you sand it down. Obviously, you don't need to get it NASA flat, so if there are some brush marks it's not the end of the world. I'm getting anxious to see the finished work. You're doing this the old school way, so if nothing else, you can be certain no one else out there has a guitar that's going to look like this one. Thanks for shortening this otherwise too long thread Haha Here are some evolutions: - i needed to scrap the binding to get a better sense of "when to stop": i had never done that, and even with a carefully designed too (box-cutter blade held in a piece of broom-stick), this took a while. Admittedly, there was some thickness to scrap through. 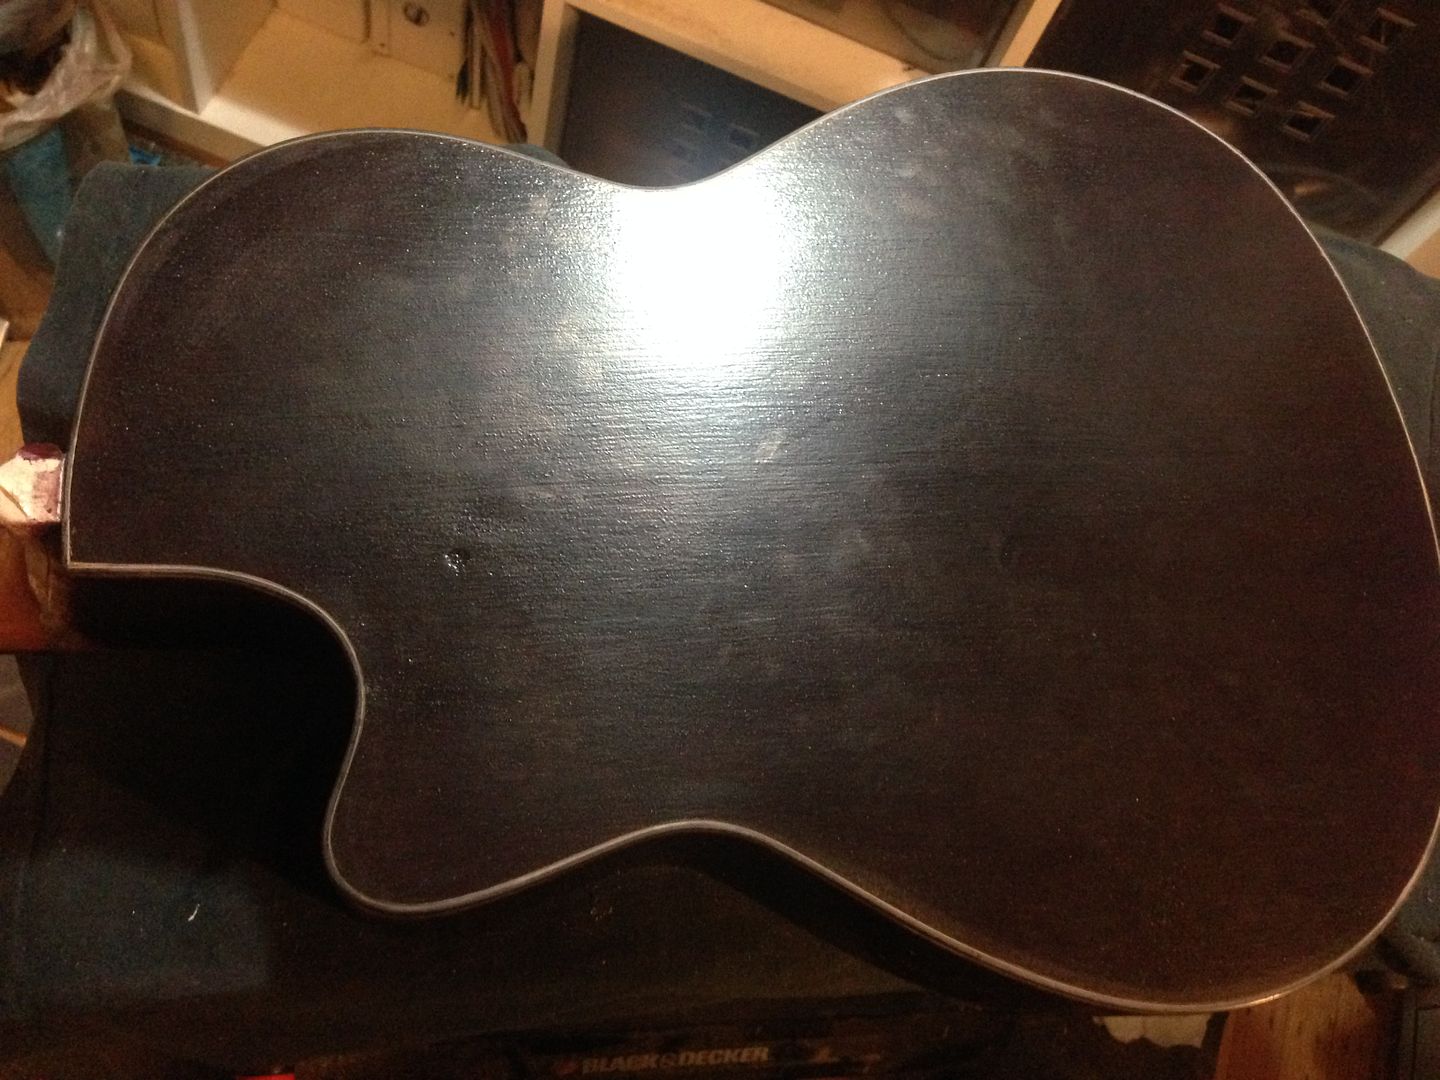
- in the end the white part of the binding is standing out nicely (maybe too much for me, it s a tad too pretty for my taste)
 - i sanded (steelwool, sanding paper 240 and 320) and got carried away and ALMOST got to flatland - stopped just before! But yes, i understand a bit better why it s probably gonna be stronger a finish if flatter. 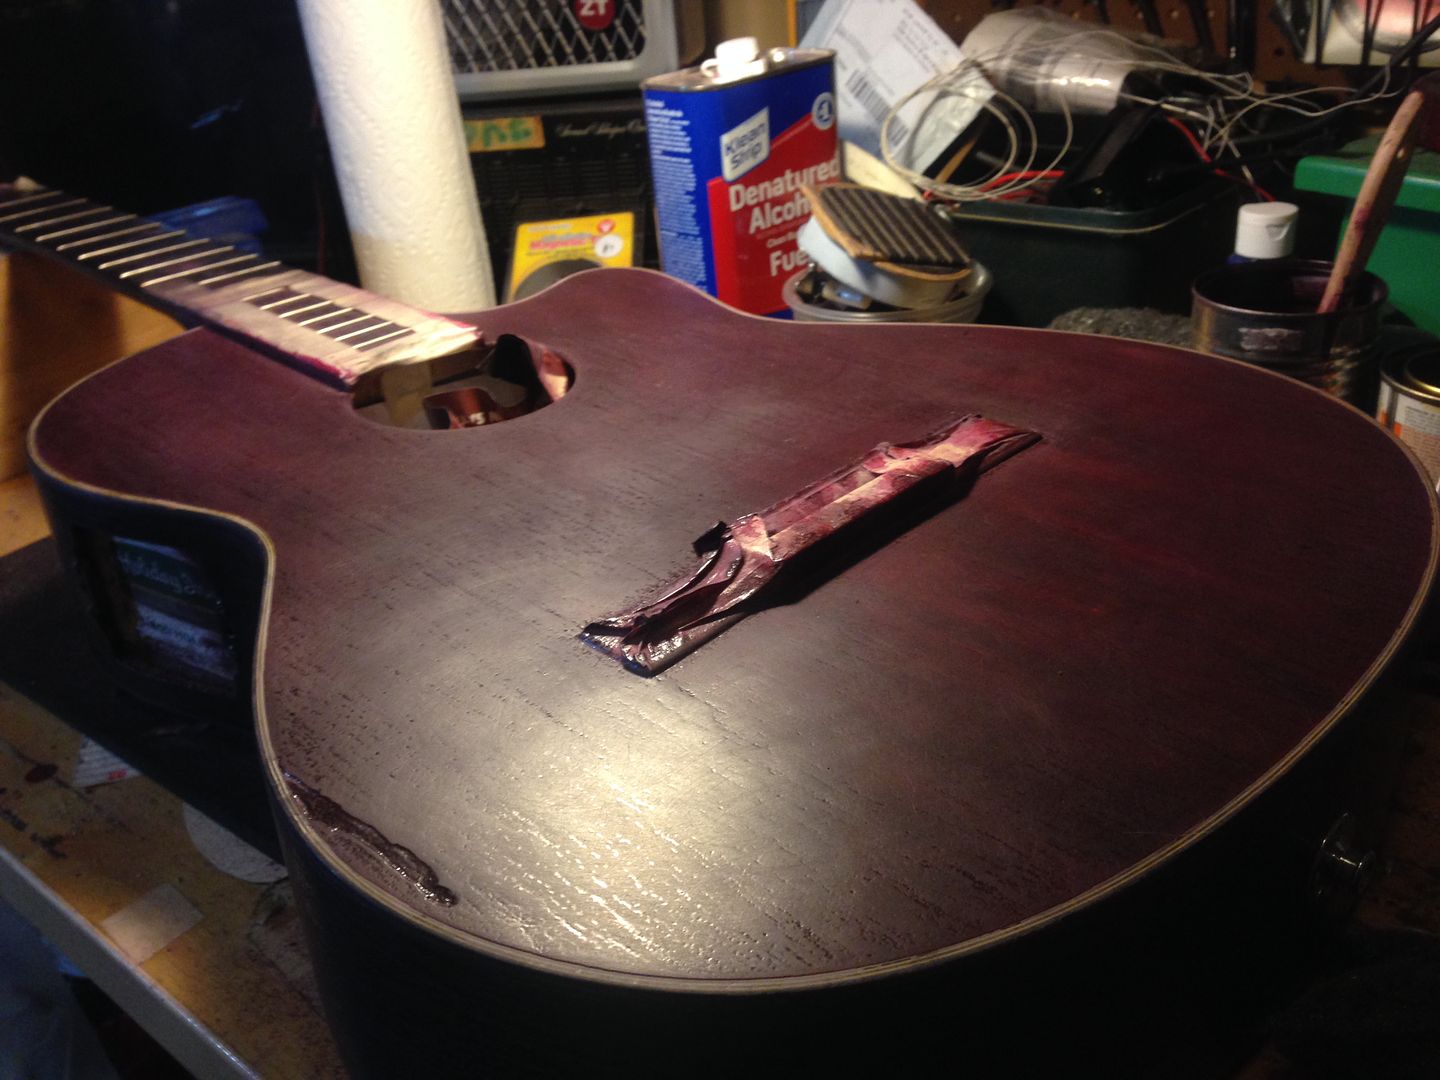 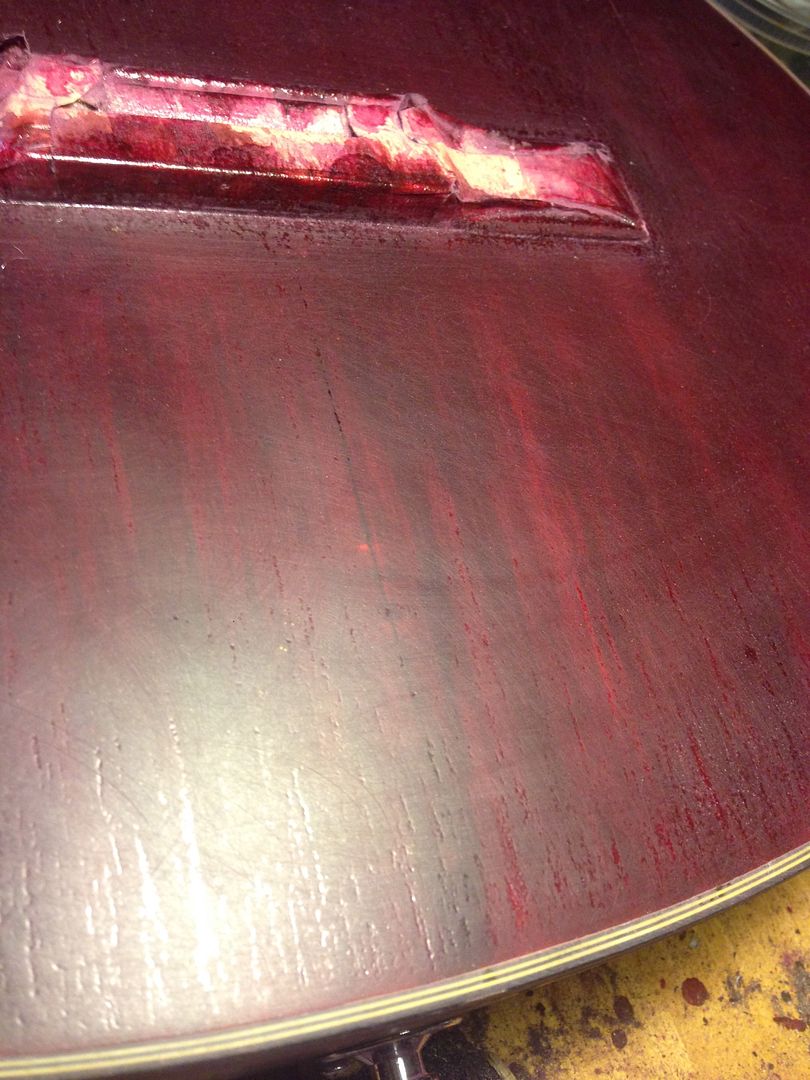 - then 1 last layer of red shellac for eveness in color I m gonna let it dry overnight and see what i have. If all looks nice, i ll sand a bit, scraped the binding again (should be faster with only 1 layer) and will go for the coating. I appreciate you sharing your experience in this - indeed, i need a sturdy matte clear coating so that i can keep on playing bongos on this thing without thinking twice. |
|
|
|
Post by strat80hm on Sept 18, 2015 15:34:57 GMT -5
Thanks. That one was a labor of love. One thing on the shellac. If you're getting a lot of brush marks you can try thinning it with denatured alcohol...It's a process...coat, sand, coat, sand...and eventually it's flat. Still layering/sanding and seeing results coming. 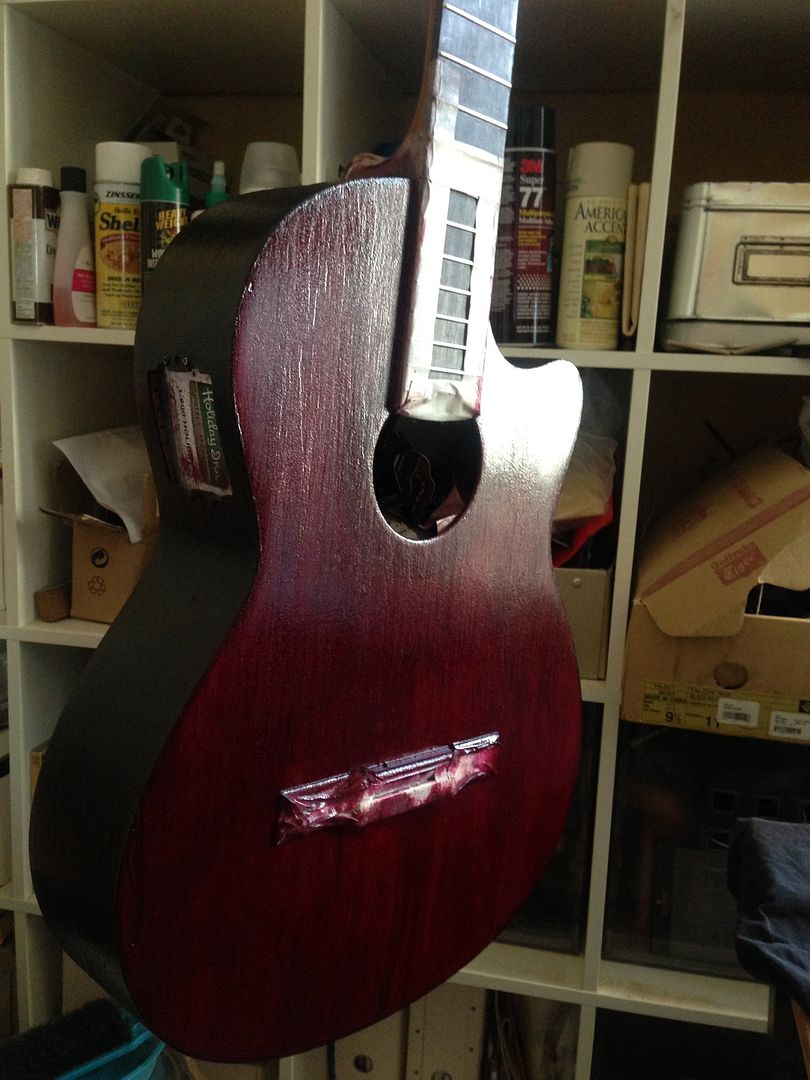 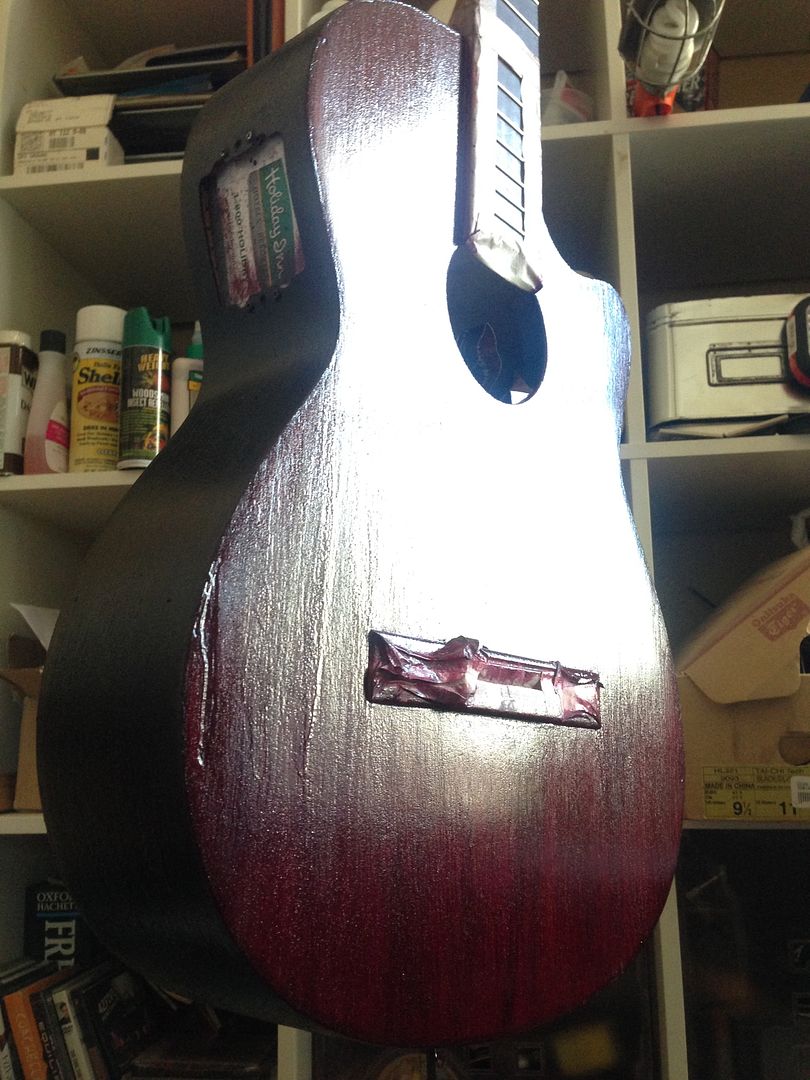 While taken into the fun of flat mirror type process, I realize that from the beginning on, my goal has always been to get that "naked wood" finish like on my LaPatrie - meaning matte, with some asperities, uneven-ness. I do not want a plain colored instrument, but more something a bit rough and organic. In that regards, brush marks are actually part of the desired results, though now i m wondering when to stop haha I suppose i could go for a couple more layers just for the sake of getting a thick/solid finish - and then stop when it looks right. Then only would i go for the clear coating. Hope this makes sense. |
|
|
|
Post by strat80hm on Sept 17, 2015 14:30:01 GMT -5
That's about 15 coats of red with another 10-12 coats of clear lacquer, all sanded smooth with 400 grit wet or dry between each 3rd coat after waiting a few day between cycles. Once it cures after 30 days I started with 400 grit wet or dry, moved to 800, then 1500 and finally 2000 grit paper. Then two rounds of buffing compound, two rounds of polishing compound and finally a couple rounds of swirl remover. Then I tossed some car wax on it. It doesn't come that way out of the can. Have I scared you off yet? Hahaha, yes, now i am afraid.. that it wont as simple as pressing on a spray and watch it dry out - ok, so time, patience and elbow grease, got it. As for the clear coat, obviously i m not there yet, good to know, back to shellac and pigments. - and the bulk of a good job is to layer and sand (with water) and repeat, all right, i ll do that today then. More soon Impressive job on that red solidbody here Cyn, love it. |
|
|
|
Post by strat80hm on Sept 17, 2015 13:23:29 GMT -5
|
|
|
|
Post by strat80hm on Sept 17, 2015 12:51:37 GMT -5
Good guidance Cyn, much appreciated. Got lazy and took another guitar to the concert last night haha - glad i did as i d feel lazy today! I m planning on using it on an important on on Saturday night in Brooklyn, which gives me about 2 days! So I found some Krylon Acrylic Crystal Clear spray, could this do the trick over shellac? I contains acetone  Otherwise I m gonna follow your expertise and get some matte lacquer today (Minwax)- along with lacquer thinner for cleaning up here and there. How many layers of shellac? Glad you like the red - i might add another layer to get to where i d like, though i m wondering: is there any limit to the number of layers? I ve done 4 so far i guess. Also, while i light-sand with thin steel-wool in between layers, i m not getting anything very "flat" surface-wise (not that i dislike it though). Should i sand more? Although you mentioned earlier that from the rugous state i m at now, i could get to smooth with the lacquer: how so? Just by applying and sanding? |
|
|
|
Post by strat80hm on Sept 16, 2015 15:33:22 GMT -5
Cool Cyn Zinsser Shellac indeed - 2 "old" pots that i got from Pratt, 1 new one from HDepot. Will test it then, thanks. Age might not be the same for each pot - i noticed that some layers had a glossy finish while others would be matte, unsure of why, but well, no big. I have a Clear Shellac spray, could i use that for clear-coating? That d be convenient! I left the big divot as is - it would have been against my "let it be" inclination 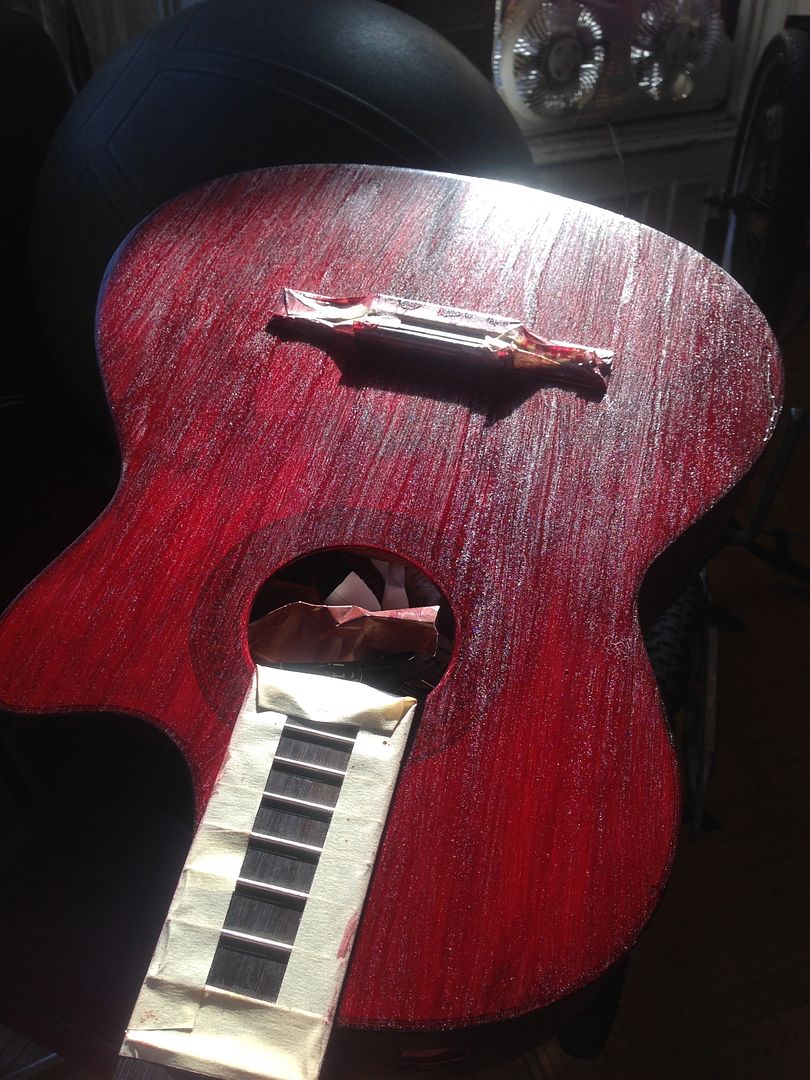  Thanks for precisions - so you say that naphta of lacquer thinner (or lighter fluid?) would not damage the shellac? good to know. Indeed finish seems hard yup - i could try to play it tonight - i d have to put back strings and pegs and preamp too. |
|
|
|
Post by strat80hm on Sept 16, 2015 0:48:14 GMT -5
Looking good! Having the time and guinea pig around to experiment on can be fun. Yeah, I never had a lot of use for solid pigments. As you said, they may, or may not, fully dissolve and keeping them consistent through multiple batches can be challenging. Just give the shellac plenty of time to harden and the clear coat, once buffed out, will polish up nicely. One caution, trying to simulate wood grain with brush strokes always works best with a matte finish. A mirror polished final clear coat will betray every imperfection and magnify attempts at a faux finish. I appreciate your support guys! Indeed, solid pigments are challenging. Also recreating a color s aint easy - i know, i should have taken notes, but i was like "i ll remember.." How long is plenty of time? Good thing to know that the clear coat can take care of this, as i m definitely going for matte finish. Looks good, anything done to the front side. It s fun indeed, thanks! Removed the strings and stuff around 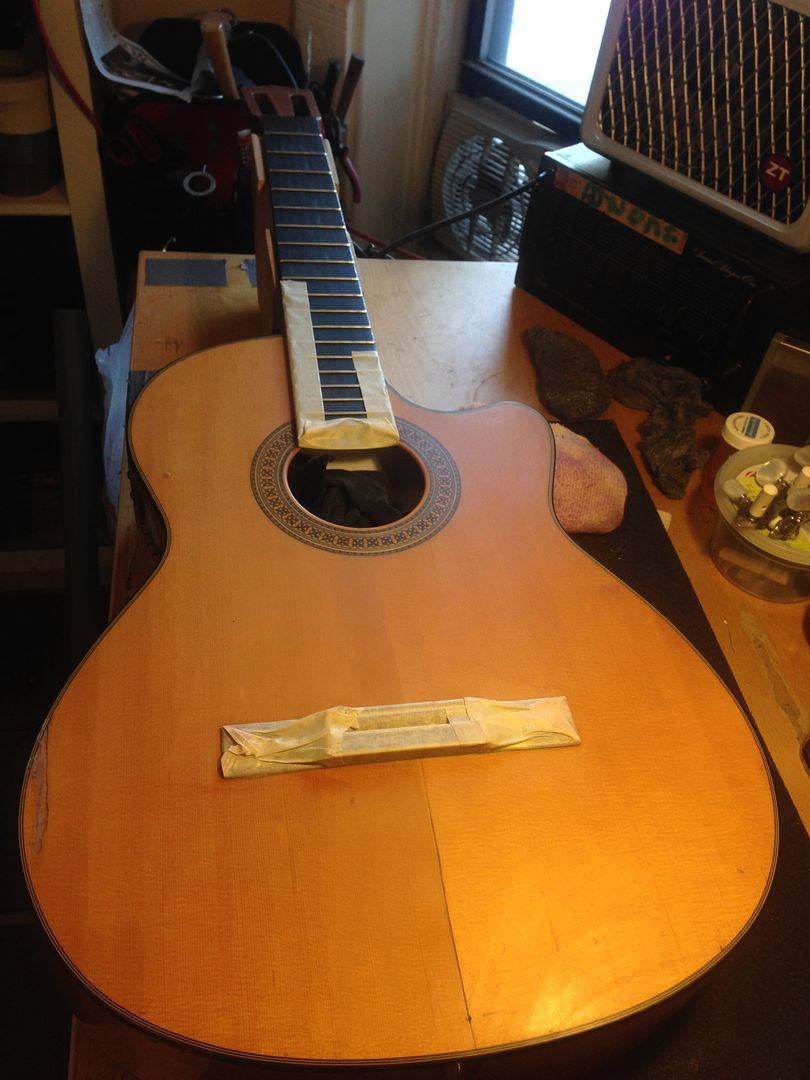 I cosmetically arrangedthe front crack (CA glue then razor blade)  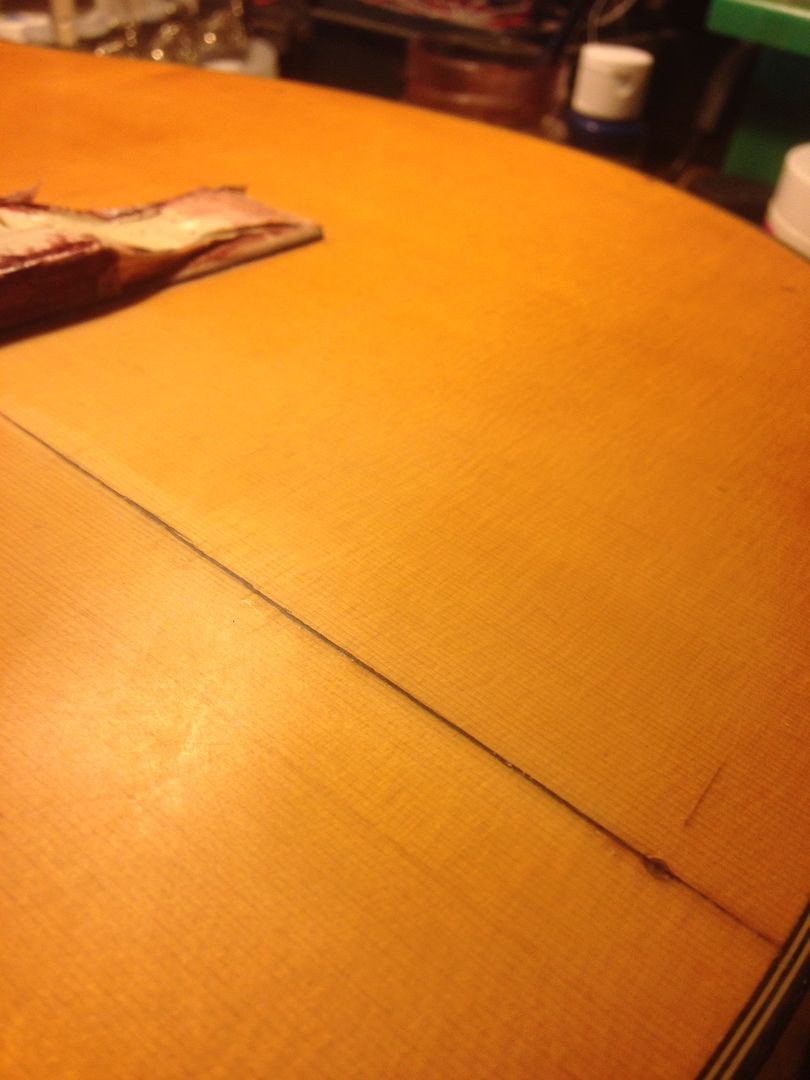 And started some coloring 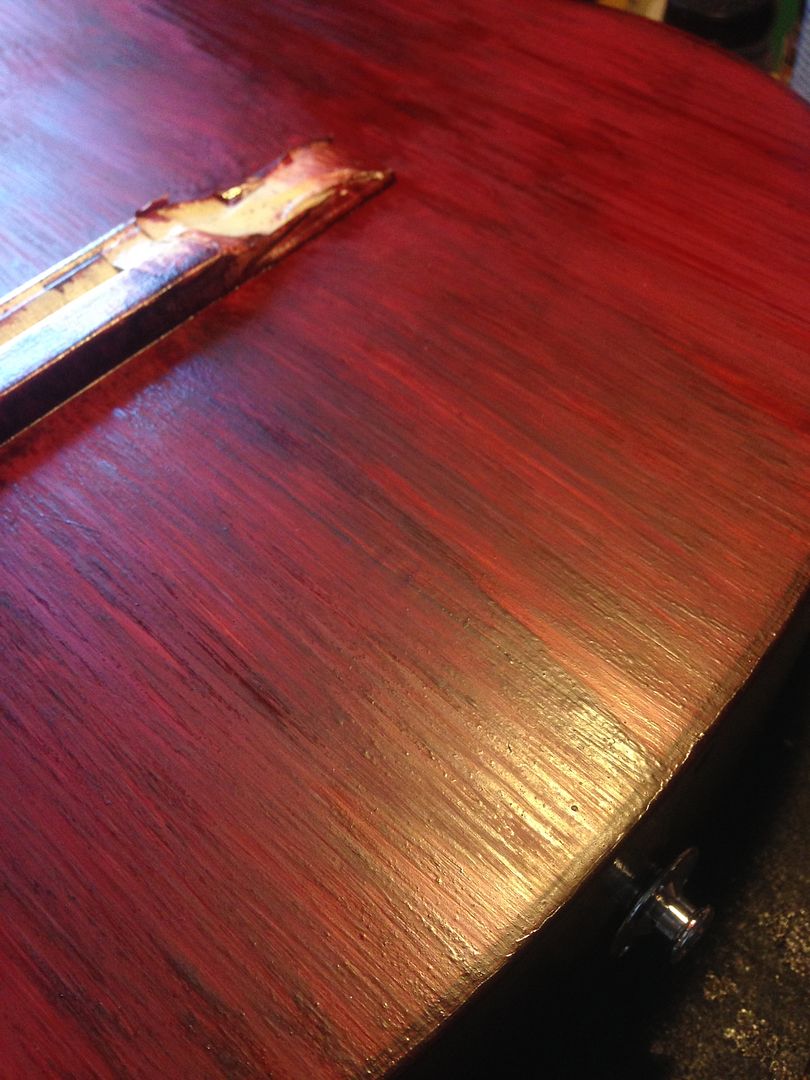 I m not happy with the front color yet - though the fun with shellac is that each layer "correct" the previous one, so i can go brighter or darker freely. Very nice product, didnt know about it. I got some amber and some even darker on (although it s labelled CLEAR). Thing is i have a last minute gig that i d need to bring this guitar to tomorrow - wondering if it s any sturdy for that as is? Then i d correct the front color and apply coat. Besides the pain re-assembling/disassembling, is this any safe? |
|
|
|
Post by strat80hm on Sept 14, 2015 16:00:51 GMT -5
Quick update: - found some promising shade - had fun mixing pigments (liquids AND solid) - tried it on the back (3 layers and thin steel-wool ligtht sanding in between - no rag, i finally i adopted the brush, help create some "wood" pattern - it seems that the solid pigment didnt dissolve totally, though it help with that raw "open pore" wood aspect, which i like much. 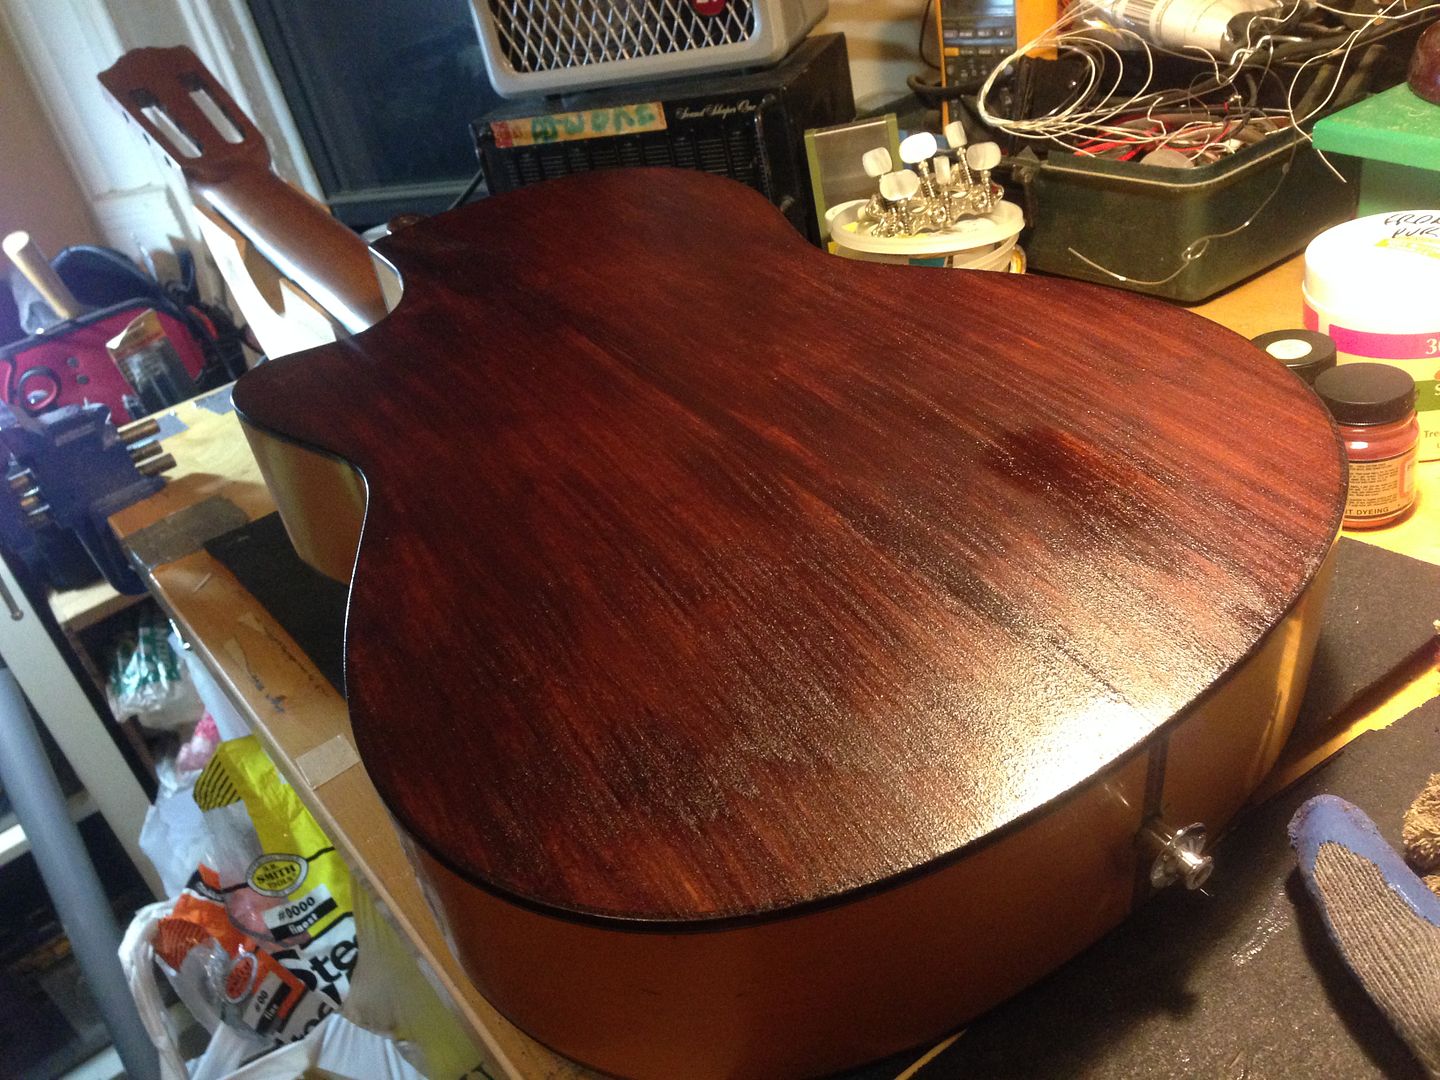 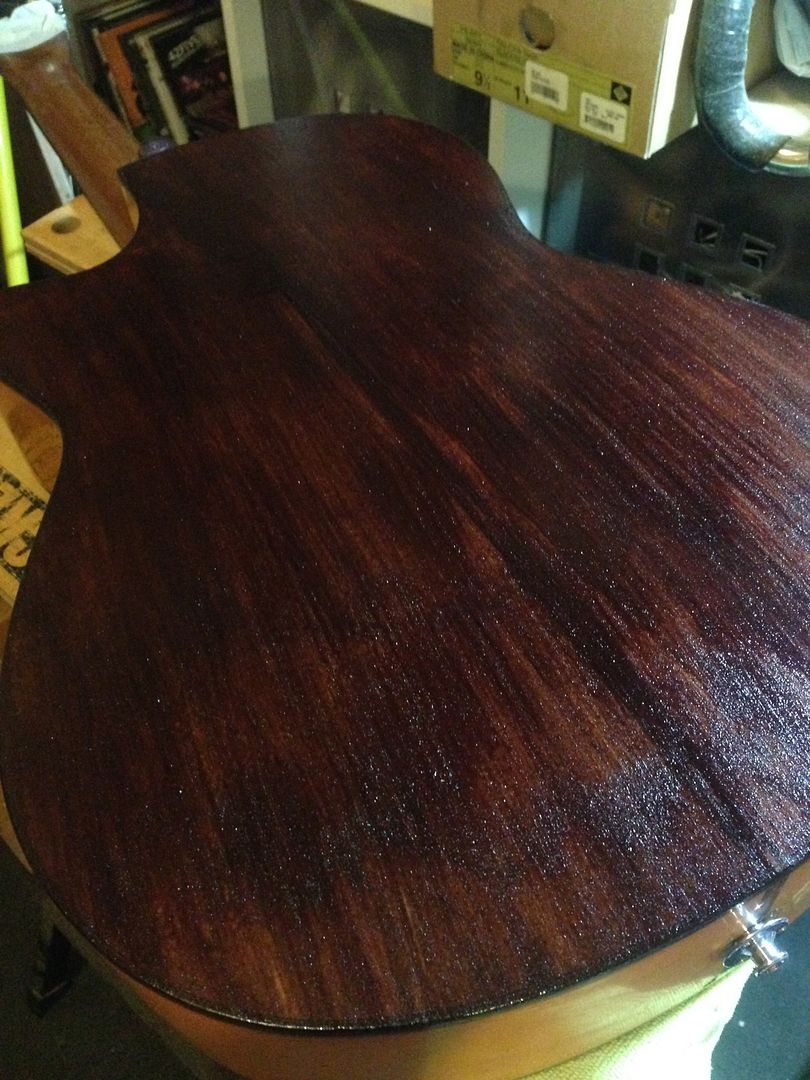 [/URL [/URL
  Plan is to go on with sides and top - keep on sanding/layering and end with clear coat as suggested. |
|
|
|
Post by strat80hm on Sept 13, 2015 12:06:56 GMT -5
CAVAET:Granted, it's not like a professional gun, but you can get very decent results with a little practice. Shellac can be sprayed, but it more commonly is brushed. HTC1 Interesting option, thanks for sharing this. I didnt know it existed - I was thinking of getting a empty spray bottle at the hardware store (the ones used to spray water on plants) and do test with it. I m gonna keep on experimentating with the manual technique first though - wiping and/or brushing; albeit uneven, i guess i like the hand-made look to it - it actually looks like some real reddish wood. More soon |
|
|
|
Post by strat80hm on Sept 12, 2015 19:00:45 GMT -5
You can even pull off a burst with the right gun. If you're concerned about the lacquer lifting the binding you might want to consider spraying a couple light coats of shellac prior to the lacquer. The shellac acts as a barrier between the original finish and the fresh lacquer. This is old school, but it works So, are the waters muddy enough for you yet? Indeed this is helpful Cyn I ve read, discussed, researched and am gonna start with tinted shellac. - as of now, i experimenting - on scrap wood and on the back of the guitar itself - with Shellac and pigments. - found the right reddish tint i m after, really promising. - experimenting with adding denatured alcohol trying to find the right consistence. - have no spraying gun so am perfecting manual technique to apply this evenly. Obviously this is not very easy to obtain something even haha I might wanna try with a brush and thin thin layers at a time maybe. More soon.. |
|
|
|
Post by strat80hm on Sept 4, 2015 14:36:52 GMT -5
Another option, which I probably should have though of off the bat, is aging the lacquer before applying. CRS... Brain seems to remember things pretty well Cyn1, thanks for tip. I m still researching options, at the moment, Aging the lacquer or tinting it before sounds like the good direction, i m starting to consider a middle way: - light sanding of sides/back, then lacquer (aged or colored or both) with hopefully a dark chocolate shade to it. - full sanding of the top, reddish dye then natural (danish oil) finish Hopefully the binding can survive this? |
|
|
|
Post by strat80hm on Aug 29, 2015 12:35:54 GMT -5
As far as the finish options... Lacquer levels very well, dries in very thin coats and buffs up to a mirror finish. As far as the wood grain showing through after you use lacquer to tint in...probably not going to happen. Spraying the dye works better than rubbing it, but you use what you've got. You'll be removing all of the old finish by hand, as most strippers strong enough to cut poly\catalyst coating will potentially melt the glue on the binding, bridge and top. Let me know if I need to clarify anything here. Thanks for sharing all this Cyn, your verbose is under control, all s right on point. I m all for letting it look the way it does visually, chipped and scratched, but with a warmer tint - love Wilie Nelson s nylon string guitar - i would not articially "relic" a guitar but i dont intend on making is look any newer. I would not mind a natural wood finish - like on my LaPatrie, natural, no polish - though here that would mean sanding to barewood: regardless of the time it d take, would it really be smart to do that structure-wise since i already had that crack? Any success removing a thick layer of poly with a heat gun and scraper? This might hurt the biding too though. Will bring the guitar as-is to the art shop by Pratt institute and see what i find there - yes i d love to do this rubbing, less tools. Thanks for the tip about the binding: indeed that was the next question on my list. So you re saying to just lacquer away and THEN scratch the layers along the binding, got it. More soon.. |
|
|
|
Post by strat80hm on Aug 27, 2015 16:10:10 GMT -5
I m not sure i m actually done with the structural part of the fixing, though i m wandering into the decoration part: From that yellow spruce/cypress look, m aiming for that sort of taint, no idea how to go there yet. For the top:  Or also  For the back/sides  I like those 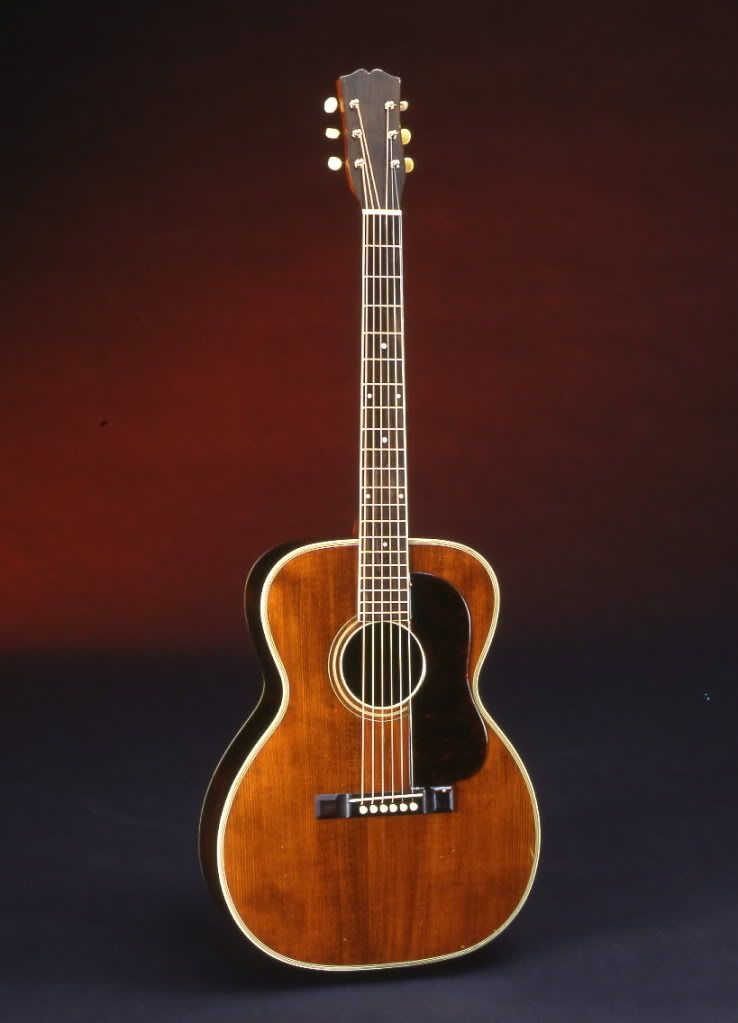  |
|
|
|
Post by strat80hm on Aug 27, 2015 15:05:10 GMT -5
Thanks for following up Cynical1 I d love an acoustic guitar that wouldnt need much care, like an electric basically - i tried a humidifier once, but i always forget to fill it up, or even to put it back in. And all my guitars live outside of any case in my studio, ready for grabs at any moment. Granted this is probably what caused cracks on the acoustics (i have another on to fix actually..) I appreciate the suggestions too: i might not want a guitar with a motif on it, but for sure a nice dark wood top would look fine. (no it doesnt react to acetone, it s the usual thick yamaha finish (polyurethane?). I was thinking light woodsteel sanding, then colored lacquer (reddish on top - brown on sides) hopefully this would sustain? I dont mind the guitar to look beatup (it actually make the audience think i m kinda of a big deal i noticed hahaha) though like these marquetry strips too: => wondering if i could use those should i want light colored binding with the red and brown? This is where i am - i like the matte finish too.. 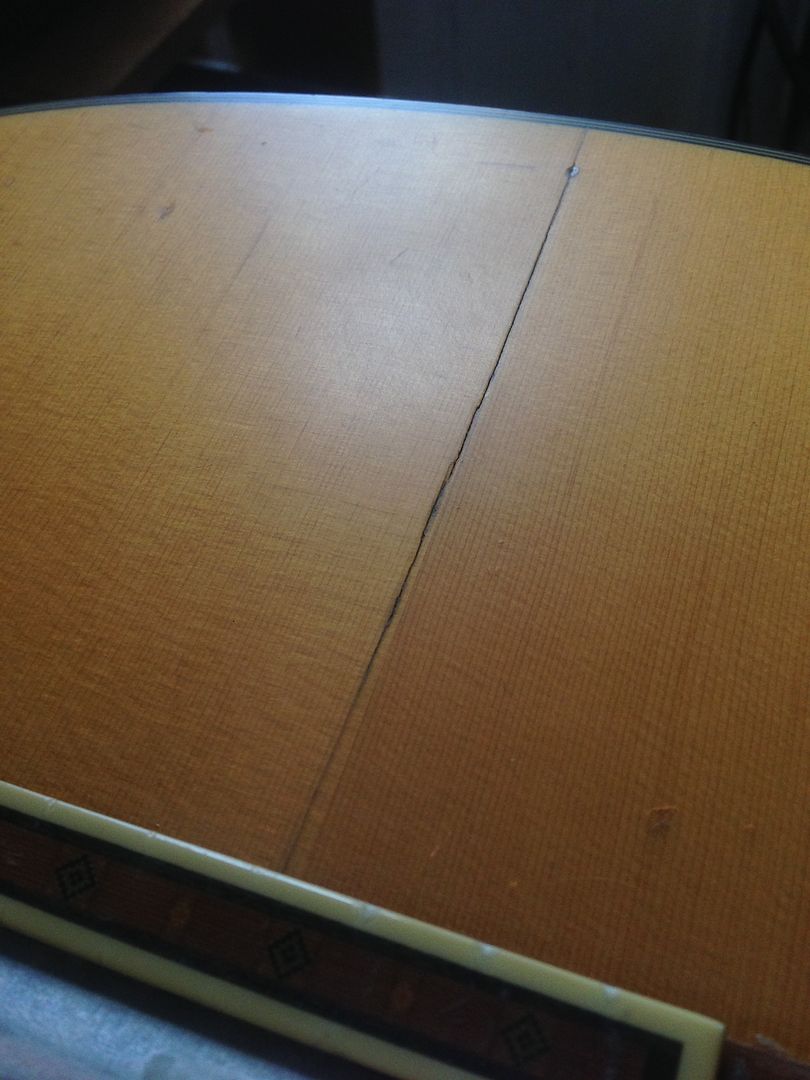 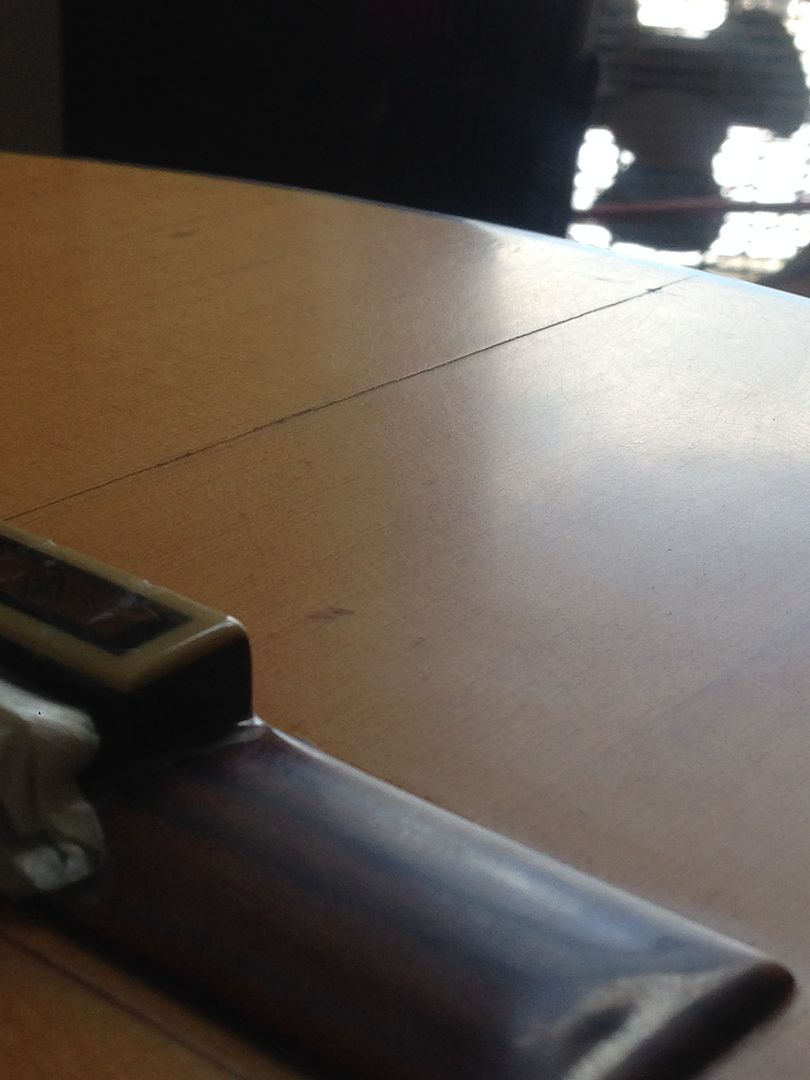 Also there is that big chip (which helped me get that guitar for cheap!) 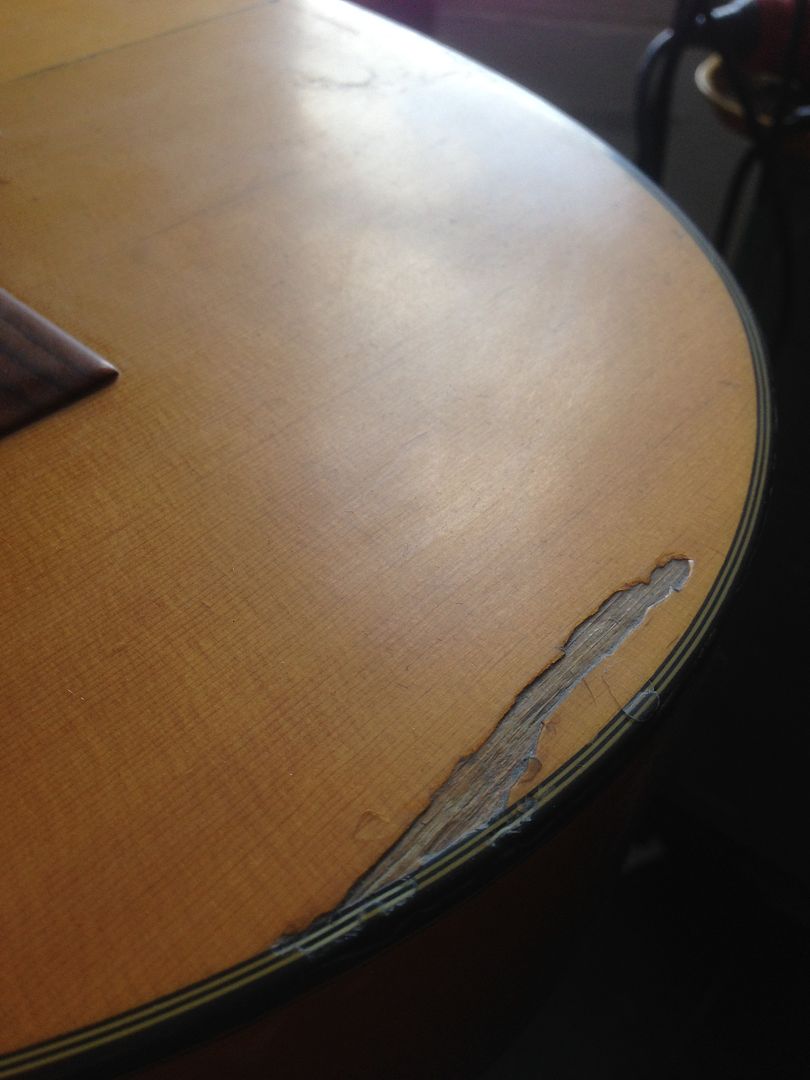 I m still open to suggestion as for how to finish this. |
|
|
|
Post by strat80hm on Aug 27, 2015 11:30:27 GMT -5
Here s what i got after removing the clamp: Rough but flat 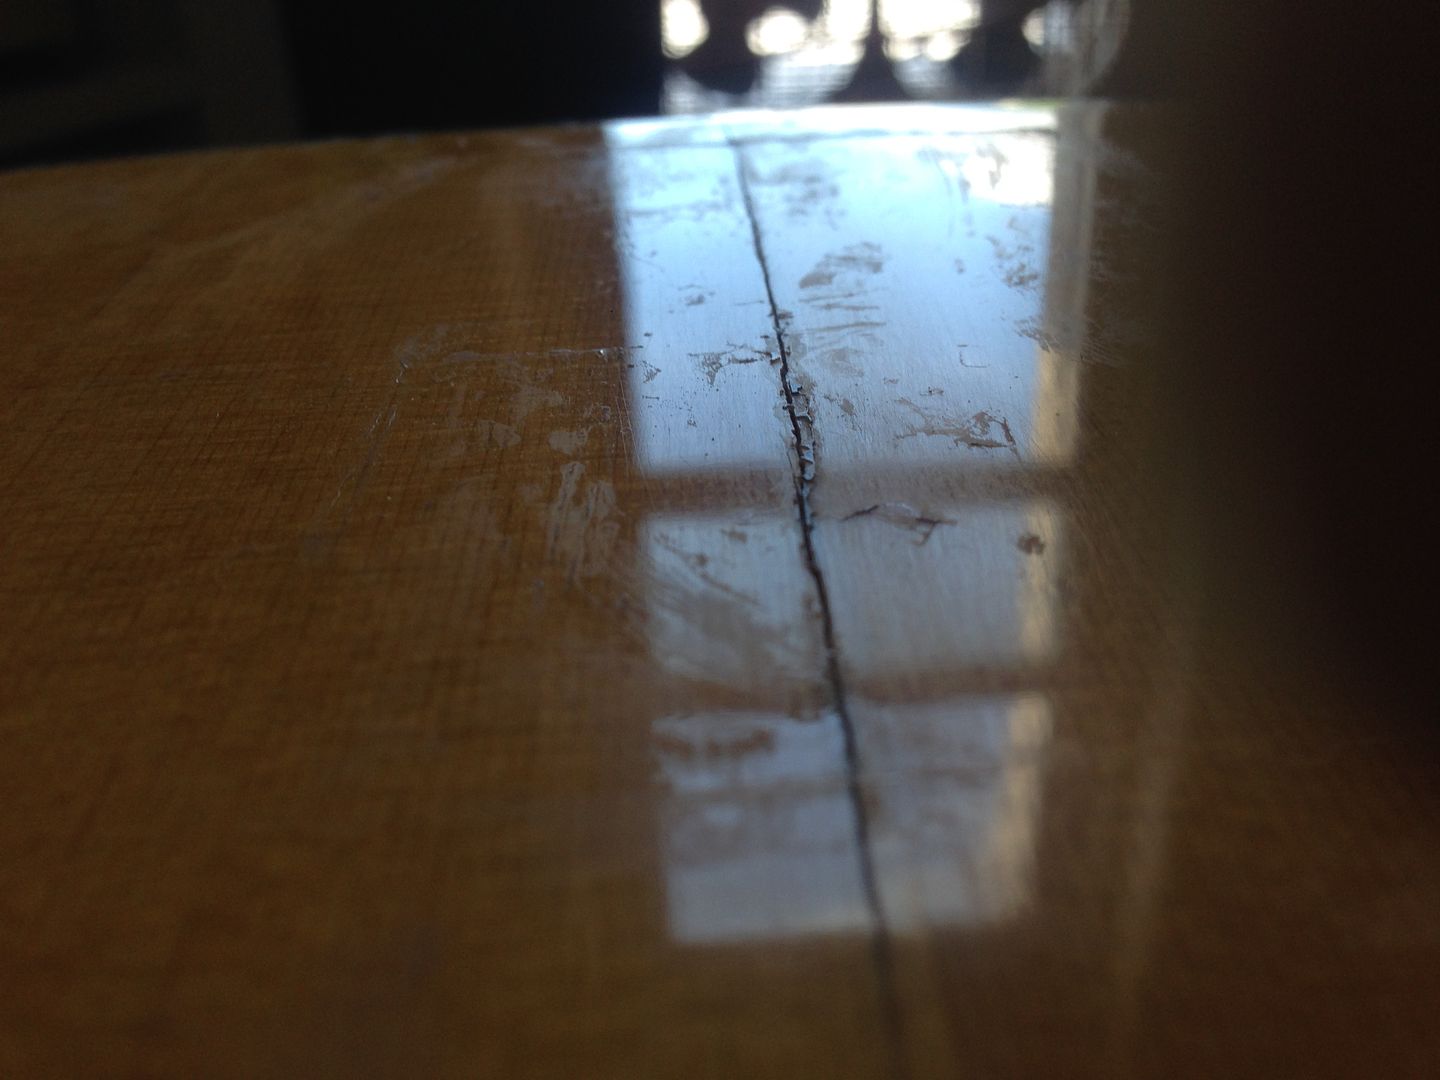 Testing with the light: no sign of open crack apparently  Obviously i m gonna have to address the finish 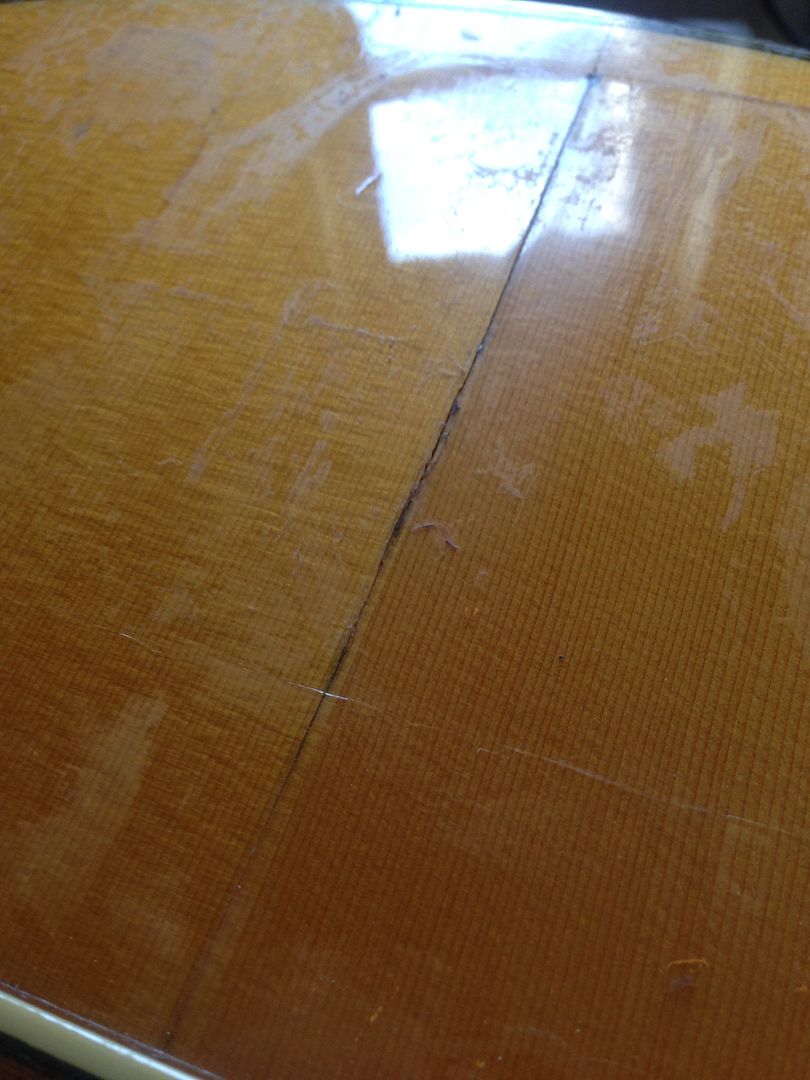 If this is it, cool, though it seemed a bit too easy - can titebond actually be strong enough to hold it together without any extra bracing? |
|
|
|
Post by strat80hm on Aug 27, 2015 11:24:14 GMT -5
So, have you investigated case humidors yet? HTC1 No, do you mean humidifying-gig-cases or sarcophagus-shaped guitar-closet? |
|
|
|
Post by strat80hm on Aug 27, 2015 11:19:42 GMT -5
Lazy but courageous! My work is to seat in an office and direct some small software development team, less lazy but not so brave I guess.[/quote] Brave, courageous? Haha thanks i ll take that! Admittedly i m quite happy with my choice - been actively avoiding what i didnt want in favor of what i wanted - to discover new things regularly. I ve never known any steady paycheck on the other hand - except for that time when i wanted to discover the Broadway world and went on that tour all over the USA with a musical theater show for 1 year and a half!! Was fun to discover all those places, being treated like a rock star and have money in the bank when it was over. But it got old too haha |
|
|
|
Post by strat80hm on Aug 26, 2015 13:46:16 GMT -5
That s what is up so far: - fixed a loose bracing 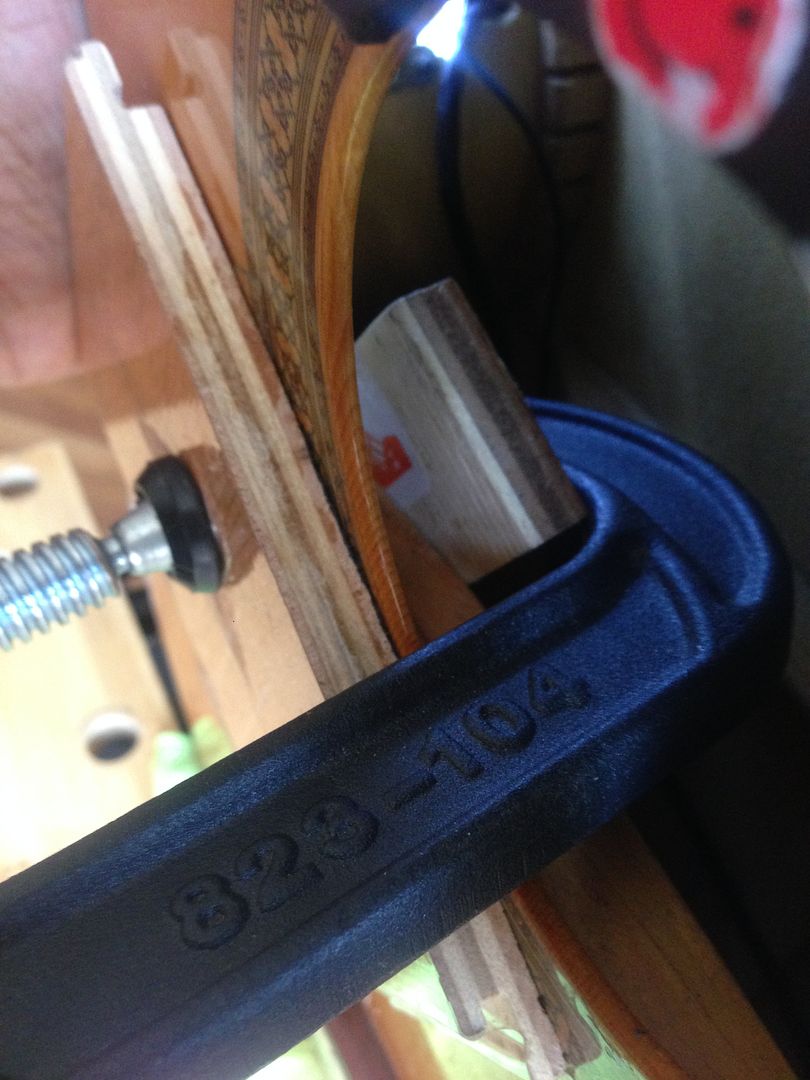 - fixing crack with wood glue for now 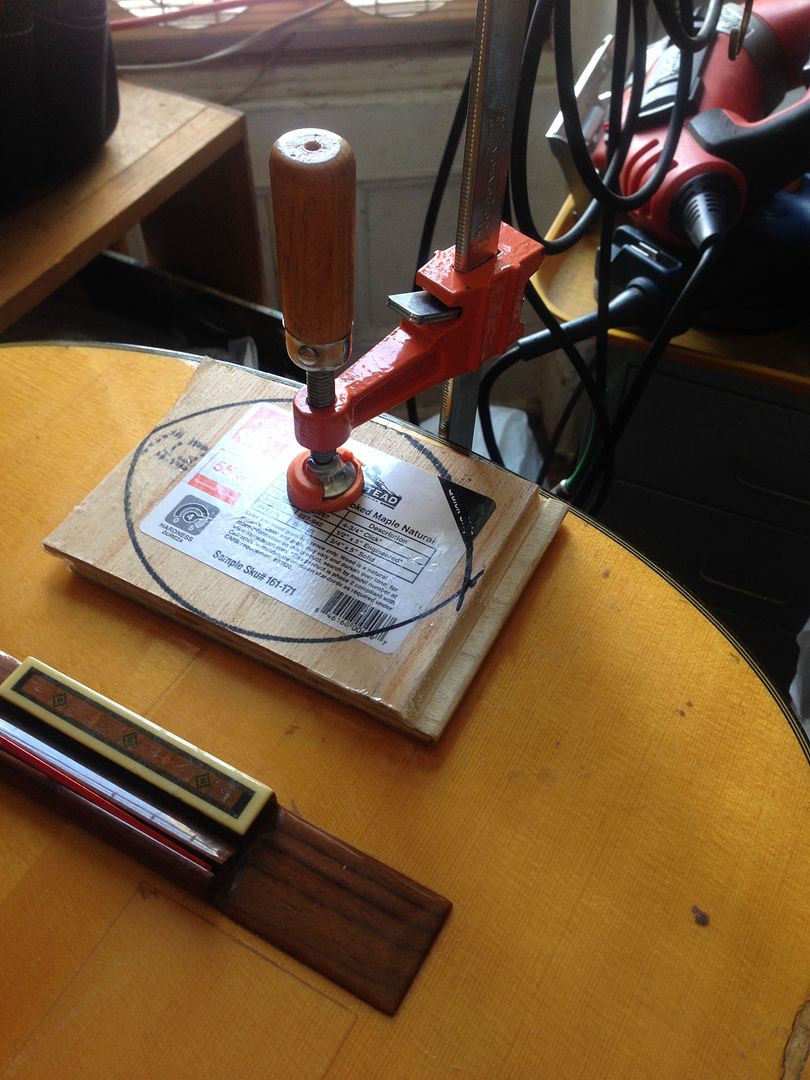 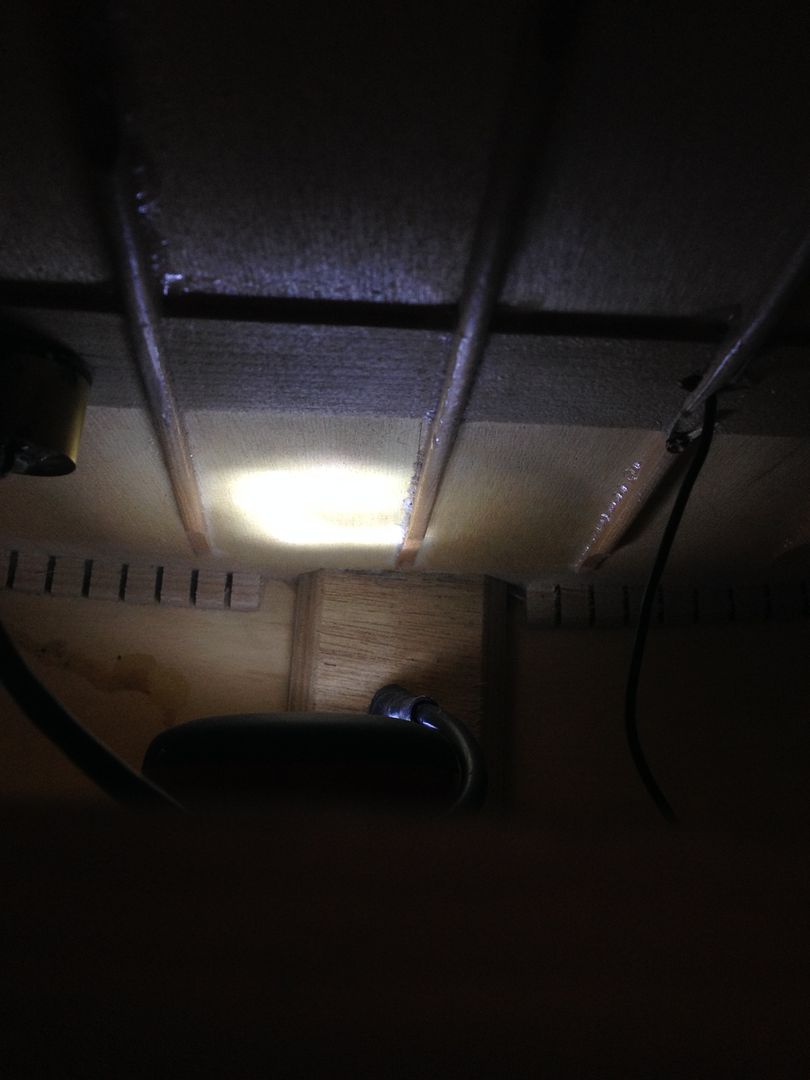 This is drying, hopefully it ll work.. |
|
|
|
Post by strat80hm on Aug 26, 2015 10:52:09 GMT -5
γιου αρ γουελκομ! : (that sounds : you are welcome!) btw, it is nice to have someone here who actually plays music for a living. I feel respect! Thank you! I have no choice as i m too lazy to do anything else. Worked well for the past 25 years though! Is your work related to guitars at all? |
|
|
|
Post by strat80hm on Aug 26, 2015 10:49:52 GMT -5
A trick to make the glue flow better is to heat a pan of water on the stove. Not boiling, but hot. Let the glue bottle soak for about 10 minutes so it's hot all the way through. Resist the temptation to water down the glue. Anything more than a 5% dilution will have a significant effect on the bond strength. Remember, all this repair will do is cosmetically seal the crack. It will not have any effect on any potential bracing issues. PS: Check out this article on fixing an old Martin. Some of the content applies to your situation: Thanks for reminding me of heating the glue - i indeed was about to dilute it. Titebond3 was fluid enough to be used as is in the syringe when i glued a bracing yesterday - i removed the needle though I m planning on addressing the understructure of the crack today. Good tips on that articles, thanks again! |
|
|
|
Post by strat80hm on Aug 25, 2015 10:53:20 GMT -5
Clean up the dust/dirt inside the crack, then a small amount of strong wood glue with a syringe along the crack, then some small amount of wood putty of ideally identical color along the crack, then some very light sanding. Just an idea. ef̱charistó̱ GD, i m hoping for something along these lines yup |
|
|
|
Post by strat80hm on Aug 25, 2015 10:51:48 GMT -5
The first thing I'd want to know is what caused the crack? HTC1 Hey Cynical, thanks for input: it all started as a classic "winter crack" (caused by heater and dry air), and got worse on tour as i kept on banging the top pretending i was a bongo player in between chords. It got wider and larger, until i decided (now) to do something about it. As always, i m tempted by the easy way out when it comes to fix guitar haha |
|
|
|
Post by strat80hm on Aug 24, 2015 21:38:37 GMT -5
Update: about the crack, i m planning on doing like this:
- apply water around/under the bracing with a brush
- apply generous titebond glue
- hold it all with a stick inside and some heavier weight on top
- then i would fill up the crack with some light viscosity CA glue
I still have to remove that golpeador and i m uncertain about how to treat the top, though i just know i m a bit fed up with that bright yellow haha
|
|
|
|
Post by strat80hm on Aug 24, 2015 12:02:05 GMT -5
Hey all - i d like to submit my plans your way before i commit. This Yamaha Flamenca - top solid spruce, back & sides cypress, with a thick polish layer (polyurethane probably) - has a crack on the top, along the bracing: Here s the crack 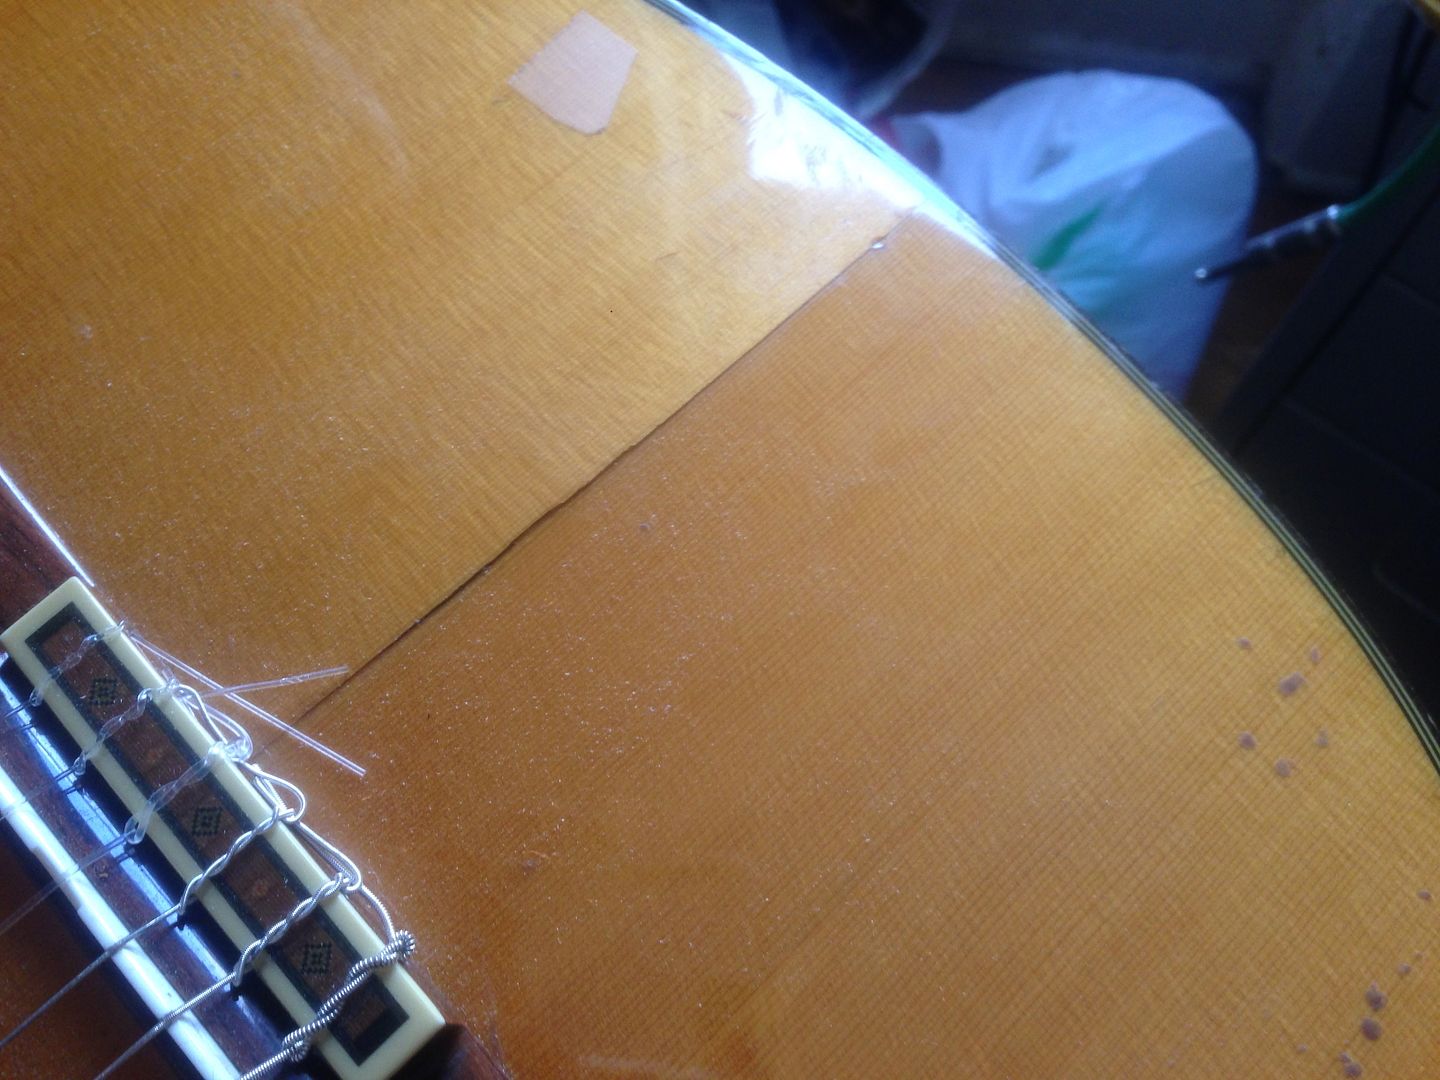 Full crack is more visible with a light inside:  Here s the bracing 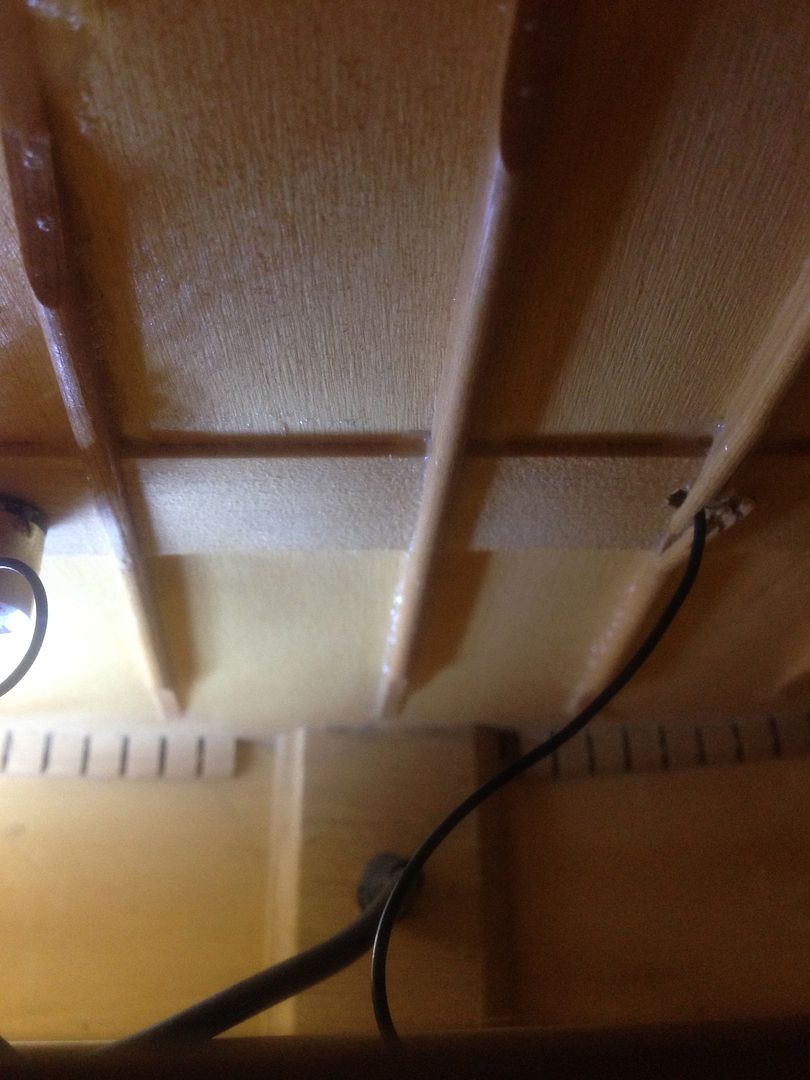 Fixing Top: Crack is a couple of years old now, though the table top doesnt really move much if i press on it vertically. - my plan is to fill it up inside/outside with titebond so that it doesnt get worse, would this do the trick? Top refinish - unglue the golpeador (that thin plastic guard to protect from percussive playing) using a heat gun - sanding top with steel wood and apply lacquer to obtain a nice dark red result - OR sanding to bare wood, apply dye and some natural finish protection (danish oil) note: i d like to avoid to sand down to barewood as i m sure that thick polish keeps the guitar sturdy (i play i lot of percussion on it) Back & Sides refinish I d like to change that yellow finish, darken the back and sides - deep brown chocolate - while keeping some wood pattern/transparency. So the plan is: - sand the glossy finish with steelwood - apply with a rag several thin layers of lacquer on top until it looks fine. Could you please share your thoughts? Thank you |
|


 [/URL
[/URL


